Search This Blog

Monday, June 30, 2025

How Do I Configure UI Defaults in APEX

 Introduction

Configuring UI Defaults in Oracle APEX is a powerful way to standardize the appearance and behavior of forms and reports throughout your application. Instead of manually setting labels, item types, and formatting each time you create a page, UI Defaults let you define these preferences once at the table and column level. As a result, APEX will automatically apply your settings during page generation, saving development time and ensuring a consistent user experience.

To configure UI Defaults in Oracle APEX, you begin by defining how your tables and columns should behave when they are used to create Forms, Reports, or other components. These settings allow you to predefine labels, display types, formatting masks, alignments, and validation rules. UI Defaults are especially helpful when working with standard data structures, ensuring consistency across applications.

To start configuring UI Defaults, open your APEX workspace and follow these steps:

  1. Access the UI Defaults Interface
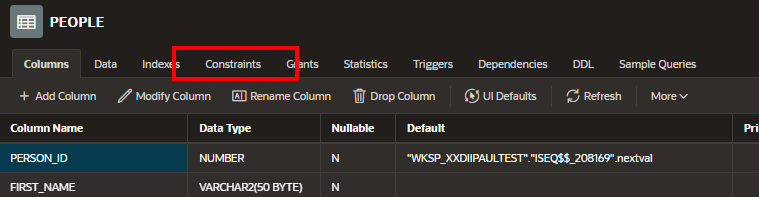
    Navigate to SQL Workshop > Object Browser.
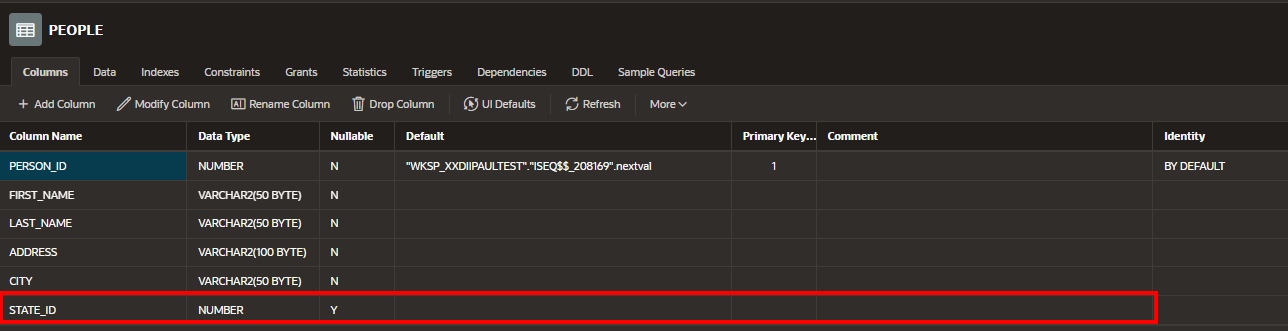
    Locate the table for which you want to define defaults. Click the table name.
    On the right, select the UI Defaults tab.

  2. Define Table-Level Defaults
    In the UI Defaults tab, at the top, you can configure settings that apply to the entire table.
    For example, you can choose whether checkboxes or radio groups are used for certain column types.
    You can also define the default report type (e.g., Interactive Report) that should be used when the table is selected in wizards.

  3. Define Column-Level Defaults
    Below the table settings, you’ll see each column listed. For every column, you can define:

    • Label: The default label shown in forms and reports

    • Display Type: Choose from text field, number field, email item, select list, etc.

    • Format Mask: Set number/date formatting (e.g., 999,999.99 or DD-MON-YYYY)

    • Column Alignment: Align text left, center, or right in reports

    • Width: Default width of the column in reports

    • Validation: Add rules like required values, minimum or maximum numbers, or patterns

  4. Save UI Defaults
    After making changes, click Apply Changes to save your settings. These UI Defaults are now stored in your workspace metadata.

  5. Use UI Defaults in Wizards
    When you create a new Form or Report using the APEX wizards, your UI Defaults will automatically be applied. This includes item types, formatting, and labels, reducing the amount of manual configuration needed.

  6. Review and Update UI Defaults as Needed
    As your application grows or business rules change, revisit the UI Defaults and adjust them to reflect updated design standards or validations. Changes to UI Defaults do not automatically update existing pages, but they will apply to new pages created after the update.

In Oracle APEX, UI Defaults streamline development by allowing you to define how form items and report columns should appear and behave based on table and column metadata. These settings can be configured either through SQL Workshop or directly during page creation in Application Builder. Below are the two main ways to manage UI Defaults.

A. Defining UI Defaults in SQL Workshop

To define UI Defaults from SQL Workshop:

  1. Navigate to SQL Workshop > Object Browser

  2. Click the name of the table for which you want to define defaults

  3. Open the UI Defaults tab

  4. For each column, you can configure:

    • Item Type: Choose from options like Text Field, Select List, Date Picker

    • Display Options: Set column alignment or define the item as read-only

    • Validation: Define rules like required fields or numeric format masks

  5. Click Apply Changes to save the configuration

Once saved, these UI Defaults are automatically applied anytime this table is used to generate a Form or Report within APEX.

B. Applying UI Defaults During Page Creation in Application Builder

You can also use UI Defaults during the creation of Forms and Reports:

  1. Open Application Builder

  2. Click Create Page

  3. Choose Form or Report

  4. Select the table that already has UI Defaults configured

  5. APEX will apply all default item types, validations, and display settings automatically

UI Defaults for Form Items

Oracle APEX supports specific UI Defaults based on data types to ensure proper control selection and formatting. Here are common examples:

  • VARCHAR2: Text Field, Textarea, Email Item

  • NUMBER: Number Field, Slider, Format Mask like 999,999.99

  • DATE: Date Picker, with formats such as DD-MON-YYYY

  • CLOB: Rich Text Editor or Textarea

  • BOOLEAN: Yes/No Switch or Checkbox

  • Foreign Keys: Select List or Popup LOV

For instance, a STATUS column with values like "Active" or "Inactive" can be configured to use a Radio Group, improving usability.

UI Defaults for Reports

When generating reports, APEX can also apply column-level UI Defaults. These include:

  • Alignment: Set text to left, center, or right

  • Display Type: Choose Plain Text, HTML, or a Hyperlink

  • Format Mask: Define number, currency, or date formatting

  • Visibility: Hide columns that aren't essential to the report

For example, a PRICE column can be set to:

  • Format: $999,999.99

  • Alignment: Right

  • Aggregation: Display a SUM at the bottom

These configurations ensure that every new Classic Report or Interactive Report using the table automatically inherits the desired formatting and behavior.

By using UI Defaults effectively, you can streamline your development process, minimize repetitive configuration, and ensure all your pages have a consistent look and behavior. This is particularly useful in larger applications with many forms and reports.

In Oracle APEX, UI Defaults streamline development by allowing you to define how form items and report columns should appear and behave based on table and column metadata. These settings can be configured either through SQL Workshop or directly during page creation in Application Builder. Below are the two main ways to manage UI Defaults.

A. Defining UI Defaults in SQL Workshop

To define UI Defaults from SQL Workshop:

  1. Navigate to SQL Workshop > Object Browser

  2. Click the name of the table for which you want to define defaults

  3. Open the UI Defaults tab

  4. For each column, you can configure:

    • Item Type: Choose from options like Text Field, Select List, Date Picker

    • Display Options: Set column alignment or define the item as read-only

    • Validation: Define rules like required fields or numeric format masks

  5. Click Apply Changes to save the configuration

Once saved, these UI Defaults are automatically applied anytime this table is used to generate a Form or Report within APEX.

B. Applying UI Defaults During Page Creation in Application Builder

You can also use UI Defaults during the creation of Forms and Reports:

  1. Open Application Builder

  2. Click Create Page

  3. Choose Form or Report

  4. Select the table that already has UI Defaults configured

  5. APEX will apply all default item types, validations, and display settings automatically

UI Defaults for Form Items

Oracle APEX supports specific UI Defaults based on data types to ensure proper control selection and formatting. Here are common examples:

  • VARCHAR2: Text Field, Textarea, Email Item

  • NUMBER: Number Field, Slider, Format Mask like 999,999.99

  • DATE: Date Picker, with formats such as DD-MON-YYYY

  • CLOB: Rich Text Editor or Textarea

  • BOOLEAN: Yes/No Switch or Checkbox

  • Foreign Keys: Select List or Popup LOV

For instance, a STATUS column with values like "Active" or "Inactive" can be configured to use a Radio Group, improving usability.

UI Defaults for Reports

When generating reports, APEX can also apply column-level UI Defaults. These include:

  • Alignment: Set text to left, center, or right

  • Display Type: Choose Plain Text, HTML, or a Hyperlink

  • Format Mask: Define number, currency, or date formatting

  • Visibility: Hide columns that aren't essential to the report

For example, a PRICE column can be set to:

  • Format: $999,999.99

  • Alignment: Right

  • Aggregation: Display a SUM at the bottom

These configurations ensure that every new Classic Report or Interactive Report using the table automatically inherits the desired formatting and behavior.

Conclusion
By taking a few minutes to configure UI Defaults in APEX, you can significantly increase development efficiency and enforce uniform design standards across your application. Whether you're building a simple form or a complex report, UI Defaults reduce repetitive tasks and promote best practices. As your application evolves, these defaults help maintain consistency and improve long-term maintainability.

UI Defaults

 Introduction

User Interface (UI) Defaults in Oracle APEX are powerful settings that help developers streamline application development by automatically applying preferred configurations to new components. These defaults include settings such as field types, item label alignments, column formatting, and naming conventions, all of which can be tied to table and column metadata. By setting UI Defaults at the workspace level, developers can ensure consistent design and behavior across pages and applications, significantly reducing the time spent on manual adjustments and improving overall user experience.

User Interface (UI) Defaults in Oracle APEX

User Interface (UI) Defaults in Oracle APEX help standardize the look and behavior of forms, reports, and other UI components across an application. By defining UI Defaults, developers can ensure consistent styling, layout, and attributes when generating forms and reports for database tables. These defaults save development time and reduce manual configuration, making application development more efficient.


UI Defaults in Oracle APEX are predefined design and behavior settings assigned to database tables and columns that help streamline and standardize the development process. These settings control how items appear and function when developers generate forms, reports, or interactive components. UI Defaults can define label text, display format, item type (like Text Field, Email, or Number Field), and even built-in validations.

When a developer generates a new Form or Report region in APEX using the Create Page wizard, APEX looks for UI Defaults associated with the referenced table and its columns. If defaults exist, APEX automatically applies them. For example, if the EMAIL column in a table has a UI Default set to use an Email item type, any form built on that table will use the Email field by default instead of a regular text field. Similarly, columns like SALARY can have currency formatting, numeric input fields, and validation rules automatically assigned based on their UI Defaults.

UI Defaults are defined and stored in the APEX Builder interface under Shared Components > UI Defaults. You can set defaults at two levels:

  • Table-Level UI Defaults define defaults for entire tables, such as setting all columns to be displayed in a report or setting alignment for all fields.

  • Column-Level UI Defaults are more granular and allow you to define a display format, item type, label, help text, and validation rule for specific columns.

By using UI Defaults, developers can ensure:

  • Consistency across multiple forms and reports without manually reconfiguring each item.

  • Efficiency, since common properties like alignment, masks, and validation are applied automatically.

  • Best practices are followed through enforced input types and validations.

  • Maintainability, since changing the default at the column level updates the behavior for future components that reference it.

Benefits of UI Defaults in APEX

  • Saves Development Time: No need to manually configure field types, labels, and validations repeatedly

  • Ensures Consistency: Forms and reports follow the same design patterns

  • Improves Maintainability: Easier to update application-wide formatting and validation rules

  • Supports Best Practices: Encourages the use of proper item types and alignments


UI Defaults in Oracle APEX are predefined attributes that control:

  • Labels, formatting, and display settings for form items

  • Default form controls for different data types

  • Report column alignment, formatting, and visibility

  • Validation rules and constraints

These settings apply automatically when you create Forms, Interactive Reports, Classic Reports, and Faceted Search Reports.

For example, if a column named email has a UI Default set to an Email item type, then every time a form is created, that column will automatically use an Email field instead of a standard text field.

Where UI Defaults Are Stored

UI Defaults are stored at the Database Table and Column level. These defaults are automatically used when generating Forms and Reports in APEX.

They can be defined at:

  • Table-Level UI Defaults: Define settings for an entire table

  • Column-Level UI Defaults: Define specific settings for each column


For example, a SALARY column can be set to:

  • Item Type: Number Field

  • Format Mask: $999,999.99

  • Validation: Minimum value must be greater than zero

Whenever a new Form or Report is generated on the SALARY column, APEX will automatically apply these settings.

You can update or override UI Defaults manually when needed, but having strong defaults in place helps enforce a consistent and professional user interface across the entire application.

Conclusion
Using UI Defaults in Oracle APEX not only enhances consistency across your applications but also speeds up the development process by reducing repetitive configuration tasks. Whether you're building forms, reports, or interactive grids, defining these defaults ensures that your UI elements align with your design standards automatically. As your data model evolves, UI Defaults continue to provide a reliable foundation for creating high-quality interfaces with minimal effort.

How Do I Link the State table to the People table

In Oracle APEX, building relationships between tables is a key part of effective data modeling and application development. One common scenario is linking a State table to a People table, allowing each person to be associated with a specific state. This is typically done using a foreign key constraint, which not only enforces referential integrity but also enables dynamic LOVs for form fields, making data entry easier and more consistent. In this blog, we’ll walk through how to create this link step by step, covering table structure, constraint setup, and how to reflect this relationship in your APEX forms.

To link the State table to the People table in Oracle APEX, you need to follow standard relational database principles. This involves creating a foreign key relationship between the People table and the State table, ensuring that each person record can reference a valid state. This link not only enforces data integrity but also allows you to implement dynamic LOVs (List of Values) in APEX forms and reports, making data entry more efficient and error-free.

Step 1: Table Design

Make sure you have two tables: STATES and PEOPLE.

CREATE TABLE STATES (
    STATE_CODE VARCHAR2(2) PRIMARY KEY,
    STATE_NAME VARCHAR2(100)
);

CREATE TABLE PEOPLE (
    PERSON_ID NUMBER GENERATED BY DEFAULT AS IDENTITY PRIMARY KEY,
    FIRST_NAME VARCHAR2(100),
    LAST_NAME VARCHAR2(100),
    STATE_CODE VARCHAR2(2),
    CONSTRAINT fk_people_state FOREIGN KEY (STATE_CODE) REFERENCES STATES (STATE_CODE)
);

In this example:

  • STATE_CODE is the primary key of the STATES table.

  • STATE_CODE in the PEOPLE table is a foreign key that references the STATES table.

Step 2: Populate the States Table

Insert the list of U.S. states (or any relevant data) into the STATES table.

INSERT INTO STATES (STATE_CODE, STATE_NAME) VALUES ('CA', 'California');
INSERT INTO STATES (STATE_CODE, STATE_NAME) VALUES ('TX', 'Texas');
INSERT INTO STATES (STATE_CODE, STATE_NAME) VALUES ('NY', 'New York');
-- Add more states as needed
COMMIT;

Step 3: Create a Form in APEX

  1. In Oracle APEX, go to App Builder.

  2. Open your application or create a new one.

  3. From the Create menu, select FormForm on a Table with Report.

  4. Choose the PEOPLE table.

  5. During the wizard, APEX will detect STATE_CODE and allow you to configure it as a Select List.

  6. For the LOV source, select Table/View and choose STATES.

  7. Set Display Value as STATE_NAME and Return Value as STATE_CODE.

This LOV will now show the full state name while storing the two-letter code.

Step 4: Using LOV in Existing Forms

If you already have a form:

  1. Go to the Page Designer.

  2. Find the STATE_CODE item.

  3. Change the Type to Select List.

  4. Set List of Values to:

    • Type: SQL Query

    • SQL Query:

SELECT STATE_NAME d, STATE_CODE r FROM STATES ORDER BY STATE_NAME

This tells APEX to display the full state name (d) and return the code (r) when a user selects a value.

Step 5: Testing the Setup

Run the application and navigate to your People form. The State field should now appear as a drop-down list populated with data from the STATES table. When you create or update a person, APEX will ensure that the selected state exists in the STATES table.

This approach provides a scalable and consistent way to manage relationships between tables in Oracle APEX, making your applications more robust and user-friendly.

Example

A screenshot of a computer

AI-generated content may be incorrect.


A screenshot of a video

AI-generated content may be incorrect.


A screenshot of a computer

AI-generated content may be incorrect.


A screenshot of a computer

AI-generated content may be incorrect.


A screenshot of a computer

AI-generated content may be incorrect.


A screenshot of a computer

AI-generated content may be incorrect.

A screenshot of a computer

AI-generated content may be incorrect.


A screenshot of a video

AI-generated content may be incorrect.

Linking the State table to the People table ensures your application maintains clean, relational data and improves usability by enabling drop-down lists for state selection. By using a foreign key and leveraging APEX form capabilities, you create a user-friendly interface that enforces valid data entry and supports future scalability. With this setup, your application becomes more maintainable and aligned with relational database best practices.

How Do I Create The STATES LOV

Creating a well-designed List of Values (LOV) in Oracle APEX is essential for improving user input accuracy and consistency, especially when dealing with standardized data like US states. In this blog, we will explore how to create a States LOV step-by-step, covering both static and dynamic approaches. By following these detailed instructions, you will learn how to implement a reusable dropdown list that enhances your application’s usability and data integrity.

To create a States LOV (List of Values) in Oracle APEX, follow these detailed steps:

  1. Understand what a LOV is
    A LOV is a dropdown or popup list that lets users select a value from predefined options. For states, it typically shows the state name but stores a short code (like state abbreviation).

  2. Decide on LOV type: Static or Dynamic

  • Static LOV: hard-coded list inside APEX. Good for small, fixed lists like US states.

  • Dynamic LOV: SQL query pulling data from a database table. Useful if you have or want a states table.

  1. Create the US States table (if needed)
    If you want a dynamic LOV, create a table to hold states:

CREATE TABLE US_States (
  State_Abbreviation VARCHAR2(2) PRIMARY KEY,
  State_Name VARCHAR2(100)
);

INSERT INTO US_States (State_Abbreviation, State_Name) VALUES ('AL', 'Alabama');
INSERT INTO US_States (State_Abbreviation, State_Name) VALUES ('AK', 'Alaska');
-- Add remaining states here
COMMIT;
  1. Create a Static LOV

  • Go to Shared Components > List of Values

  • Click Create > From Scratch

  • Enter a name, for example: LOV_STATES

  • Select Static as LOV Type

  • Enter values in this format (one per line):

    Alabama;AL
    Alaska;AK
    Arizona;AZ
    Arkansas;AR
    California;CA
    
  • Save the LOV.

  1. Create a Dynamic LOV (Using SQL Query)

  • Go to Shared Components > List of Values

  • Click Create > From Scratch

  • Name the LOV, for example: LOV_STATES

  • Choose SQL Query as LOV Type

  • Enter this query:

    SELECT State_Name AS display_value, State_Abbreviation AS return_value
    FROM US_States
    ORDER BY State_Name
    
  • Save the LOV.

  1. Use the LOV in your application

  • In your page, create or edit an item (like a select list)

  • Under List of Values, select your created LOV (LOV_STATES)

  • Set the Return Value type to match your LOV return (usually VARCHAR2(2) for state abbreviation)

  • Optionally, set a Null Display Value such as -- Select State -- to prompt users to pick one

  1. Test your LOV
    Run the page and check the dropdown to ensure all states appear correctly, and selecting a state stores the correct abbreviation.

This is the standard approach in Oracle APEX to create a robust, reusable States LOV, improving user experience by ensuring consistent state selection across your application.

Example:

A List of Values (LOV) in Oracle APEX can be utilized by both page items (such as select lists, checkboxes, or radio groups) and report fields, controlling the displayed options and restricting user selections. LOVs can be defined as either static or dynamic:

  • Static LOVs: Based on predefined pairs of display and return values entered by the developer. 

  • Dynamic LOVs: Retrieve data from various data sources, including:

    • Local Database

    • REST Enabled SQL

    • REST Data Source

Dynamic LOVs automatically reflect changes in the underlying data, ensuring that users have access to the most current information. 

A screenshot of a computer

AI-generated content may be incorrect.


A black screen with yellow text

AI-generated content may be incorrect.


A screenshot of a computer

AI-generated content may be incorrect.


When selecting a type of list of values, you have two primary options:

Dynamic List of Values: This type of list is generated based on a data source, which can be:

  • Local Database

  • REST Enabled SQL

  • REST Data Source

Dynamic lists automatically update to reflect changes in the underlying data, ensuring that the information remains current without manual intervention.

Static List of Values: A static list consists of predefined display and return values. Once established, these lists remain unchanged unless manually updated. They are useful when the set of values is fixed and not subject to frequent changes. 

docs.oracle.com

Choosing between dynamic and static lists depends on whether you require real-time data updates or a fixed set of values.


A screenshot of a computer

AI-generated content may be incorrect.

When configuring a new List of Values (LOV) in Oracle Application Express (APEX), you can select from three primary data source types:

  1. Local Database:

    • Description: Retrieves data directly from tables or views within the local Oracle database associated with your APEX application.

    • Usage: Ideal for scenarios where the required data resides within the same database environment as your application.

  2. REST Enabled SQL Service:

    • Description: Accesses data from a remote Oracle database using REST-enabled SQL services, allowing SQL queries to be executed over HTTP or HTTPS.

    • Setup: To utilize this option, define REST Enabled SQL references by navigating to Shared Components > REST Enabled SQL in your APEX application.

    • Usage: Suitable for integrating data from external Oracle databases without direct database links, leveraging RESTful web services for data retrieval.

  3. REST Data Source:

    • Description: Fetches data from external RESTful web services, enabling integration with various web APIs and services.

    • Setup: Define REST Data Sources within your application by going to Shared Components > REST Data Sources.

    • Usage: Appropriate for incorporating data from third-party APIs or services that expose RESTful endpoints.

Selecting the appropriate data source type for your LOV depends on the location and nature of the data you intend to present, ensuring efficient and effective data retrieval within your APEX application.

In Oracle APEX, when configuring a List of Values (LOV) that utilizes a Local Database as its data source, you can base it on the following:

  • Table: Directly reference a specific database table to populate the LOV.

  • SQL Query: Use a custom SQL query to define the LOV's data set.

  • PL/SQL Function Returning SQL Query: Employ a PL/SQL function that returns a SQL query, offering dynamic data retrieval capabilities.

  • Property Graph: (Available in Oracle Database 23c and later) Leverage a property graph to define the LOV, enabling graph-based data representations.

These options provide flexibility in sourcing data for your LOVs within APEX applications.

A screenshot of a computer

AI-generated content may be incorrect.


Specify the column that will serve as the return value for your List of Values. 

Specify the column to be used as the display value for your List of Values (LOV). After creating the LOV, you can define additional display columns for item types that support multiple columns, such as the Popup LOV. 

A screenshot of a computer

AI-generated content may be incorrect.


A black and yellow striped background

AI-generated content may be incorrect.

In conclusion, creating a States LOV in Oracle APEX is a straightforward process that can greatly enhance your application’s user experience. Whether you choose a static list for simplicity or a dynamic SQL-based LOV for flexibility, understanding the creation and application of LOVs is a valuable skill. By integrating this feature, you ensure accurate data entry and provide users with an intuitive way to select states throughout your application. 

How Do I Create The Airports table

 Creating the US_Airports table is a fundamental step for managing airport data efficiently in Oracle databases. This table captures key details about airports across the United States, including the city, state, airport code, and geographic coordinates. The table design ensures data integrity by enforcing constraints such as a three-character airport code and a primary key on this code, which uniquely identifies each airport. Setting up this table correctly allows you to store, query, and manipulate airport information for various applications like travel systems, mapping services, or logistics management.

Using Arial font, size 14px, plain text:

To create the US_Airports table in Oracle, you use the CREATE TABLE statement. This defines the structure of your table and the data types of each column. Here's how you do it step-by-step:

  1. Define the table and columns:

CREATE TABLE US_Airports (
    City VARCHAR2(100),
    State VARCHAR2(100),
    Airport_Code VARCHAR2(10) CONSTRAINT chk_airport_code CHECK (LENGTH(Airport_Code) = 3),
    Latitude NUMBER(9,6),
    Longitude NUMBER(9,6),
    CONSTRAINT pk_airport PRIMARY KEY (Airport_Code)
);
  • City and State are text columns with max length 100 characters.

  • Airport_Code is a 3-letter airport code; the check constraint chk_airport_code ensures its length is exactly 3.

  • Latitude and Longitude are numeric columns that hold coordinates with precision up to 6 decimal places.

  • The PRIMARY KEY constraint on Airport_Code makes sure each airport code is unique and indexed for fast lookups.

  1. Add data into the table

To populate the table with airports, you use INSERT INTO statements specifying the column values in the correct order. Each insert must be followed by a COMMIT; to save changes permanently.

Example:

INSERT INTO US_AIRPORTS (City, State, Airport_Code, Latitude, Longitude)
VALUES ('Atlanta', 'Georgia', 'ATL', 33.6407, -84.4277);
COMMIT;
  1. Notes on the insert statements

  • Make sure the column names in the insert statement exactly match those in the table (State not ST as in some examples).

  • The Airport_Code must be 3 characters; otherwise, the check constraint will reject the insert.

  • Latitude and Longitude must be numeric values with up to 6 decimal places.

  • You can insert multiple rows one by one as above, or use batch inserts if preferred.

  1. Full insert example

Here is a corrected and expanded version of the insert statements with proper column names (State instead of ST):

INSERT INTO US_AIRPORTS (City, State, Airport_Code, Latitude, Longitude) VALUES ('Atlanta', 'Georgia', 'ATL', 33.6407, -84.4277); COMMIT;
INSERT INTO US_AIRPORTS (City, State, Airport_Code, Latitude, Longitude) VALUES ('Los Angeles', 'California', 'LAX', 33.9416, -118.4085); COMMIT;
INSERT INTO US_AIRPORTS (City, State, Airport_Code, Latitude, Longitude) VALUES ('Chicago', 'Illinois', 'ORD', 41.9742, -87.9073); COMMIT;
INSERT INTO US_AIRPORTS (City, State, Airport_Code, Latitude, Longitude) VALUES ('Dallas', 'Texas', 'DFW', 32.8998, -97.0403); COMMIT;
-- Continue adding rows in the same format
  1. Creating and populating in Oracle APEX SQL Workshop

  • Log in to your Oracle APEX workspace.

  • Navigate to SQL Workshop > SQL Commands.

  • Paste the CREATE TABLE statement and run it.

  • Paste the INSERT statements one by one or in batches and run them.

  • Verify your data by running:

SELECT * FROM US_AIRPORTS;
  1. Additional Tips

  • Use uppercase for SQL keywords (CREATE TABLE, INSERT INTO, etc.) for readability.

  • Use consistent column names.

  • If inserting many rows, you may want to disable COMMIT after each insert and commit once at the end for better performance.

  • Consider adding an index on frequently searched columns if needed (besides the primary key).

To create the US_Airports table, you use the CREATE TABLE statement, specifying columns for City, State, Airport_Code, Latitude, and Longitude. A check constraint ensures airport codes are exactly three characters long, and the primary key constraint guarantees uniqueness. After the table is created, you populate it with data using multiple INSERT INTO statements, each adding a specific airport's details. Committing after each insert ensures the data is saved reliably. This setup forms a solid foundation for any system needing accurate airport location data and supports efficient querying and reporting.


How Do I Create The Cities table

 Introduction

Creating the Cities table in Oracle APEX is a straightforward task that allows you to store geographic and location-based data, such as city names and their corresponding latitude and longitude coordinates. This type of table is especially useful for applications involving maps, search filters, and location analytics. Using SQL Workshop in Oracle APEX, you can run a SQL script to define the table structure, apply constraints, and populate the table with a predefined list of major U.S. cities.

Creating the Cities table in Oracle APEX involves defining the table structure and populating it with initial data. This process uses SQL commands executed within the SQL Workshop environment.

First, the table is created using the CREATE TABLE statement. The Cities table includes four columns:

  • city_id: A numeric column generated automatically as an identity (auto-increment) and set as the primary key.

  • city_name: A VARCHAR2 column (up to 50 characters) to store the name of the city; this column is mandatory (NOT NULL).

  • latitude and longitude: Numeric columns that store geographic coordinates with precision to six decimal places, also mandatory.

After defining the table, a PL/SQL block inserts multiple rows of city data. Each INSERT statement adds a city with its name, state, latitude, and longitude. The COMMIT statement finalizes these changes in the database.

Steps to Create the Cities Table in Oracle APEX:

  1. Open SQL Workshop in your Oracle APEX workspace.

  2. Navigate to SQL Commands.

  3. Copy and paste the following SQL to create the table:

CREATE TABLE Cities (
    city_id NUMBER GENERATED BY DEFAULT AS IDENTITY PRIMARY KEY,
    city_name VARCHAR2(50) NOT NULL,
    latitude NUMBER(9,6) NOT NULL,
    longitude NUMBER(9,6) NOT NULL
);
  1. Run the above command to create the table.

  2. Next, copy and paste the PL/SQL block with multiple INSERT statements to populate the table:

BEGIN
    INSERT INTO Cities (city_name, latitude, longitude) VALUES ('New York', 40.712776, -74.005974);
    INSERT INTO Cities (city_name, latitude, longitude) VALUES ('Los Angeles', 34.052235, -118.243683);
    INSERT INTO Cities (city_name, latitude, longitude) VALUES ('Chicago', 41.878113, -87.629799);
    -- (repeat for other cities as needed)
    COMMIT;
END;
  1. Execute this block to insert all city records.

  2. Verify the data by querying the table:

SELECT * FROM Cities;

Note: The example you provided included a state column in the inserts but not in the table definition. To avoid errors, ensure the state column is either added to the table or omitted from the inserts.

Using this approach in Oracle APEX, you create a structured table with geographic data ready for your applications. This enables location-based features such as mapping, filtering by city, or spatial analysis, all managed within the APEX environment without needing external tools.

Conclusion
By defining and populating the Cities table using SQL scripts in Oracle APEX, developers can establish a reusable, reliable source of location data for use across various applications. Whether you're building dashboards, forms, or geographic visualizations, having this structured city data ready in your database allows for more interactive and data-driven user experiences. With the flexibility of APEX and the power of SQL, managing and leveraging this type of reference data becomes both efficient and scalable.

How Do I Make a Faceted Search Map Page in Oracle APEX

Combining faceted search with a map region in Oracle APEX enables users to filter data visually and spatially at the same time. This design ...