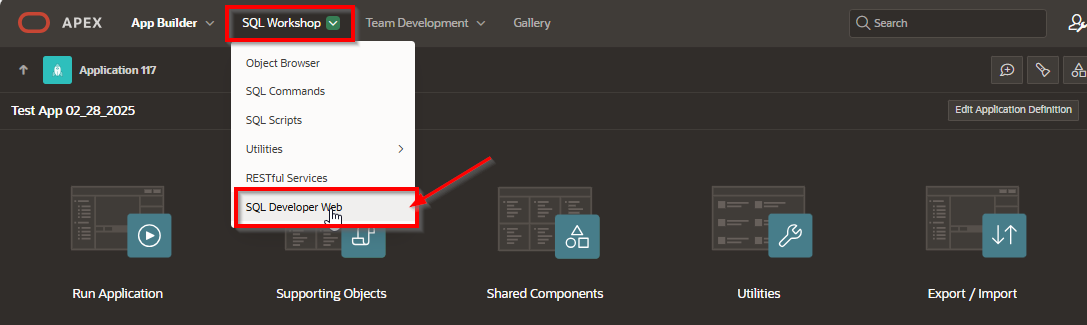
Search This Blog

Monday, June 30, 2025

How to customize an alert message

 Introduction

Customizing alert messages in Oracle APEX allows you to provide users with clear, personalized feedback that matches your application’s style and tone. Instead of generic pop-ups, customized alerts can improve user experience by making messages more informative, visually appealing, and context-specific. This blog will guide you through various techniques to tailor alert messages, from simple JavaScript modifications to using built-in APEX message APIs for enhanced control and design.

In Oracle APEX, customizing alert messages enables you to create notifications that fit your application’s design and improve user experience. Alerts can be personalized using JavaScript, Dynamic Actions, APEX message functions, and CSS, giving you flexibility in styling, positioning, and even adding animations.

Using JavaScript to Create Custom Alerts
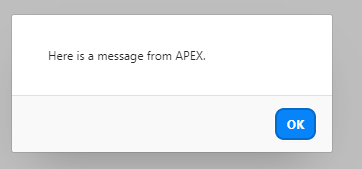
JavaScript lets you go beyond the standard alert() function. For example, using APEX’s built-in function:

function showCustomAlert() {  
    let message = "This is a custom alert message.";  
    apex.message.alert(message);
}

This shows a pop-up alert styled by APEX. For more visual customization, you can create styled dialog boxes:

function showStyledAlert() {  
    $("body").append('<div id="customAlert" class="custom-alert">Important Message</div>');  
    $("#customAlert").fadeIn().delay(2000).fadeOut();  
}

Here, the alert fades in and out, and you can style it with CSS.

Customizing Alerts with APEX Message Functions
Oracle APEX provides built-in functions that integrate alerts within the page UI. For example, to show a success notification:

apex.message.showPageSuccess("Operation completed successfully!");

For error messages:

apex.message.alert("An error occurred. Please check your input.");

These functions provide consistent styling and placement for messages.

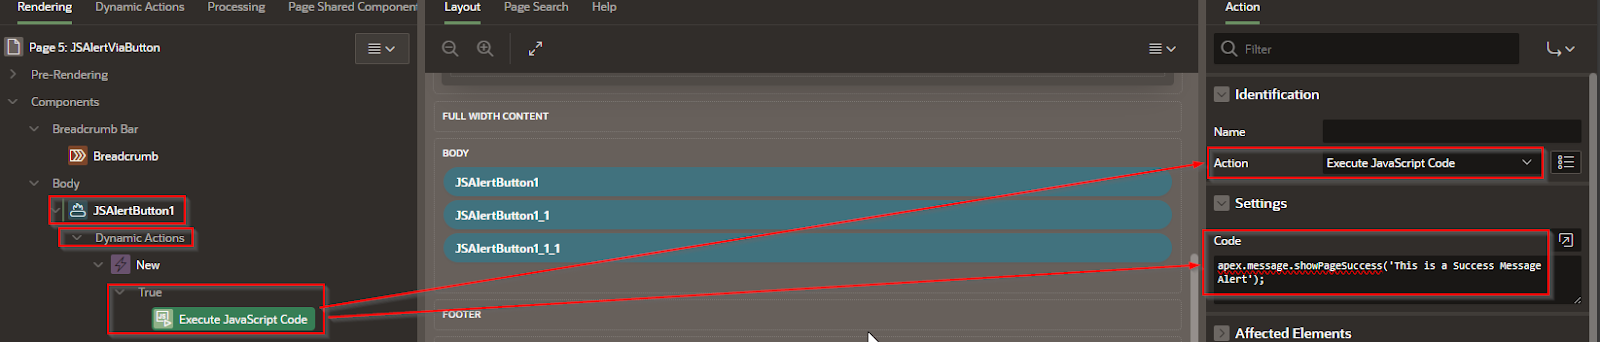
Using Dynamic Actions to Trigger Custom Alerts
You can configure Dynamic Actions to display alerts without writing JavaScript manually:

  1. Create a button on your page.

  2. Add a Dynamic Action with Event set to Click.

  3. Set Action to Execute JavaScript Code and enter:

apex.message.alert("This is a custom alert triggered by a button.");

When clicked, the alert appears seamlessly.

Using CSS to Style Alert Messages
CSS can greatly enhance the look of your custom alerts. For example, add this CSS to your Inline CSS:

.custom-alert {
    position: fixed;
    top: 20px;
    right: 20px;
    background-color: #ffcc00;
    color: #333;
    padding: 10px 20px;
    border-radius: 5px;
    box-shadow: 0px 4px 6px rgba(0, 0, 0, 0.1);
    display: none;
}

This styles a yellow alert box with a subtle shadow. Combine with JavaScript to show and hide alerts dynamically:

function showCustomAlert(message) {  
    let alertBox = $("<div class='custom-alert'></div>").text(message);  
    $("body").append(alertBox);  
    alertBox.fadeIn().delay(3000).fadeOut();  
}
$("#myButton").on("click", function() {  
    showCustomAlert("This is a custom-styled alert!");  
});

Using Bootstrap Alerts in APEX
If your app uses Bootstrap, you can leverage its alert classes for consistent styling:

<div id="myAlert" class="alert alert-warning" role="alert" style="display:none;">  
    This is a Bootstrap alert message.
</div>

Then show it with JavaScript:

$("#myAlert").show().delay(3000).fadeOut();

This creates a styled alert that disappears after a few seconds.

Best Practices for Custom Alerts in APEX

  • Use apex.message.showPageSuccess() for success messages.

  • Use apex.message.alert() for critical alerts needing user attention.

  • Employ Dynamic Actions to add alerts without coding when possible.

  • Combine CSS and JavaScript for modern, visually appealing messages.

  • Avoid excessive alerts to prevent disrupting users.

Customizing alert messages in Oracle APEX helps deliver clearer, timely feedback that fits your application’s look and feel. Whether you use JavaScript, Dynamic Actions, CSS, or Bootstrap, selecting the right approach enhances usability and keeps users informed effectively.

Example

Here you need to create a function with the look and feel of the message and then call it via JavaScript.

Create a button

At the “page” level add the following code to the “Function and Global Variable Declaration” section

Code: 

function show_notification(Msg){  

        apex.message.showPageSuccess(Msg); 

        $('#t_Alert_Success').attr('style','background-color: #ffe5ad;');

        $('.t-Alert-title').attr('style','color: black;font-weight: bold;');

        $('#t_Alert_Success div div.t-Alert-icon span').removeClass('t-Icon').addClass('fa fa-warning');

}


A screenshot of a video

Description automatically generated

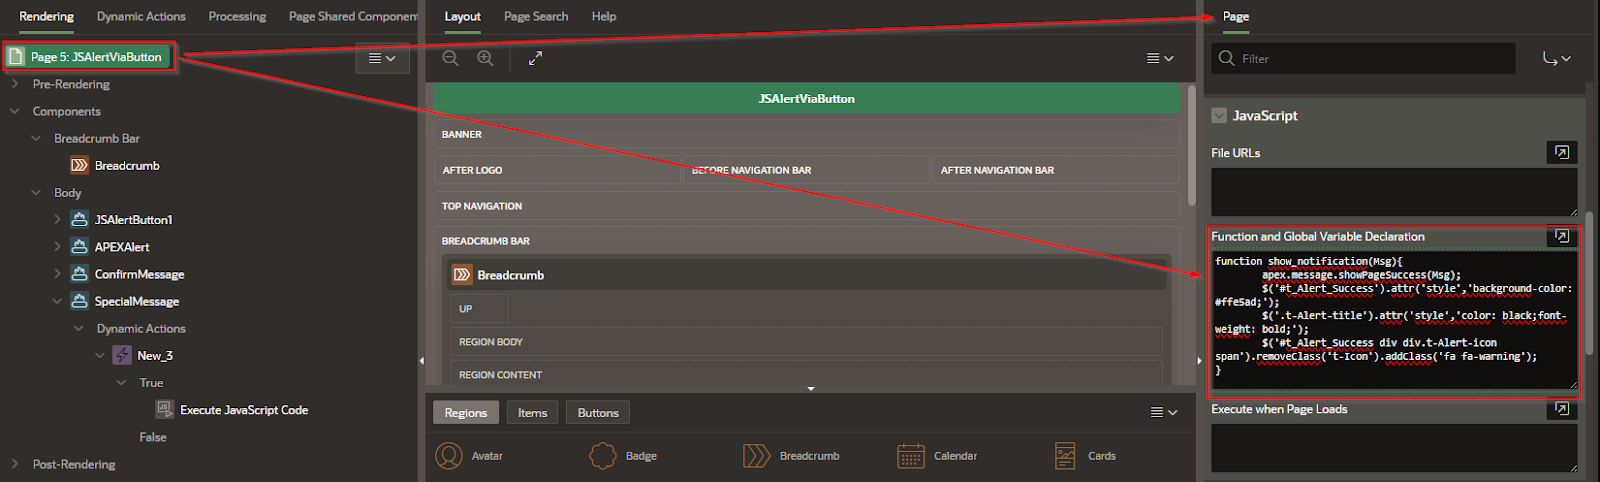
  • Next, create a button with a Dynamic Action

  • Set the True action to : Execute JavaScript Code

  • Add the following code: show notification("Your Message");


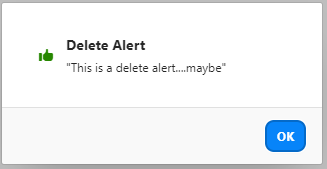
This will display the following message

A screenshot of a computer

Description automatically generated


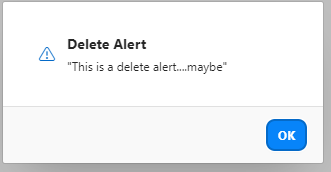
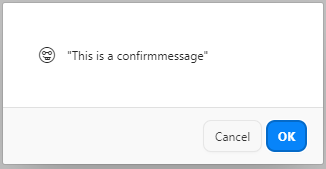
Here is another way of doing it without JavaScript

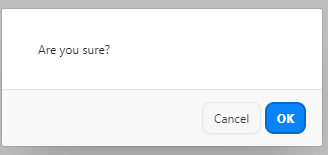
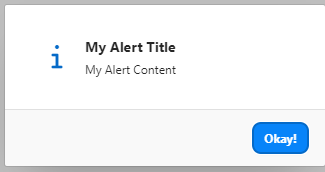
To get the following message: 

A screenshot of a computer error message

AI-generated content may be incorrect.


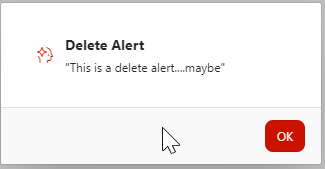
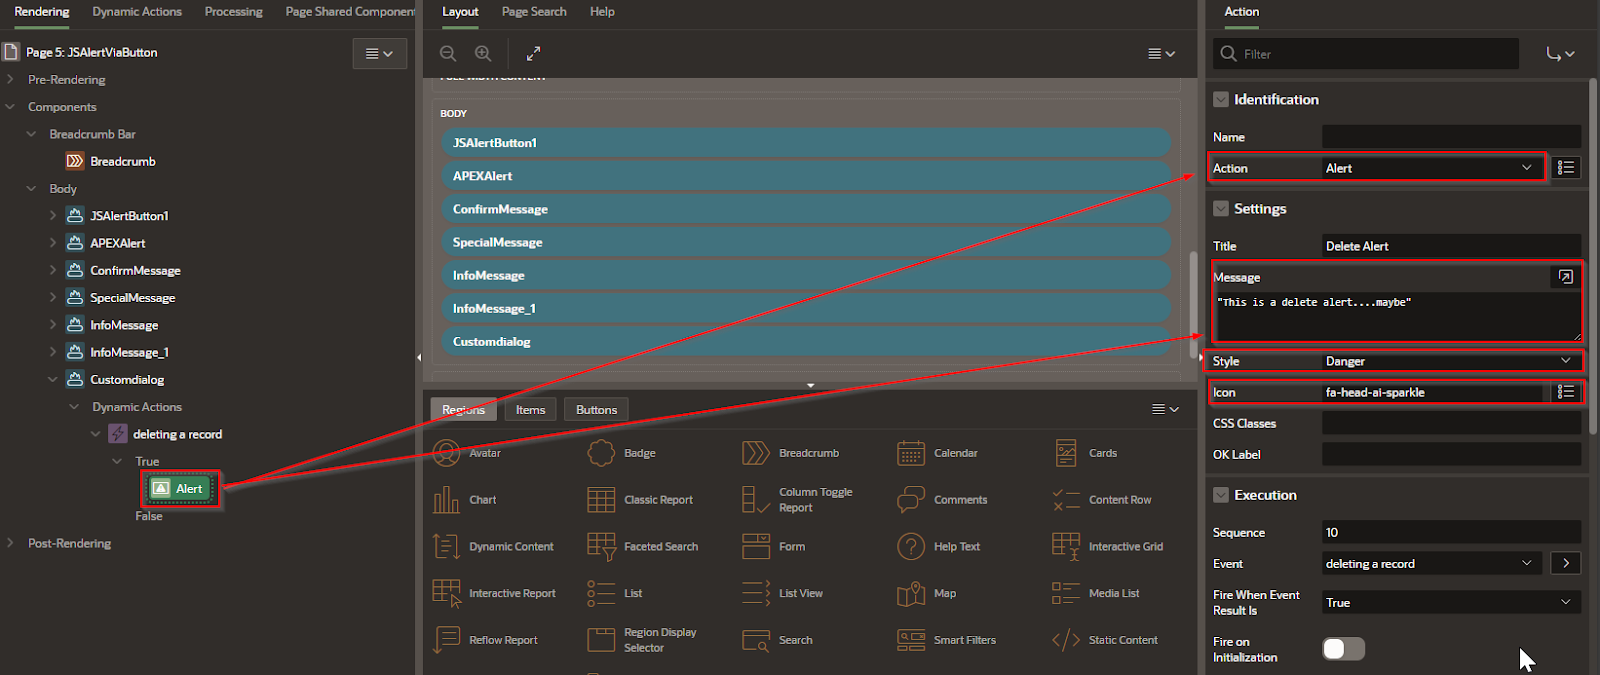
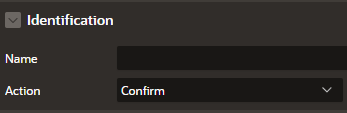
  1. Create a button with a Dynamic Action.

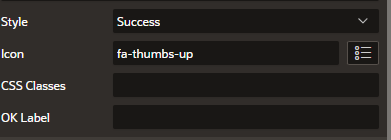
  2. In the TRUE action select “Alert”.

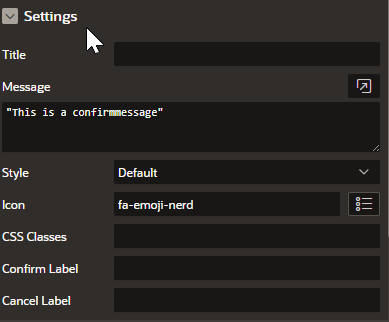
  3. Give it a title and some message.
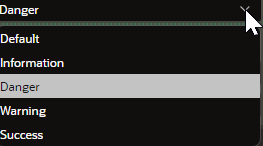
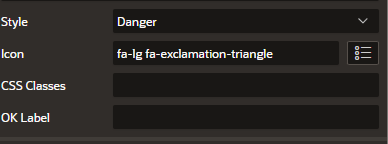
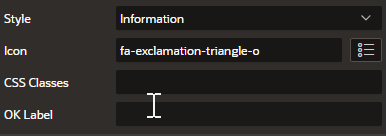
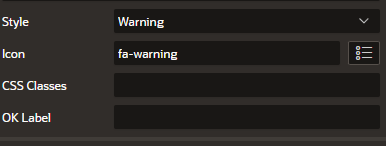
  4. Select a Style.

A screen shot of a computer

Description automatically generated

  1. Add an Icon if you want to.


A screen shot of a computer

AI-generated content may be incorrect.

Informational


Danger

A screenshot of a computer

Description automatically generated A screenshot of a computer

AI-generated content may be incorrect.


Informational

A screenshot of a computer error

Description automatically generated A screenshot of a computer

Description automatically generated


Warning

A screenshot of a computer error

Description automatically generated A screenshot of a video game

Description automatically generated


Success

A screenshot of a computer error

Description automatically generated A screenshot of a computer

Description automatically generated


Confirm

A screenshot of a computer

Description automatically generated A screen shot of a computer

Description automatically generated

A screenshot of a computer

Description automatically generated


Conclusion

By customizing alert messages in Oracle APEX, you enhance communication with your users and create a more professional and user-friendly interface. Whether through styled pop-ups, dynamic content, or integrated page notifications, personalized alerts help users understand important information and respond appropriately. Mastering alert customization is an essential skill for developers looking to build polished and effective applications.

How do I trigger Alerts and info messages with a button

 Introduction

Triggering alerts and informational messages with a button is a common way to enhance user interaction in Oracle APEX applications. By providing immediate feedback, you can guide users, confirm actions, or notify them of important information without navigating away from the current page. This blog will explain how to configure buttons in APEX to display alerts and info messages effectively, improving the overall user experience and making your applications more responsive and intuitive.

Trigger Alerts and Info Messages with a Button in Oracle APEX
Alerts and informational messages help provide immediate feedback to users when they perform actions such as clicking a button. In Oracle APEX, you can trigger these messages using JavaScript, Dynamic Actions, or PL/SQL processes, giving you flexibility in how you interact with users. This guide covers various methods to display alerts and messages upon button clicks.

Using JavaScript to Trigger Alerts
JavaScript offers a simple way to show alert messages when a button is pressed. For example, create a button and set its action to be defined by a Dynamic Action. Then, create a Dynamic Action with these settings: Event as Click, Selection Type as Button, and Action as Execute JavaScript Code. Add the code:

alert('This is a simple alert message!');

This displays a pop-up alert when the button is clicked. You can also include dynamic content by retrieving page item values, like:

var username = $v('P1_USERNAME');  
alert('Hello, ' + username + '! Welcome to the application.');

JavaScript Confirmation Alerts
To ask users for confirmation before proceeding, use JavaScript’s confirm() method:

if (confirm('Are you sure you want to continue?')) {  
    alert('You selected OK!');  
} else {  
    alert('You canceled the action.');
}

This shows a confirmation dialog, and subsequent alerts depend on the user's choice.

Custom Info Messages with APEX Functions
APEX provides built-in JavaScript functions like apex.message.showPageSuccess() for success notifications and apex.message.alert() for error alerts, which integrate seamlessly with the page UI:

apex.message.showPageSuccess('Your action was successful!');
apex.message.alert('An error occurred. Please try again.');

Triggering Alerts Using Dynamic Actions
You can display alerts without writing JavaScript by configuring Dynamic Actions: create a button, then a Dynamic Action with Event set to Click and Action to Execute JavaScript Code with the message display function. For example:

apex.message.showPageSuccess('Data saved successfully!');

To show error messages based on conditions, create a PL/SQL Process that checks input and uses apex_error.add_error() to display inline notifications:

IF :P1_INPUT IS NULL THEN  
    apex_error.add_error(  
        p_message => 'This field cannot be empty.',  
        p_display_location => apex_error.c_inline_in_notification  
    );  
END IF;

Using PL/SQL to Trigger Notifications
You can also trigger notifications using PL/SQL code. For example, set a session state value and use a Dynamic Action to display it:

apex_util.set_session_state('P1_MESSAGE', 'Operation completed successfully.');

Then in JavaScript:

apex.message.alert($v('P1_MESSAGE'));

For errors, use apex_error.add_error() to show messages in the notification area.

Best Practices

  • Use JavaScript alerts for simple confirmations or warnings.

  • Use apex.message.showPageSuccess for friendly success messages.

  • Use apex_error.add_error for consistent validation error handling.

  • Use Dynamic Actions to add alerts without coding when possible.

  • Avoid excessive alerts to prevent disrupting users.

Oracle APEX offers multiple ways to trigger alerts and info messages via buttons, ranging from simple JavaScript alerts to advanced PL/SQL validations and integrated message functions. Choosing the right method helps create a better user experience by providing clear, timely feedback.

Example

A screen shot of a video game

Description automatically generated

  • Create a button

  • Give it a Dynamic Action

  • In the True Action section

    • Set the Identification Action to: Execute JavaScript Code

  • In the Settings add the following to the Code field:

apex.message.showPageSuccess('This is a Success Message Alert');


  1. The following code generates this “Success” message:

Code: apex.message.showPageSuccess('This is a Success Message Alert');

Message: 

A green and blue sign with white text

Description automatically generated

  1. The following code generates this “Alert” message:

Code: apex.message.alert( "Here is a message from APEX.",);

Message:

A screenshot of a message

Description automatically generated


  1. The following code generated a “Confirm” message:

Code: 

apex.message.confirm( "Are you sure?", function( okPressed ) {

     if( okPressed ) {

         deleteIt();

   }

});

Message:

A screenshot of a phone

Description automatically generated

  1. The following code will display generated errors:

Code: 

// First clear the errors

apex.message.clearErrors();


// Now show new errors

apex.message.showErrors([

    {

        type:       "error",

        location:   [ "page", "inline" ],

        pageItem:   "P1_ENAME",

        message:    "Name is required!",

        unsafe:     false

    },

    {

        type:       "error",

        location:   "page",

        message:    "Page error has occurred!",

        unsafe:     false

    }

]);

  1. Customized messages

    1. Create a Button with a Dynamic Action of Action: Execute JavaScript Code

    2. In the Code, place the following:

apex.message.alert( "My Alert Content", function(){

    console.log("Dialog Closed!")

}, {

    title: "My Alert Title",

    style: "information",

    dialogClasses: "my-custom-class",

    iconClasses: "fa fa-info fa-2x",

    okLabel: "Okay!"

} );


Generates the following:

A screenshot of a computer

Description automatically generated


Conclusion
Using buttons to trigger alerts and informational messages in Oracle APEX is a simple yet powerful technique to communicate with users in real time. By setting up dynamic actions or processes that display these messages, you can ensure users receive clear feedback on their actions, helping reduce errors and improve usability. Mastering this feature will enable you to build interactive applications that are both user-friendly and efficient.

How Do I Create A Table Using SQL Developer Web

 Introduction

Creating tables is one of the fundamental tasks when working with databases, and Oracle’s SQL Developer Web makes this process straightforward through a web-based interface. Whether you are designing a new schema or adding tables to an existing application, SQL Developer Web provides the tools to define columns, set data types, and establish constraints without needing to write complex SQL scripts manually. This blog will walk you through the step-by-step process of creating tables using SQL Developer Web, helping you build a solid database foundation.

Creating a table using SQL Developer Web in Oracle APEX is a straightforward process that allows you to define the structure of your data directly through a browser interface without writing complex SQL commands manually.

To create a table:

  1. Log in to SQL Developer Web through your Oracle APEX workspace or Autonomous Database console.

  2. Navigate to the Database Objects section in the menu.

  3. Select Tables to view existing tables in your schema.

  4. Click on Create Table to open the table creation form.

  5. Enter a unique Table Name that follows your naming conventions.

  6. Define the columns by specifying the Column Name, Data Type (such as VARCHAR2, NUMBER, DATE), and optionally, the Size or Precision.

  7. Set any necessary Constraints on each column, such as NOT NULL, PRIMARY KEY, or UNIQUE, to enforce data integrity.

  8. You can add multiple columns by clicking Add Column and repeating the previous steps.

  9. Review your table design and click Save to create the table in the database.

After saving, the new table will appear in the list of database objects and is ready for data insertion or further modifications.

Creating tables with SQL Developer Web is beneficial for developers and administrators who prefer a visual and guided approach over writing DDL scripts. It reduces errors by providing form-based input and immediate feedback. This method also helps ensure that all required constraints and data types are correctly set up from the start, supporting data consistency and application reliability.

Example

A screenshot of a computer

AI-generated content may be incorrect.


A screenshot of a computer

AI-generated content may be incorrect.


A screenshot of a computer

AI-generated content may be incorrect.

A screenshot of a computer

AI-generated content may be incorrect.


A screenshot of a computer

AI-generated content may be incorrect.


A screenshot of a computer

AI-generated content may be incorrect. A screenshot of a computer

AI-generated content may be incorrect.

Conclusion
Using SQL Developer Web to create tables simplifies the database design process by providing an intuitive and accessible interface. By defining columns, data types, and constraints clearly, you ensure your data is organized and consistent. Mastering table creation in SQL Developer Web is essential for any developer or administrator working with Oracle databases, making it easier to manage your data and support your applications effectively.

How Do i Managing Database Users and Roles

 Introduction

Managing database users and roles is a critical aspect of securing and organizing access to your Oracle database. By properly defining users and assigning roles with specific privileges, you can control who has access to what data and which actions they are allowed to perform. Oracle APEX provides tools to create, modify, and manage users and roles efficiently, helping you enforce security policies and maintain a well-structured environment. This blog will explain how to manage database users and roles effectively within Oracle APEX.

In Oracle APEX, SQL Developer Web provides a convenient interface for managing database users and roles, enabling database administrators to control access and permissions without relying solely on command-line tools. Managing users effectively is essential to maintain database security and ensure users have the appropriate level of access.

To create a new database user:

  1. Open SQL Developer Web and navigate to User Management.

  2. Click on Create User to open the user creation form.

  3. Enter the new user’s details such as username, default tablespace, and temporary tablespace.

  4. Assign initial privileges to the user, for example, CONNECT (allows login), RESOURCE (allows creation of certain schema objects), or DBA (full administrative privileges).

  5. Set the user’s password securely.

  6. Click Save to create the user in the database.

You can also manage privileges directly with SQL commands. For example, to grant privileges to a new user, run:

GRANT CONNECT, RESOURCE TO NEW_USER;
ALTER USER NEW_USER IDENTIFIED BY 'securepassword';

This grants the basic permissions to connect and create objects and sets the user’s password.

To modify or restrict a user’s permissions, you can revoke privileges as needed. For instance:

REVOKE RESOURCE FROM NEW_USER;

This removes the RESOURCE privilege, limiting the user’s ability to create schema objects.

By managing users and roles carefully, you ensure that each person or application accessing the database has the correct permissions—no more, no less. This protects sensitive data, maintains operational integrity, and helps enforce compliance policies within your Oracle environment. SQL Developer Web simplifies these tasks by providing an easy-to-use graphical interface alongside the flexibility of SQL commands.

Best Practices for Using SQL Developer Web
Always utilize bind variables to safeguard against SQL injection attacks.
Frequently review execution plans to optimize your queries for better performance.
Leverage RESTful Services to securely expose your data through APIs.
Continuously monitor database performance to identify and avoid slow-running queries.
Assign only the minimum required privileges to database users to maintain security.

SQL Developer Web is a robust browser-based tool for managing Oracle databases. It offers a simple interface to execute SQL queries, create database objects, and administer users. With built-in RESTful Services, you can develop APIs directly from the database. Its performance monitoring features assist in optimizing database activity. Using SQL Developer Web within Oracle APEX allows for efficient database management without the need for extra software installations.

Conclusion
Effective management of database users and roles ensures that your data remains secure and accessible only to authorized individuals. By using Oracle APEX’s user and role management features, you can implement fine-grained access controls and maintain compliance with security standards. Keeping your database permissions organized not only protects your data but also simplifies administration as your applications grow and evolve.

How Do I Monitor Database Performance

 Introduction

Monitoring database performance is essential to ensure that your Oracle database runs efficiently and reliably. By keeping track of key metrics such as query response times, resource usage, and wait events, you can identify bottlenecks, optimize queries, and prevent potential issues before they impact users. Oracle APEX provides several tools and views that help you monitor the health and performance of your database in real time. This blog will guide you through the basics of monitoring database performance and using available tools effectively.

The Performance Hub in SQL Developer Web is a powerful tool designed to help you monitor and analyze the performance of your Oracle database in real time. It provides comprehensive insights into query execution, resource consumption, wait events, and system bottlenecks, enabling you to quickly identify and address performance issues.

To monitor database performance using Performance Hub:

  1. Log in to SQL Developer Web.

  2. Click on the Performance Hub option in the menu.

  3. Here, you can view various performance metrics, including currently running SQL queries, CPU and memory usage, I/O statistics, and detailed wait event information that may be causing delays.

  4. The interface also displays session activity and resource consumption by different database users, which is useful for pinpointing heavy workloads.

One key feature of Performance Hub is the ability to analyze execution plans for SQL queries. Execution plans reveal how the database engine processes a query, showing steps like table scans, index usage, and joins. By examining these plans, you can identify inefficient operations such as full table scans where indexes would be more appropriate.

Example: Checking Execution Plans
Suppose you have a query that runs slowly, such as:

SELECT * FROM LARGE_TABLE WHERE STATUS = 'ACTIVE';
  1. Run this query in SQL Developer Web’s SQL Worksheet.

  2. Click on the Explain Plan button to generate and view the execution plan.

  3. Review the plan to see if the query is performing a full table scan or using indexes efficiently.

  4. If a full table scan is identified and performance is poor, consider adding an index on the STATUS column or rewriting the query to improve efficiency.

By regularly monitoring query performance and resource usage in the Performance Hub, you can proactively tune your database, optimize SQL statements, and ensure that your applications run smoothly. This approach minimizes downtime and maximizes the responsiveness of your Oracle database environment.

Conclusion
Regularly monitoring your database performance helps maintain a stable and responsive environment for your applications and users. By leveraging Oracle APEX’s monitoring tools and analyzing key performance indicators, you can proactively address issues, optimize resource usage, and improve overall database efficiency. Developing a habit of continuous performance monitoring is a critical step toward ensuring your database supports business needs smoothly and reliably.

How Do I Use RESTful Services

 Introduction

RESTful Services have become a crucial part of modern application development, enabling seamless communication between different systems over the web. In Oracle APEX, RESTful Services allow you to create, consume, and manage APIs that interact with your database and external applications. Whether you want to expose data securely, integrate with third-party services, or build mobile-friendly applications, understanding how to use RESTful Services in APEX is essential. This blog will introduce you to the basics of RESTful Services and how to implement them effectively within your Oracle APEX environment.

Oracle APEX’s SQL Developer Web includes built-in RESTful Services capabilities that allow you to create APIs to interact with your database data easily. This enables you to expose data and business logic securely over the web using standard HTTP methods.

To create a REST API:

  1. Open SQL Developer Web and click on RESTful Services from the menu.

  2. Choose Create Module to start a new REST module and define a base endpoint URL that groups related resources.

  3. Add Resource Handlers for HTTP methods such as GET, POST, PUT, and DELETE to define how your API will respond to different requests.

  4. For each handler, configure the SQL query or PL/SQL procedure that processes the request. For example, you might use a SELECT query for GET requests or an INSERT statement for POST requests.

  5. Click Save and then Deploy to activate the REST API, making it available for clients to consume.

Example: Exposing employee data via a REST API

  • Create a GET handler with this SQL query:

    SELECT * FROM EMPLOYEES WHERE EMP_ID = :EMP_ID;
    
  • You can then call this API with a URL like:

    https://yourdatabase.oraclecloud.com/ords/hr/employees?EMP_ID=10
    

This request returns the employee record with EMP_ID 10 in JSON format.

Using RESTful Services in Oracle APEX allows you to build modern, web-accessible APIs that enable integration with external systems, mobile applications, and other cloud services, all while leveraging your existing database objects and logic.

Conclusion
Using RESTful Services in Oracle APEX opens up powerful possibilities for integrating your applications with external systems and delivering data in a flexible, scalable way. By leveraging REST APIs, you can build more dynamic, connected applications that meet modern user expectations. As you become familiar with creating and consuming RESTful Services, you will enhance your ability to develop innovative solutions that are both efficient and easy to maintain.

How Do I Manage Database Objects

 Introduction

Managing database objects is a fundamental part of working with Oracle APEX and the underlying Oracle database. Whether you're creating tables, editing views, defining indexes, or managing sequences, Oracle APEX provides a set of powerful tools through the SQL Workshop and SQL Developer Web interfaces. These tools allow developers to design and maintain the structure of their applications' data models without needing advanced SQL knowledge. This blog will walk you through the steps to view, create, and manage common database objects directly from within Oracle APEX.

In Oracle APEX, you can manage database objects such as tables, views, and indexes using SQL Developer Web, which provides a user-friendly interface for these tasks without needing to write complex SQL scripts manually.

To create a new table:

  1. Open SQL Developer Web and navigate to the Database Objects section.

  2. Select Tables from the list of object types.

  3. Click the Create Table button.

  4. Enter a unique name for your table.

  5. Define the columns by specifying column names, data types (such as VARCHAR2, NUMBER, DATE), and any necessary constraints like NOT NULL or PRIMARY KEY.

  6. After setting all required columns and constraints, click Save to create the table in the database.

To modify an existing table:

  1. In the Tables list, select the table you want to change.

  2. Click Edit to open the table structure.

  3. You can add or remove columns, change data types, adjust constraints, or modify other properties as needed.

  4. After completing your changes, click Save to apply the modifications.

To drop (delete) a table:

  1. Select the table from the Tables list.

  2. Click Delete to remove the table.

  3. Confirm the deletion when prompted. Be cautious, as this action permanently deletes the table and its data.

Using SQL Developer Web to manage database objects provides an intuitive way to organize your database schema directly from the browser, helping maintain and evolve your application’s data structures efficiently.

Conclusion
Oracle APEX makes it easy to manage database objects through intuitive, web-based tools. From creating new tables to modifying existing views or maintaining indexes, all essential tasks can be done without leaving the APEX environment. Learning how to use these features not only improves development efficiency but also helps ensure your database remains well-organized and optimized. Whether you’re building a new application or maintaining an existing one, effective database object management is key to long-term success.

How Do I Execute SQL Queries

 Introduction

Executing SQL queries is a core task for anyone working with Oracle APEX or any Oracle database. Whether you're retrieving data, updating records, or performing calculations, knowing how to run SQL statements efficiently is essential. Oracle APEX provides multiple ways to execute SQL, including the SQL Workshop, SQL Commands interface, and SQL Developer Web. This blog will guide you through the steps to write and execute SQL queries within the APEX environment so you can work confidently with your data.

To execute SQL queries in Oracle APEX, you use the SQL Worksheet, a built-in tool that allows you to run SQL and PL/SQL statements directly against your database. This is useful for retrieving data, creating or modifying database objects, and performing data manipulation operations.

Start by opening the SQL Worksheet:

  1. Log in to your Oracle APEX workspace.

  2. Navigate to SQL Workshop.

  3. Click SQL Commands or SQL Developer Web, then open the SQL Worksheet.

Once you're in the editor:

  • Type your SQL query in the editor window.

  • Click the Run button (a green triangle icon) or press Ctrl + Enter on your keyboard.

  • The results of the query will appear in the output panel below the editor, displaying rows affected or returned, and any error messages if applicable.

Here are some example queries you can try:

Selecting all records from a table

SELECT * FROM EMPLOYEES;

Creating a new table

CREATE TABLE DEPARTMENTS (
    DEPT_ID NUMBER PRIMARY KEY,
    DEPT_NAME VARCHAR2(100)
);

Inserting data into a table

INSERT INTO DEPARTMENTS (DEPT_ID, DEPT_NAME) VALUES (1, 'HR');

Updating records

UPDATE EMPLOYEES SET SALARY = SALARY * 1.1 WHERE DEPT_ID = 1;

Deleting a record

DELETE FROM EMPLOYEES WHERE EMP_ID = 5;

Each time you run a command, the results panel will show how many rows were affected or what data was retrieved. This immediate feedback makes it easy to test and adjust your SQL statements as needed. Whether you're working on data maintenance, reporting, or application development, the SQL Worksheet is your direct line to the database.

Conclusion
Running SQL queries in Oracle APEX is a straightforward process that gives you direct access to interact with your database. Whether you're testing a new query, performing updates, or exploring tables, APEX offers user-friendly tools to help you execute SQL with ease. Mastering these features will help you manage data more effectively and build more powerful, data-driven applications.

How Do I Access SQL Developer Web

 Introduction

SQL Developer Web is a browser-based tool available within Oracle APEX environments, especially for Autonomous Databases (ADB) and some on-premises setups with Oracle REST Data Services (ORDS) enabled. It allows developers and administrators to work with database objects, run SQL commands, monitor performance, and manage users—all from a modern web interface without installing any desktop software.

Whether you're working in Oracle APEX Service, Autonomous Database, or a local ORDS-enabled instance, accessing SQL Developer Web is fast, secure, and efficient. This blog will guide you through the steps to access SQL Developer Web and start working with your database online.

To access SQL Developer Web from within Oracle APEX:

  1. Log in to your Oracle APEX workspace.

  2. Navigate to the SQL Workshop menu.

  3. Click on SQL Developer Web.

  4. When prompted, enter your database credentials.

  5. Click Sign In to launch the SQL Developer Web interface.

Alternatively, you can access SQL Developer Web directly through Oracle Cloud if you are using Autonomous Database:

  1. Log in to the Oracle Cloud Console.

  2. Go to the Autonomous Database section.

  3. Click on the name of your database instance.

  4. From the menu, select Tools.

  5. Click SQL Developer Web.

  6. Enter your database credentials and connect.

Once inside SQL Developer Web, you'll find several key areas designed to streamline database interaction:

  • SQL Worksheet: A place to write, run, and save SQL and PL/SQL statements.

  • Database Objects: A tree view to explore and manage tables, views, indexes, sequences, and other schema objects.

  • RESTful Services: Tools to define and manage REST endpoints for data access and integration.

  • Performance Hub: Visual tools to monitor queries, session activity, and resource usage in your database.

  • User Management: Interface to manage database users, roles, and privileges.

SQL Developer Web is an essential tool for APEX developers, providing quick and powerful access to backend data and administrative controls in a secure and intuitive environment.

Conclusion
Accessing SQL Developer Web gives you a powerful and convenient way to interact with your Oracle database from anywhere with an internet connection. With just a few steps, you can log in, explore data, and execute SQL in a clean and responsive interface. Whether you're a developer, DBA, or analyst, SQL Developer Web enhances your workflow by providing instant access without the need for installation or configuration on your local machine.

How Do I Refresh Reports or Items Based on Form Fields

 Introduction

In Oracle APEX, dynamic and responsive user interfaces are essential for delivering a smooth user experience. One powerful feature that supports this is the ability to refresh reports or form items automatically based on changes in other form fields. This technique allows developers to update data displays or enable/disable elements without requiring a full page reload. Whether you're filtering an interactive report based on a dropdown selection or recalculating a field in real time, understanding how to use dynamic actions and partial page refreshes is key to building interactive applications.

You can use Dynamic Actions in Oracle APEX to refresh reports or form items when a field value changes, enabling a more interactive and responsive user experience. This approach avoids full page reloads and helps keep the interface efficient and user-friendly.

Example: Refreshing a Report When a Field Changes
To refresh a report based on a field such as P1_CUSTOMER_ID, follow these steps:

  1. In the Page Designer, select the item P1_CUSTOMER_ID.

  2. Under the Dynamic Actions section, click Create.

  3. For the event, choose Change (this triggers when the field value changes).

  4. For the true action, select Refresh.

  5. In Affected Elements, choose the report region that should be updated.
    Now, when the user selects a different customer ID, the report will automatically refresh to reflect the change—without requiring a page reload.

Best Use Cases for Using Form Fields in SQL Queries

  • Interactive Filtering: Use form fields as bind variables in WHERE clauses to dynamically filter report results or data in charts.

  • Cascading LOVs (List of Values): Populate a LOV based on the selected value of another item. For example, selecting a country dynamically loads states.

  • Data Processing: Insert, update, or delete records using PL/SQL that references form items like :P1_EMP_ID or :P1_SALARY.

  • Dynamic SQL Execution: Build flexible SQL queries at runtime by referencing items like :P2_CATEGORY_ID.

  • Validations: Enforce rules using PL/SQL that checks values entered into the form before submission.

Form fields in Oracle APEX act as bind variables in SQL and PL/SQL, allowing you to directly use them in queries and logic. You can reference them using the colon notation (e.g., :P2_STATUS, :P2_IS_READ). These values can control what gets displayed in reports or LOVs, and what gets processed or validated in PL/SQL code.

Example Query Using Form Field in a Filter
This is commonly used in search forms or filter panels:

SELECT ...
FROM ...
WHERE ...
AND (:P2_IS_READ IS NULL  -- Shows all records when "All" is selected
     OR :P2_IS_READ = IS_READ)  -- Filters records based on the selected status

This logic allows for flexible filtering based on user input while keeping the SQL compact and easy to maintain.

Using form fields effectively makes your APEX applications dynamic, responsive, and user-centered. They are essential tools for tailoring the interface and functionality to real-time user actions.

Conclusion
Refreshing reports or items based on form field changes enhances the interactivity and responsiveness of your APEX applications. By using dynamic actions, proper triggering events, and clear dependencies, you can create forms that immediately reflect user input and deliver real-time feedback. This approach improves usability and streamlines user workflows, making your applications more intuitive and efficient.

How Do I Use Form Fields in Validations

 Introduction

When working with Oracle APEX, form validations play a vital role in ensuring data accuracy, improving user experience, and maintaining application integrity. Using form fields in validations allows developers to enforce rules based on user input before data is submitted or processed. Whether you're checking for required values, comparing two fields, or applying conditional logic, understanding how to reference and work with form fields is essential. This blog will guide you through the practical use of form fields within validation logic in Oracle APEX.

To use form fields in validations in Oracle APEX, begin by understanding that validations are rules you define to check whether the data entered by the user is correct before the form is submitted. You can apply validations at different levels, such as item-level (single field), page-level (multiple fields), or using PL/SQL expressions.

First, go to the Page Designer and locate the item or page where you want to create a validation. Under the Validation section, click Create and choose the type of validation you want to apply. For basic validations, like checking if a field is not null, you can select “Item is NOT NULL” and assign it directly to a form item.

If you want to use multiple fields in a single validation, select PL/SQL Function Returning Boolean or PL/SQL Expression. This allows you to write logic using the names of form fields. You reference form fields in PL/SQL using the syntax :P1_ITEM_NAME, where P1_ITEM_NAME is the name of the form item. For example, to check that a start date is before an end date, you can write:
:P1_START_DATE < :P1_END_DATE

You can also create validations that trigger only under specific conditions. Use the Server-side Condition section to control when the validation runs. For example, you might run a validation only if a checkbox is selected or if another field has a specific value.

In addition, you can customize error messages to make them user-friendly. Set the Error Message property of the validation to clearly explain what went wrong and how the user can fix it.

Once the validation is defined, it will be evaluated when the page is submitted. If the condition fails, the form submission is stopped and the user is shown the error message. This helps ensure the integrity of the data before any changes are made to the database.

Form fields can be checked using SQL or PL/SQL validations before submission to ensure data integrity and enforce business rules. These validations help prevent invalid or duplicate data from being entered into the system.

For example, to ensure a username is unique, you can create a validation using a SQL query. In the Page Designer, go to the Validations section and create a new validation of type Function Returning Error Text. Enter the following SQL code:

SELECT 'Username already exists' 
FROM users 
WHERE username = :P1_USERNAME;

This validation will run when the form is submitted. If the query returns a result, it means the username already exists in the database, and the form submission will be blocked. The error message "Username already exists" will be displayed to the user.

To check if a field is not empty, you can create a validation using PL/SQL. In the same way, choose PL/SQL Function Returning Error Text as the type. Then, use the following PL/SQL block:

IF :P1_EMP_NAME IS NULL THEN  
    RETURN 'Employee name cannot be empty';  
END IF;

This validation will check if the P1_EMP_NAME field has a value. If it is null, the message 'Employee name cannot be empty' will be shown, and the form submission will not proceed.

These types of validations allow you to control the logic of your form and guide the user with clear messages, helping them correct their input before saving data.

Conclusion
Using form fields in validations is a foundational skill for building robust and user-friendly APEX applications. By leveraging these fields effectively, you can prevent errors, guide user input, and maintain clean data throughout your system. As you continue to build and refine your forms, remember to test your validations thoroughly to ensure they respond accurately to all possible user inputs.

Sunday, June 29, 2025

How Do I Use Form Fields in Dynamic SQL Execution

 Introduction

In Oracle APEX, Dynamic SQL allows you to build and execute SQL statements at runtime, offering flexibility in how queries and operations are formed based on user input. By incorporating form fields (page items) into your dynamic SQL, you can create highly adaptable logic that responds directly to what the user enters or selects on the page. This approach is useful for advanced filtering, conditional execution, or building SQL statements where parts of the query change dynamically.

How Do I Use Form Fields in Dynamic SQL Execution
Font: Arial, font size: 14px, plain text

In Oracle APEX, form fields (page items) can be used inside dynamic SQL to build flexible, conditional logic based on user input. Dynamic SQL is useful when you need to construct a query or DML statement at runtime, especially when the structure or filters of the statement depend on what the user enters.

Step 1: Create Page Items
Create the necessary page items that will collect user input. For example:

  • P1_TABLE_NAME – where the user enters a table name

  • P1_FILTER_VALUE – where the user inputs a value to filter on

Step 2: Use PL/SQL Dynamic SQL Block
You can use EXECUTE IMMEDIATE to run dynamic SQL. Reference form fields using bind variables where possible. Example:

DECLARE
  v_sql   VARCHAR2(4000);
BEGIN
  v_sql := 'DELETE FROM ' || DBMS_ASSERT.simple_sql_name(:P1_TABLE_NAME) ||
           ' WHERE status = :1';

  EXECUTE IMMEDIATE v_sql USING :P1_FILTER_VALUE;
END;

Step 3: Use DBMS_ASSERT to Prevent Injection
Always validate dynamic parts like table or column names using DBMS_ASSERT. Never concatenate raw user input directly into SQL. DBMS_ASSERT.simple_sql_name ensures only valid SQL identifiers are used.

Step 4: Example: Building a Dynamic SELECT
This block returns a count from a table chosen by the user:

DECLARE
  v_sql   VARCHAR2(1000);
  v_count NUMBER;
BEGIN
  v_sql := 'SELECT COUNT(*) FROM ' || DBMS_ASSERT.simple_sql_name(:P1_TABLE_NAME);

  EXECUTE IMMEDIATE v_sql INTO v_count;

  :P1_RESULT := v_count;
END;

Step 5: Set Page Process or Dynamic Action
Add this PL/SQL block to a Page Process (e.g., when a button is clicked), or use a Dynamic Action of type "Execute PL/SQL Code" and set the page items as "Items to Submit" and "Items to Return" appropriately.

Step 6: Handle Exceptions
Wrap your dynamic SQL with exception handling to catch and respond to errors.

EXCEPTION
  WHEN OTHERS THEN
    APEX_DEBUG.MESSAGE('Error: ' || SQLERRM);
    raise_application_error(-20001, 'Invalid action requested.');

Best Practices

  • Use bind variables (USING) instead of concatenating user values into the SQL.

  • Sanitize object names using DBMS_ASSERT.

  • Avoid exposing table or column names directly to users unless strictly necessary.

  • Use APEX session state correctly by submitting items before executing dynamic SQL.

  • Limit the scope and complexity of dynamic SQL to what is absolutely needed.

Using form fields with dynamic SQL gives you flexibility in Oracle APEX, allowing you to build responsive and user-driven actions securely and efficiently.


Sometimes, you need to construct SQL queries dynamically using PL/SQL.

Example: Executing a Dynamic Query with a Form Field

DECLARE  

    v_sql VARCHAR2(4000);  

BEGIN  

    v_sql := 'SELECT emp_name, department FROM employees WHERE emp_id = ' || :P1_EMP_ID;  

    EXECUTE IMMEDIATE v_sql;  

END;

  • This approach is useful for dynamic filtering but should be used cautiously to prevent SQL injection.

Conclusion

Using form fields in dynamic SQL execution within Oracle APEX lets you build smart, data-driven applications that react in real time to user input. While powerful, this technique should be handled carefully to avoid SQL injection risks. By validating inputs and using bind variables wherever possible, you can safely harness the full power of dynamic SQL with page item values in your APEX applications.

How Do I Make a Faceted Search Map Page in Oracle APEX

Combining faceted search with a map region in Oracle APEX enables users to filter data visually and spatially at the same time. This design ...