In Oracle APEX, adding a Delete button to a Classic Report is only the first step; wiring it correctly to perform the deletion and refresh the report dynamically is essential for a seamless user experience. This process involves creating the backend logic to delete the selected record and ensuring the report refreshes immediately to reflect the changes without requiring manual page reloads. Properly wiring the Delete button improves application responsiveness and maintains data integrity by providing instant feedback to the user.
In Oracle APEX, wiring a Delete button to perform a DELETE operation and then refresh the Classic Report involves several detailed steps. This ensures that when a user clicks the Delete button, the corresponding record is removed from the database, and the report updates immediately to reflect this change.
Step 1: Add a Delete Button in the Classic Report
When designing your Classic Report, include a column that contains a Delete button or link for each row. This can be done by adding a column with HTML markup or by using a link column type with an icon or button style.
Example SQL snippet to add a Delete link:
SELECT EMPLOYEE_ID,
       FIRST_NAME,
       LAST_NAME,
       '<button class="delete-btn" data-id="' || EMPLOYEE_ID || '">Delete</button>' AS DELETE_BUTTON
FROM EMPLOYEES
Here, each button has a data-id attribute storing the unique identifier of the record.
Step 2: Create a Dynamic Action to Handle the Delete Button Click
In your APEX page, create a Dynamic Action triggered by a click on the Delete button. Configure it as follows:
-
Event: Click
-
Selection Type: jQuery Selector
-
jQuery Selector:
.delete-btn(matches the CSS class used on the buttons)
Step 3: Add a True Action to Execute the DELETE Statement
Add a True Action of type “Execute PL/SQL Code” that performs the DELETE operation on the database. The PL/SQL block will use the value of the record’s ID passed from the button click.
Example PL/SQL block:
BEGIN
  DELETE FROM EMPLOYEES WHERE EMPLOYEE_ID = :P1_EMPLOYEE_ID;
  COMMIT;
END;
Here, :P1_EMPLOYEE_ID is a page item that you will set dynamically to the button’s data-id.
Step 4: Set the Page Item Dynamically Using JavaScript
Before the PL/SQL block runs, add a JavaScript action to assign the clicked record’s ID to the page item. Use this code:
var empId = $(this.triggeringElement).data('id');
$s('P1_EMPLOYEE_ID', empId);
This assigns the ID to the hidden page item P1_EMPLOYEE_ID which the PL/SQL block uses.
Step 5: Refresh the Classic Report Region
Add another True Action of type “Refresh” and select the Classic Report region as the target. This will reload the report data after the deletion completes, showing the updated dataset without the deleted record.
Step 6: Test Your Setup
Run the page, click the Delete button next to any row, and verify the record is removed and the report refreshes immediately.
Additional Tips:
-
Use a confirmation dialog to prevent accidental deletions by adding a “Confirm” True Action before running the DELETE.
-
Ensure the page item used to pass the ID is hidden and cleared after each operation.
-
If the report uses pagination or filters, refreshing the region will keep those intact.
By following these steps, you wire the Delete button to effectively remove records and keep the Classic Report up to date dynamically, enhancing user experience and maintaining data consistency.
Example
Wiring the Delete Button to Delete and Refresh a Classic Report in Oracle APEX
In Oracle APEX, allowing users to delete a record directly from a Classic Report enhances user experience by making data management more interactive. However, after deleting a record, it is also important to refresh the report so that the changes are reflected immediately without requiring a full page reload.
This tutorial explains how to wire a delete button to delete a record and refresh the Classic Report using PL/SQL, AJAX, JavaScript, and Dynamic Actions.
Why Wire the Delete Button to Refresh the Report?
Prevents users from seeing outdated data after deletion.
Avoids unnecessary full page reloads, making the application more responsive.
Provides a seamless experience by updating only the affected region.
Step 1: Modify the Classic Report SQL Query
To include a delete button, modify the SQL query to generate a button inside the report.
SELECT
empno,
ename,
job,
'<button class="delete-button" data-id="' || empno || '">Delete</button>' AS delete_action
FROM emp
Explanation:
The delete-button class is added so that JavaScript can target the button.
The data-id attribute stores the empno value, which will be used in the delete action.
Step 2: Create a PL/SQL Process to Delete a Record
Create an On-Demand AJAX Process to handle the deletion.
Go to Shared Components > Application Processes.
Click Create and select On-Demand Process (Ajax Callback).
Name the process DELETE_EMP_RECORD.
Use the following PL/SQL code:
BEGIN
DELETE FROM emp WHERE empno = :P0_EMPNO;
COMMIT;
END;
This process removes the employee record identified by empno.
Step 3: Add JavaScript to Handle the Delete Action and Refresh the Report
Open Page Designer and navigate to the Classic Report's properties.
In Page Attributes, go to JavaScript > Function and Global Variable Declaration.
Add the following JavaScript:
$(document).ready(function() {
$(".delete-button").click(function() {
var empId = $(this).data("id");
if (confirm("Are you sure you want to delete this record?")) {
$.ajax({
url: "wwv_flow.show",
type: "POST",
data: {
"p_request": "APPLICATION_PROCESS=DELETE_EMP_RECORD",
"p_flow_id": $v("pFlowId"),
"p_flow_step_id": $v("pFlowStepId"),
"p_instance": $v("pInstance"),
"P0_EMPNO": empId
},
success: function(response) {
alert("Record deleted successfully!");
apex.region("classic_report_region").refresh();
},
error: function() {
alert("Error deleting record.");
}
});
}
});
});
Explanation:
The click function captures the empno from the button’s data-id attribute.
The confirm() function asks for user confirmation before deleting.
The $.ajax() function makes an asynchronous request to delete the record.
If successful, the Classic Report region is refreshed using apex.region("classic_report_region").refresh();.
Replace "classic_report_region" with the Static ID of your Classic Report.
Step 4: Set a Static ID for the Classic Report
In Page Designer, select the Classic Report region.
Locate the Advanced section in the property panel.
Set Static ID to classic_report_region (or any preferred name).
This allows JavaScript to reference and refresh the Classic Report after deletion.
Step 5: Using Dynamic Actions Instead of JavaScript (Alternative Approach)
For a no-code approach, use Dynamic Actions instead of JavaScript.
Select the Classic Report region.
Click Create Dynamic Action.
Set Event to Click.
Set Selection Type to jQuery Selector and enter .delete-button.
Add an Action: Execute PL/SQL Code.
Enter the following code:
BEGIN
DELETE FROM emp WHERE empno = :P0_EMPNO;
COMMIT;
END;
Set Page Items to Submit to P0_EMPNO.
Add another Action: Refresh Region.
Set Affected Region to Classic Report Region.
This method eliminates the need for JavaScript while still allowing record deletion and report refresh.
Step 6: Adding a Trash Icon Instead of a Button (Optional Enhancement)
For a cleaner interface, replace the button with a Font Awesome trash icon.
Modify the SQL query to:
SELECT
empno,
ename,
job,
'<i class="fa fa-trash delete-icon" data-id="' || empno || '"></i>' AS delete_action
FROM emp
Apply CSS styles to improve the appearance:
.delete-icon {
color: red;
cursor: pointer;
font-size: 18px;
}
.delete-icon:hover {
color: darkred;
}
This change replaces the text button with a red trash icon that performs the same delete action.
Step 7: Prevent Accidental Deletion Using APEX Confirmation Dialog
To replace the default confirm() function with APEX’s built-in confirmation dialog, modify the JavaScript:
$(document).ready(function() {
$(".delete-button").click(function() {
var empId = $(this).data("id");
apex.confirm("Are you sure you want to delete this record?", {
request: "DELETE_" + empId
});
});
});
Create a PL/SQL Process (Before Header) with:
DECLARE
v_empno NUMBER;
BEGIN
v_empno := TO_NUMBER(SUBSTR(:REQUEST, 8));
DELETE FROM emp WHERE empno = v_empno;
COMMIT;
END;
Set the Condition to REQUEST LIKE 'DELETE_%'.
This method enhances user experience with a modal confirmation instead of a JavaScript alert.
Best Practices for Wiring the Delete Button and Refreshing the Classic Report
Always use confirmation dialogs to prevent accidental deletions.
Ensure the PL/SQL process commits changes to make deletions permanent.
Use region refresh instead of full page reload to improve performance.
Apply CSS styles or icons to improve the delete button’s appearance.
Implement role-based authorization to restrict delete functionality to certain users.
Wiring the delete button to delete a record and refresh the Classic Report in APEX ensures a smooth user experience. By combining PL/SQL, JavaScript, AJAX, and Dynamic Actions, users can remove records without leaving the page. Using confirmation dialogs, icons, and CSS styling further enhances usability.
EXAMPLE:
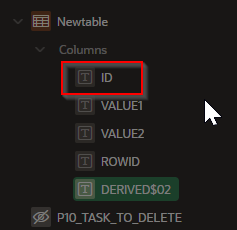
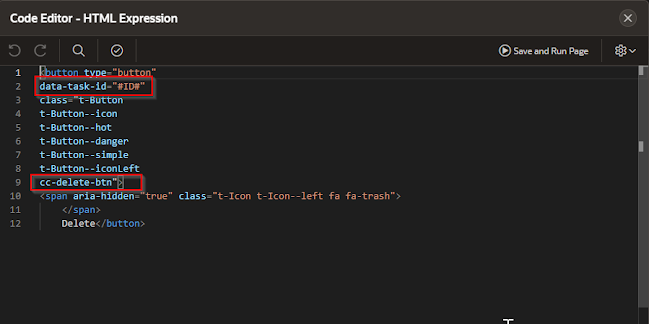
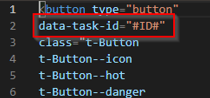
Step 1: In the HTML expression for the delete button make sure that you have the following in your markup:
data-task-id=”#ID#” which in this case is the name of the column that holds the ID value
Add the CSS class name “cc-delete-btn”. This will be used by the JQuery call to identify the button.
Step 2- In the “Body” level create a new Page Item
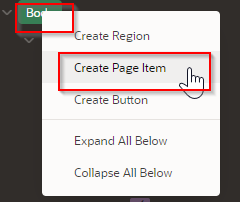
Step 3: change the name and make the field “Hidden”
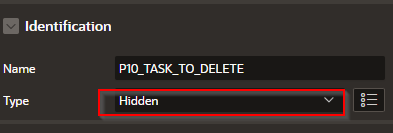
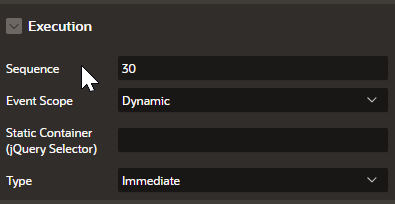
Step 4: Add a new Dynamic Task and name it “Delete task”
Make sure that the “Event Scope” is “Dynamic”
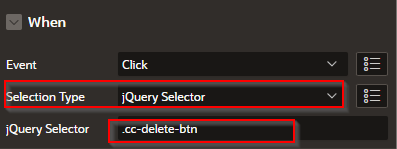
In the “When” section
Change the “Selection Type” to “JQuery Selector”
Enter “.cc-delete-btn” as the class for the JQuery Selector
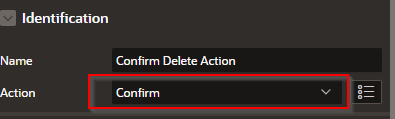
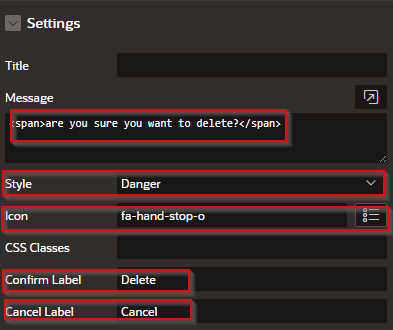
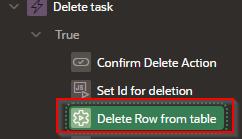
Step 5 – In the “True” Delete Task branch change the name to “Confirm delete Action”

Set the Action to “confirm”, this will generate a confirmation message.
Insert some HTML confirmation message like this:
<span> Are you sure you want to delete?</span>
Set your style. In this case we set it to “Danger”
Set your ICON if you want one in the message.
Two buttons are created: a confirmation and a cancel button.
Set the word “Delete” for the “Confirm Label”.
Set the word “Cancel” in the “Cancel Label”.
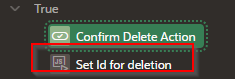
Step 6: Set the ID for deletion.
Create a new TRUE branch in the dynamic Action
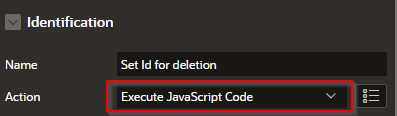
Set the identification’s action to “Execute JavaScript Code
Set the settings to the following:
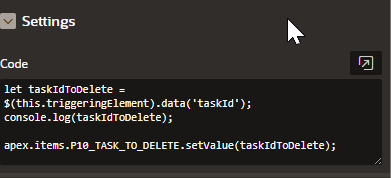
let taskIdToDelete = $(this.triggeringElement).data('taskId');
console.log(taskIdToDelete);
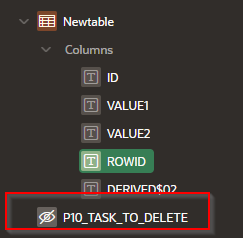
apex.items.P10_TASK_TO_DELETE.setValue(taskIdToDelete);
Code explanation
Declares taskIdToDelete and assigns the data value of the triggered object “taskId” which is somehow associated with the “data-task-id” entry in the code for the button. It saves the ID table column value into the taskIdToDelete variable.
This next piece of code sends the selected value into the console log

Since there is no PL/SQL delete code at this point in the process, you can test the button in the page and check the log to see if the ID is getting picked up correctly.
Finally, the following code takes the hidden text item P10_TASK_TO_DELETE and assigns the taskIdToDelete value

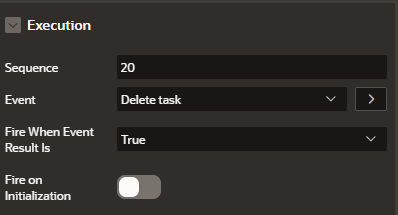
Make sure that “Delete task” is the selected event in “Execution”.
Step 7 - Delete the Row from table
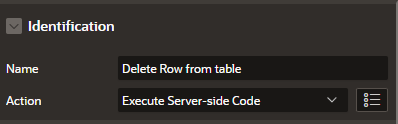
Create a “New” Dynamic Action True branch and name it “Delete row from table”
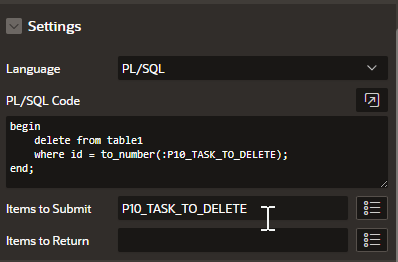
In Identification select the action: “Execute Server-side Code”
In settings add the following code:
begin
delete from table1
where id = to_number(:P10_TASK_TO_DELETE);
end;
Where :P10_TASK_TO_DELETE is the hidden text field that has the ID column value.
Make sure that you add ALL of the items that you’re passing data with (:P10_TASK_TO_DELETE) as the “Items to Submit” will pass the data from those items to the named items in the sql statement.
Step 8 – Refreshing the table
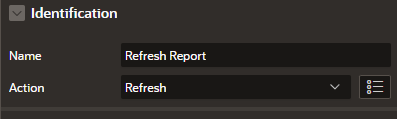
Add one more true Dynamic Action branch

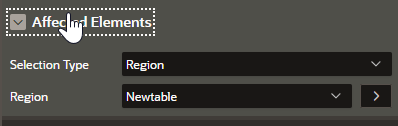
Set the identification action to “Refresh”
Set the :Selection Type” to “Region” and enter the name of the report in the “Region” area
By correctly wiring the Delete button to execute the deletion process and refresh the Classic Report region, you create a smooth, interactive interface that enhances usability. This approach minimizes user effort, prevents stale data display, and ensures your Oracle APEX application operates efficiently with real-time updates, ultimately delivering a polished and professional user experience.