The "Submit" button in Oracle APEX plays a central role in processing user input and interacting with backend logic. Whether you're working with forms, interactive grids, or other data-entry components, the Submit button allows you to capture user data and trigger validations, processes, or computations. Implementing it correctly ensures a smooth and consistent experience for both the end user and the application logic. In APEX, this button is typically configured to submit the page and initiate backend PL/SQL processes, making it a key tool for handling data persistence and flow control within your application.
In Oracle APEX, implementing a "Submit" button is essential for processing user input and managing server-side logic. When a user clicks the Submit button, the page is submitted to the server, and any defined processes, validations, or branches associated with the button are executed. Here's how to create and configure a Submit button in detail:
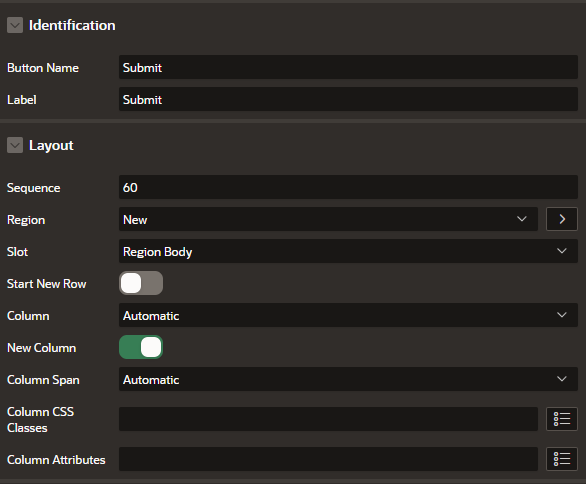
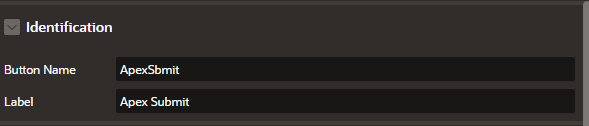
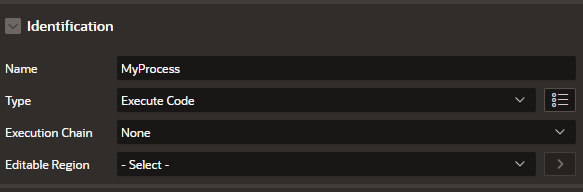
To begin, open your APEX application and navigate to the page where you want to place the Submit button. In the Page Designer, under the Buttons section, right-click and select Create > Button. Assign a meaningful name to the button, such as SUBMIT, and choose the appropriate Position (e.g., Position 01: Region Template Button).
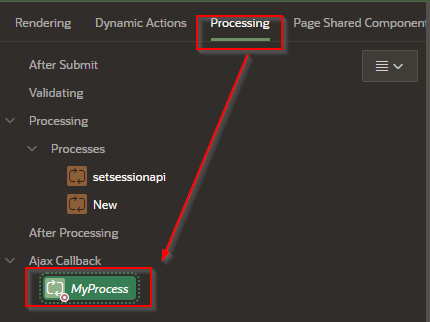
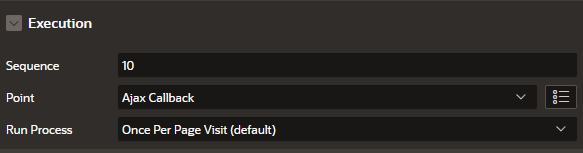
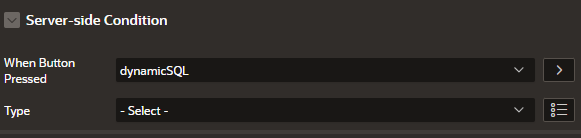
Set the Action property of the button to Submit Page. This setting ensures that clicking the button triggers a full page submit, allowing APEX to execute server-side logic. Next, go to the Processing section of the page and create a Process (e.g., to insert or update records). Under the Server-Side Condition, set the condition When Button Pressed = SUBMIT. This ensures that the process only runs when the Submit button is clicked.
Optionally, add Validations in the Validations section to check user input before the process is executed. These can be item-level or page-level validations, and APEX will automatically prevent the page process from running if validations fail. You can also configure Branching after the Submit process, such as redirecting the user to another page or showing a confirmation message.
By using these features, the Submit button acts as the control center for input handling, server-side logic, and user feedback. You can reuse this pattern across different pages and forms for consistent functionality throughout your application.
In Oracle APEX, APEX_UTIL.SET_SESSION_STATE is a built-in procedure used to programmatically set the value of one or more session state items (page items, application items, or other APEX variables) from PL/SQL. This is particularly useful when you want to update the value of an item without user interaction or when you're performing logic in a process or dynamic PL/SQL code.
Syntax:
APEX_UTIL.SET_SESSION_STATE (
   p_name  IN VARCHAR2,
   p_value IN VARCHAR2
);
Parameters:
Example 1: Set session state for a page item
BEGIN
   APEX_UTIL.SET_SESSION_STATE('P1_DEPTNO', '10');
END;
This sets the page item P1_DEPTNO to the value 10.
Example 2: Set session state for an application item
BEGIN
   APEX_UTIL.SET_SESSION_STATE('APP_USER_ROLE', 'ADMIN');
END;
This assigns the value 'ADMIN' to the application item APP_USER_ROLE.
Notes:
-
The value set using APEX_UTIL.SET_SESSION_STATE is stored in the session and can be used by subsequent processes or PL/SQL logic.
-
If the item is protected by session state protection and marked as "Restricted", the procedure may not work unless you disable the protection or adjust settings.
-
This is commonly used in Before Header or After Submit processes, or in dynamic actions that execute PL/SQL.
Use Case Example in a Process:
Suppose you want to save a department number into session state for use across multiple pages:
BEGIN
   APEX_UTIL.SET_SESSION_STATE('G_DEPT_ID', :P2_DEPT_ID);
END;
This takes the value from P2_DEPT_ID and assigns it to the application-level item G_DEPT_ID.
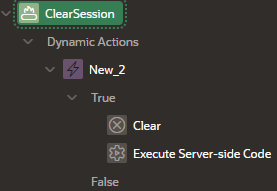
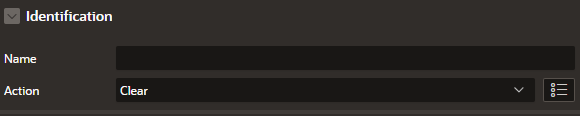
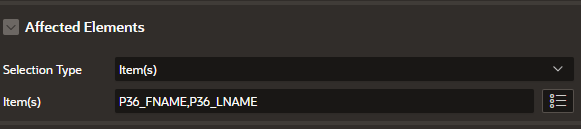
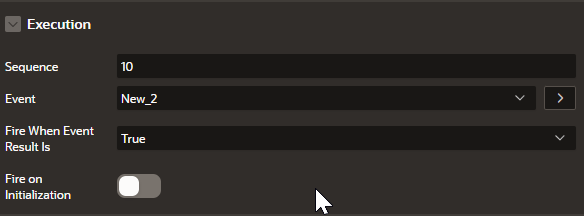
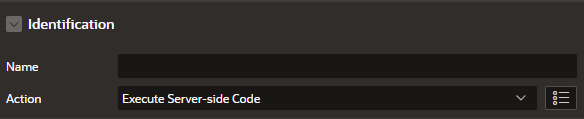
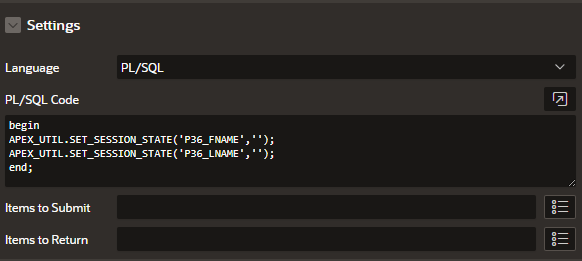
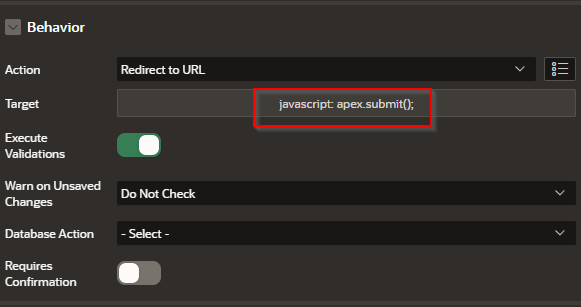
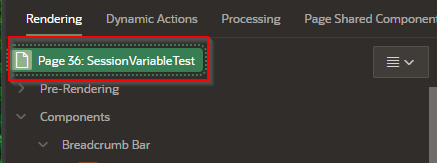
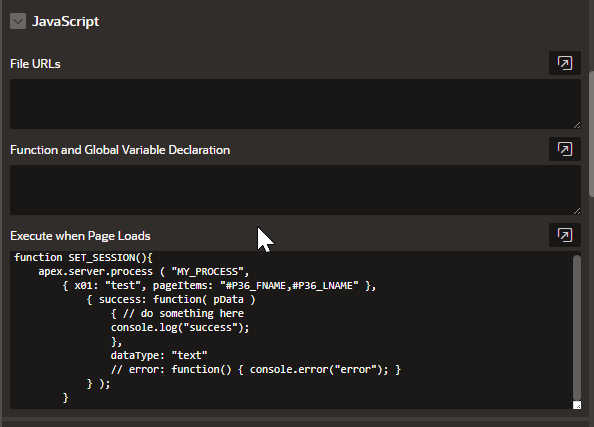
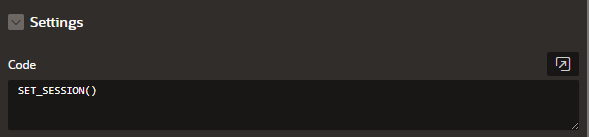
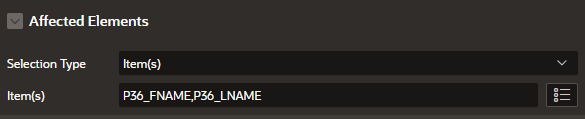
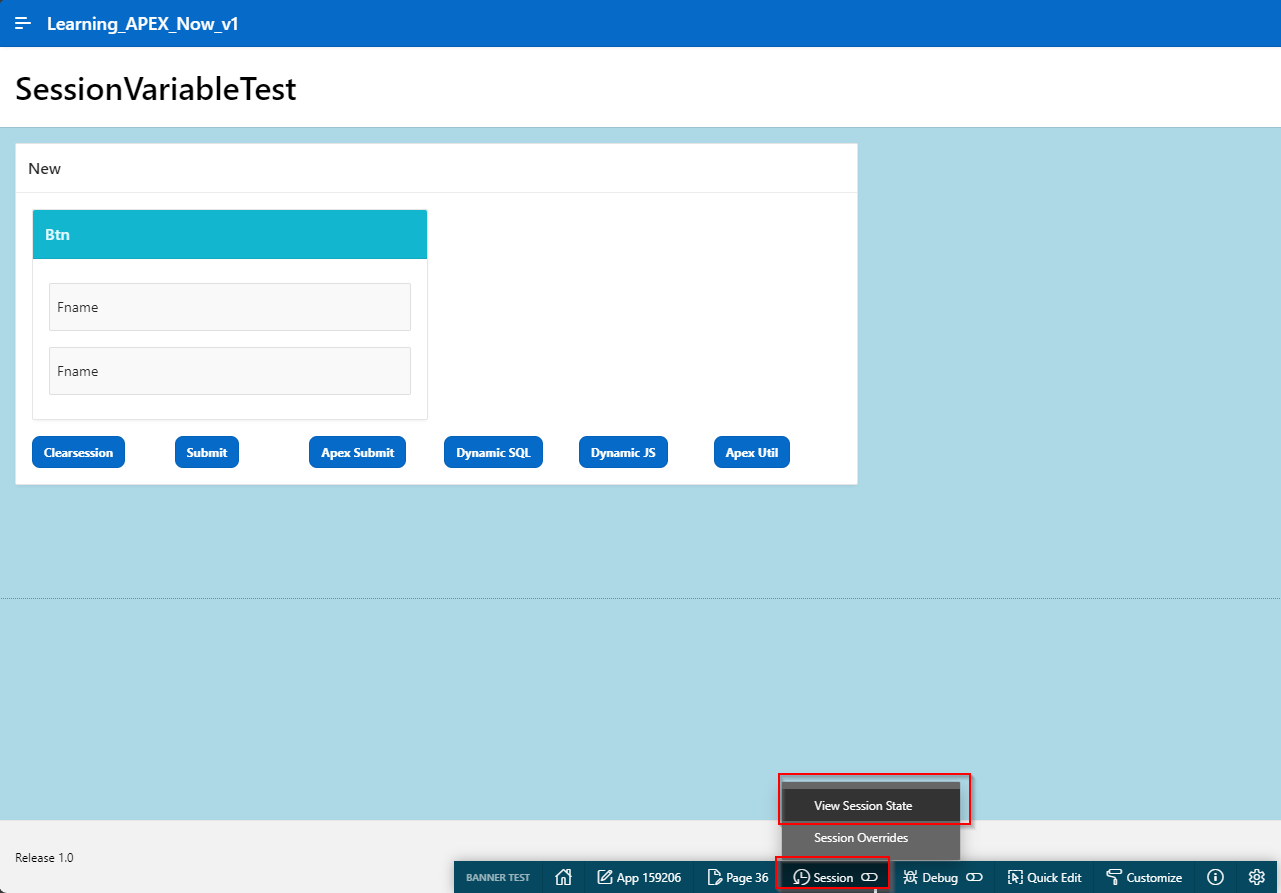
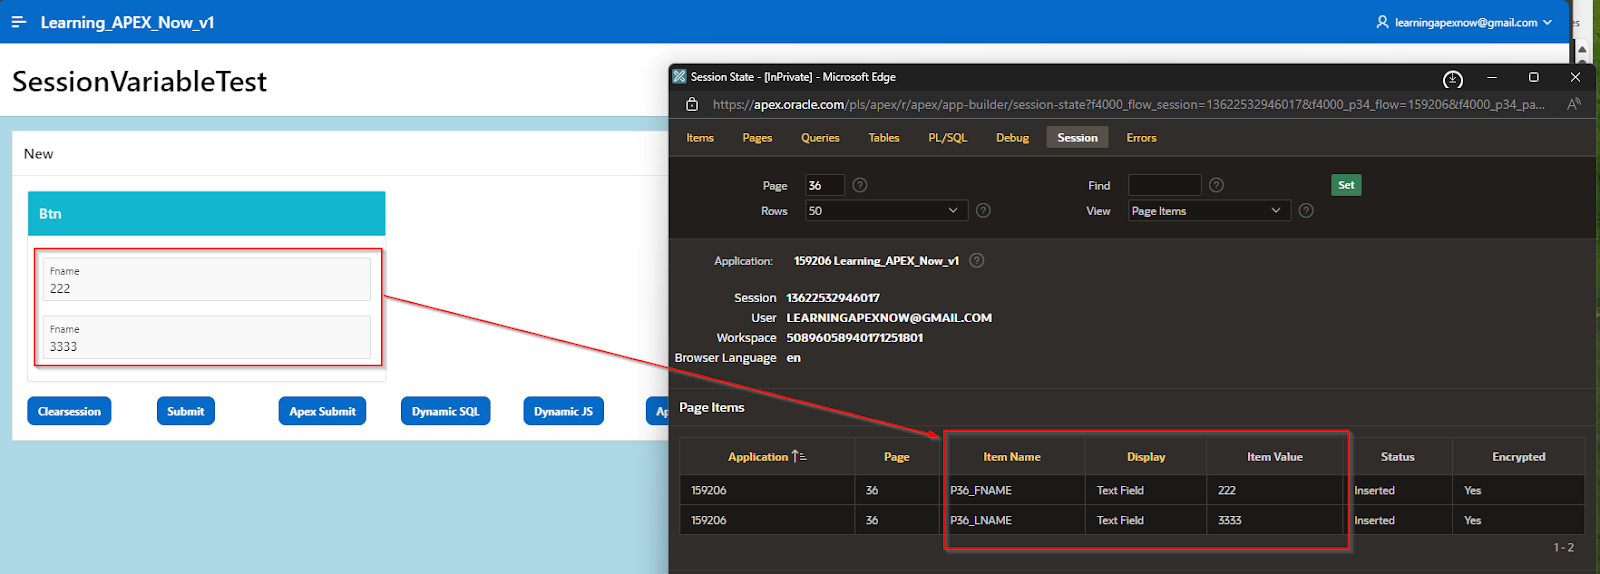
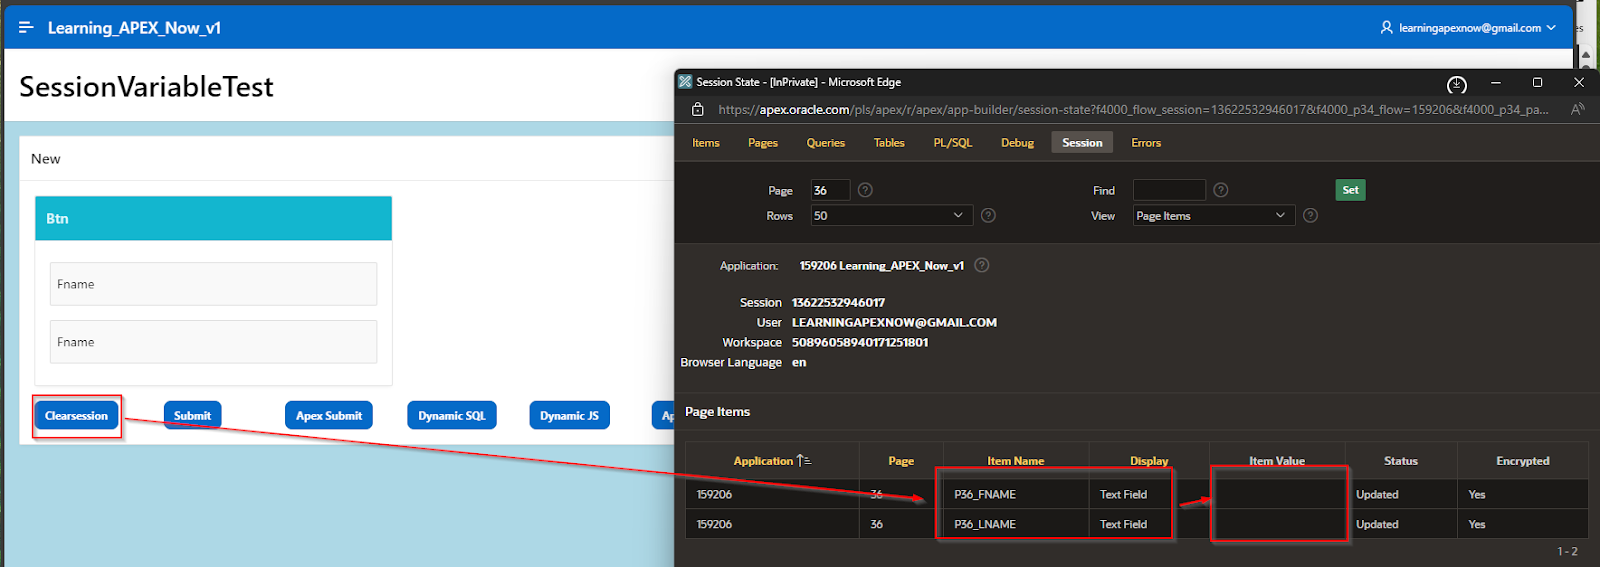
This button submits the page and sets the session state for the text fields explicitly.
Implementation Steps
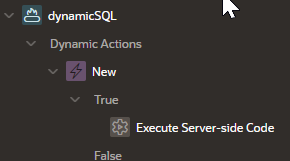
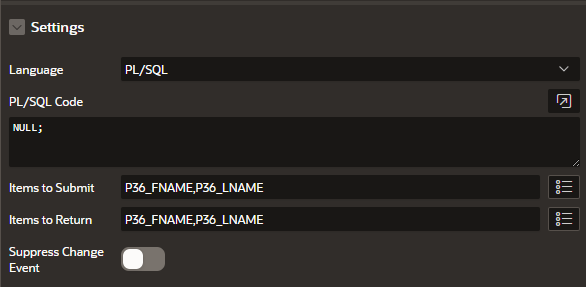
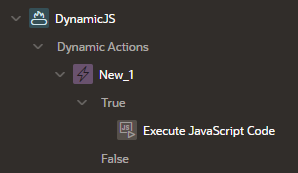
Set the Button Action to Defined by Dynamic Action.
Create a Dynamic Action with the following attributes:
apex_util.set_session_state('P1_FNAME', :P1_FNAME);
apex_util.set_session_state('P1_LNAME', :P1_LNAME);
This explicitly stores the values in the session state before submitting the page.
The Submit button is more than just a trigger—it’s the bridge between user interaction and application logic. By using built-in features such as conditions, validations, and page processes, developers can fine-tune what happens after submission. Whether you're saving a form, applying changes, or redirecting users, implementing the Submit button efficiently helps maintain a responsive and reliable application. As part of your APEX development toolkit, understanding how to configure and control this button will greatly improve the power and usability of your applications.