Search This Blog

Monday, June 30, 2025

How do I Use tabs to display regions

 In Oracle APEX, using tabs to display different regions within a single page provides an effective way to organize content and enhance user experience. Tabs allow developers to group related information into separate views while keeping the interface clean and easy to navigate. Each tab can contain one or more regions, such as forms, reports, charts, or static content, and users can switch between them without reloading the page. This is especially useful for displaying detailed data about a record or separating user inputs from outputs within a single form.

In Oracle APEX, using tabs to display regions is an effective method for organizing content on a single page. Tabs allow multiple regions to be displayed conditionally, one at a time, based on the selected tab. This improves user experience by keeping the interface clean and structured, especially when working with complex forms or reports. Each tab can host different region types such as Classic Reports, Interactive Grids, Charts, or Static Content.

To implement tabs in Oracle APEX, begin by opening the Page Designer for the desired page. From the Layout pane, right-click the Content Body or any appropriate layout position, then choose Create Region. In the Region properties, set the Region Display Selector attribute to Yes if you want the user to toggle between regions using a region selector. Alternatively, you can use a Tabs Container as the Parent Region if you want classic tab behavior. To do this, create a parent region with the Region Type set to Tabs Container. Under this container, create multiple Sub Regions, each representing a tab.

Each sub-region you define will automatically appear as a tab. You can label each tab by setting the Title of the sub-region. These tabs will automatically show only one region at a time, and Oracle APEX handles the switching logic using client-side rendering without a full page reload.

Optionally, if you want to control tab visibility based on conditions or user roles, you can configure Server-side Conditions or Authorization Schemes on each sub-region.

To customize the appearance or layout of the tabs, you can apply CSS Classes or modify templates used in the region display. APEX also allows for dynamic actions that can be triggered based on which tab is active, enabling advanced interactivity across regions.

Using tabs to display regions helps present related data sets in an organized manner without overwhelming the user with too much information at once. It provides flexibility, keeps the page structure concise, and supports modular application design that aligns with user workflows.

Using Tabs to Display Regions in Oracle APEX

Tabs are a useful way to organize content in Oracle APEX, allowing users to navigate between different sections without reloading the page. By implementing tabs, multiple regions can be displayed dynamically, improving usability and reducing clutter.

This tutorial explains how to create and configure tabs to show and hide regions dynamically.


Step 1: Creating the Regions for the Tabs

  1. Open your APEX application and navigate to the page where you want to add tabs.

  2. In the Page Designer, create multiple Static Content Regions that will be displayed in different tabs.

  3. Give each region a meaningful Title and Static ID (for example, tab_region_1, tab_region_2).

  4. Make sure all regions are inside the same Parent Region to maintain structure.


Step 2: Creating the Tab Container

  1. In Page Designer, create a new Static Content Region to act as the tab container.

  2. Inside this region, add a List or Buttons to act as the tabs.

  3. Assign Static IDs to the tabs, such as tab_1, tab_2, etc.

  4. If using Buttons, create one for each tab and style them appropriately.

Example static HTML for tabs inside the container region:

<ul class="my-tabs">

  <li><a href="javascript:void(0);" onclick="showTab(1)">Tab 1</a></li>

  <li><a href="javascript:void(0);" onclick="showTab(2)">Tab 2</a></li>

  <li><a href="javascript:void(0);" onclick="showTab(3)">Tab 3</a></li>

</ul>

Each <a> tag triggers a JavaScript function to show the corresponding region.


Step 3: Adding JavaScript to Show/Hide Regions

In Page Designer, add the following JavaScript code in the Execute When Page Loads section to control tab switching:

function showTab(tabNumber) {

    // Hide all regions first

    $("[id^=tab_region_]").hide();


    // Show the selected region

    $("#tab_region_" + tabNumber).show();


    // Update active tab styling

    $(".my-tabs li").removeClass("active");

    $(".my-tabs li:nth-child(" + tabNumber + ")").addClass("active");

}

This function hides all tab regions and then displays the selected one while updating the tab styling.


Step 4: Setting the Initial Tab Display

By default, all regions will be visible unless manually hidden.

  1. In Page Designer, navigate to each tab region and set Server-Side Condition to Never (if using Dynamic Actions to control visibility).

  2. Alternatively, add this JavaScript in Execute When Page Loads:

$("[id^=tab_region_]").hide();

$("#tab_region_1").show();

$(".my-tabs li:first-child").addClass("active");

This ensures that only the first tab's content is displayed when the page loads.


Step 5: Styling the Tabs with CSS

To enhance the appearance, add custom CSS. In Shared Components > CSS, add:

.my-tabs {

    list-style: none;

    padding: 0;

    margin: 0;

    display: flex;

    border-bottom: 2px solid #ccc;

}


.my-tabs li {

    padding: 10px 20px;

    cursor: pointer;

    background: #f1f1f1;

    margin-right: 5px;

}


.my-tabs li.active {

    background: #0077cc;

    color: white;

    font-weight: bold;

}

This styles the tabs with a clickable UI and highlights the active tab.

Step 6: Using Dynamic Actions Instead of JavaScript

If you prefer Dynamic Actions over JavaScript:

  1. Create a Dynamic Action on each tab button.

  2. Set the action to Hide all tab regions.

  3. Add another action to Show the corresponding region when the tab is clicked.

  4. Optionally, add a Set Style action to highlight the active tab.

This approach requires no manual JavaScript coding but functions similarly.

Best Practices

  • Keep tab names short and clear for easy navigation.

  • If the page has multiple tab sections, use unique IDs for each group.

  • Use Session State if you need to retain the selected tab across page reloads.

  • Test on different screen sizes to ensure the tabs remain usable on mobile devices.

Using tabs in Oracle APEX allows for better organization of content without overwhelming users with too much information at once. Whether using JavaScript or Dynamic Actions, tabs provide a seamless way to switch between regions dynamically while maintaining an efficient layout.

EXAMPLE:

Step 1 – Add a Region display selector

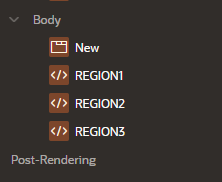
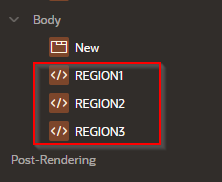
Step 2 – Add one or more regions to the body

A screenshot of a computer

Description automatically generated

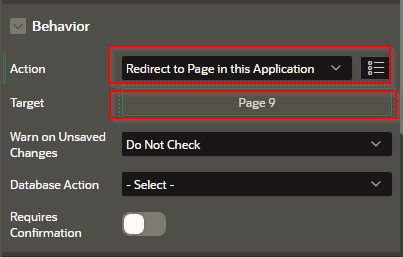
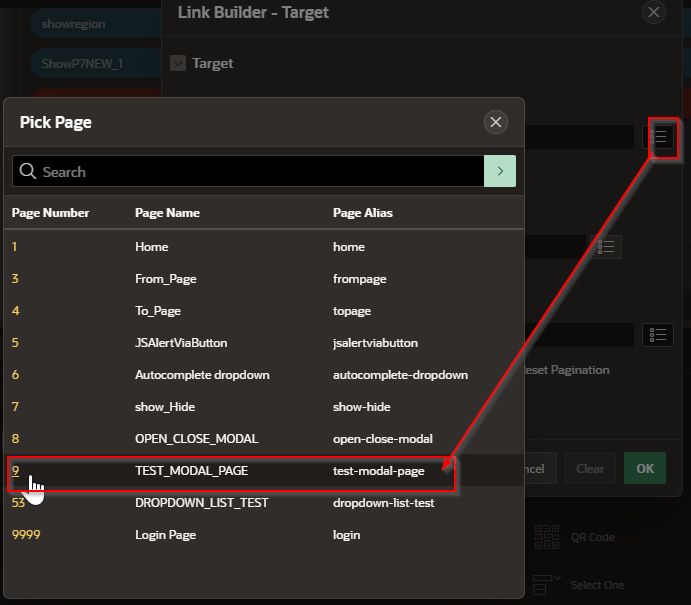
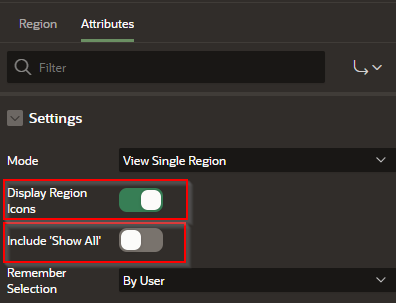
Step 3 – Set the Tab Region’s attributes as follows:

A screenshot of a computer

AI-generated content may be incorrect. A screenshot of a computer

Description automatically generated

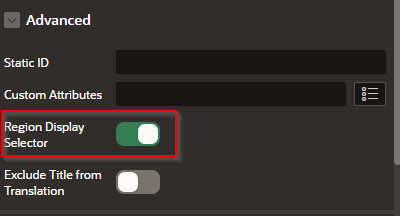
Step 4- Set the “Advanced” area of all of the regions as follows:

A screenshot of a computer

Description automatically generated A screenshot of a computer

Description automatically generated


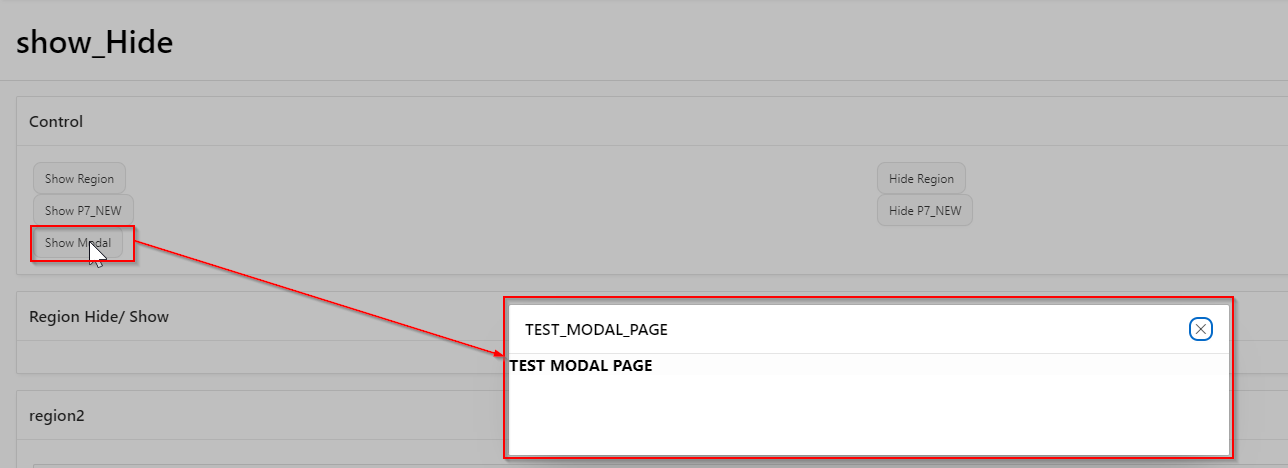
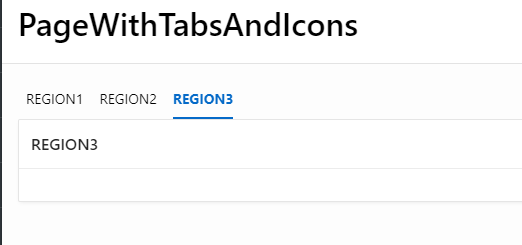
The tabs should display as follows: 

A screenshot of a computer

AI-generated content may be incorrect.


Using tabbed regions in Oracle APEX improves the usability of your applications by reducing visual clutter and logically grouping content. With just a few configuration steps in Page Designer, you can create dynamic, user-friendly layouts that streamline data interaction and improve productivity. Whether you're building administrative dashboards or user-facing forms, tabbed interfaces make your APEX applications more organized and intuitive.

How do I Create pop up modal pages

 Introduction

In Oracle APEX, creating pop-up modal pages enhances the user experience by allowing developers to display forms, reports, or other content in a focused, overlay window without navigating away from the current page. This is particularly useful for editing records, confirming actions, or presenting additional details. Modal dialogs help streamline interaction flow and keep the main page context intact, reducing page reloads and improving responsiveness. APEX provides built-in support for modal dialogs, making them easy to configure and integrate into your application with minimal effort.

In Oracle APEX, creating popup modal pages allows you to display pages in a focused overlay dialog without navigating away from the current page. These modal dialogs are particularly useful for editing records, viewing details, adding new data, or presenting confirmation messages. Oracle APEX supports modal pages natively through the Page Mode property.

To create a modal popup page, begin by navigating to the App Builder and opening your application. Click on “Create Page.” From the page types, select “Modal Dialog.” Then choose what kind of content this modal will show — for example, a Form, Report, or Blank Page. After selecting the content type, select the table or data source if applicable. Follow the page wizard steps to define the layout, fields, and processing.

Once your modal page is created, the next step is to link to it from another page, usually using a button or column link in a report. In the source page (the calling page), edit the button or link you want to use to open the modal. Set the action to “Redirect to Page in this Application” and choose the modal page number. Then, under the “Target” section, set the page mode to “Modal Dialog.” This will ensure that the page opens as a popup dialog rather than navigating to it directly.

You can also pass values to the modal page by adding items in the “Set Items” section of the link. For example, if your modal page edits an employee record, you can pass EMPLOYEE_ID into a form item. On the modal page, use page items to receive and process this data.

To close the modal dialog and return to the parent page, use a standard “Close Dialog” process. This is usually added automatically when using the page wizard. You can also add a Dynamic Action on a button to trigger the “Dialog Close” action manually.

For advanced behavior, such as refreshing the parent page or report when the modal closes, use the “Dialog Closed” dynamic action on the calling page. Set it to refresh specific regions like reports, charts, or forms, ensuring your interface reflects the most recent data.

Modal pages can also be styled with template options, and you can control their size, scrolling, and behavior through properties in the Page Designer. For example, under “Dialog,” you can configure width, height, and modal settings.

Modal pages help streamline workflow, minimize full-page navigation, and create a more professional and responsive user experience in your APEX applications.

Creating Popup Modal Pages in Oracle APEX

A popup modal page in Oracle APEX is a great way to display additional content without navigating away from the current page. Modal dialogs can be used for data entry forms, confirmation messages, reports, or any interactive content.

This tutorial explains how to create and use modal popup pages effectively in APEX, including configuring attributes, opening them with buttons, passing values, and closing them dynamically.


Step 1: Creating a Modal Page

  1. Go to Shared Components and create a new Popup Modal Page or create a new standard page and later configure it as a modal.

  2. When prompted for a page type, choose Modal Dialog.

  3. Set the Dialog Width and Height to define how large the modal will be. APEX allows fixed dimensions or responsive percentages.

  4. Under Navigation, make sure the page is Dialog Mode: Modal Dialog.

  5. Click Next and follow the standard APEX page creation process.


Step 2: Adding Content to the Modal Page

Once the modal page is created, add the content you need:

  • Use Interactive Grids or Classic Reports to display data inside the modal.

  • Add Form Items such as text fields, dropdowns, and buttons to allow user interaction.

  • Use Region Titles and icons to improve readability.


Step 3: Opening the Modal with a Button or Link

To open the modal page, a button or link should be configured.

Option 1: Using a Button

  1. Go to the Main Page where the button should be placed.

  2. Add a Button and set its Action to Redirect to Page in Modal Dialog.

  3. Enter the Target Page Number (the modal page created in Step 1).

  4. If you need to pass values to the modal, use the Set Items property to send data.

Option 2: Using a Link

If opening the modal from a report or any hyperlink, use the Link Column in Classic or Interactive Reports.

  • Set the Target as Redirect to Page in Modal Dialog.

  • Assign Item Values from the row to be displayed inside the modal.


Step 4: Passing Values to the Modal Page

When opening a modal, it's common to pass values like an ID to fetch specific data.

  1. Under Set Items, select the item on the modal page.

  2. Use a corresponding Source Item from the calling page.

  3. The modal page will now receive this value and use it in SQL queries.

Example SQL Query inside the modal:

SELECT * FROM EMPLOYEES WHERE EMPLOYEE_ID = :P10_EMPLOYEE_ID;

This will load employee details inside the modal based on the selected record.


Step 5: Closing the Modal and Refreshing the Parent Page

A modal should close after completing an action, such as saving a form.

Option 1: Using a Close Dialog Process

  1. Inside the modal page, create a Submit Button (e.g., "Save").

  2. In the Processing Section, create a PL/SQL Process to save the data.

  3. Add a Close Dialog Process after the save action to close the modal automatically.

Option 2: Using JavaScript

Use this JavaScript code inside a Dynamic Action on a button to close the modal manually:

apex.navigation.dialog.close();

If refreshing the parent page is needed, use:

apex.navigation.dialog.close(true);


Step 6: Refreshing the Parent Page After Modal is Closed

If a modal updates data, refresh the main page when it closes.

  1. Go to the Main Page where the modal opens.

  2. Create a Dynamic Action on Dialog Closed.

  3. Set the True Action to Refresh and select the relevant Report or Region to refresh.

This ensures that new or updated data appears without needing a full page reload.


Best Practices

  • Keep modal sizes appropriate. Don't make modals too large—stick to essential content.

  • Pass only necessary values to reduce complexity and avoid performance issues.

  • Ensure modals close properly after actions to improve user experience.

  • Refresh data on the parent page after a modal updates information.

  • Use dialog headers and buttons for better usability.


Popup modals in APEX are an excellent way to improve interactivity without navigating away from the main page. By configuring modal pages correctly, passing values, and ensuring they close and refresh efficiently, you can enhance the user experience and create seamless workflows.


EXAMPLE:

Step 1: Add button and create a modal page…in this case our test modal page is page 9

Step 2:  Set behavior and target

A screenshot of a computer

AI-generated content may be incorrect.

Set Target:

A screenshot of a computer

Description automatically generated


A screenshot of a computer

Description automatically generated


Result :

A screenshot of a computer

Description automatically generated


Conclusion

Using modal pages in Oracle APEX is a powerful way to build interactive and user-friendly applications. Whether you are creating a simple form for quick edits or a detailed report that needs to appear in a focused view, modal dialogs offer a clean and efficient solution. By leveraging APEX's native dialog features, developers can maintain design consistency, simplify navigation, and provide a better user interface experience throughout the application.

HOW DO I SET A HOME PAGE

 Setting a home page in Oracle APEX is an essential step in defining the default landing page for your application. The home page serves as ...