Search This Blog

Monday, June 30, 2025

How do I DELETE manually from a table

 Introduction

In Oracle APEX, deleting records manually from a table is a common task when managing application data. Whether you're building an admin dashboard or managing transactional data, it's often necessary to provide users with the ability to remove specific records directly from the interface. By combining form controls, SQL commands, and APEX processes, you can set up a secure and functional way to perform manual deletions from a table. This blog post explains the detailed steps to accomplish this, including how to use buttons, PL/SQL processes, and appropriate validations to safely delete rows.

In Oracle APEX, manually deleting records from a table involves creating a user interface element, such as a button or a link, that triggers a process to remove the selected row from the database. This task requires combining declarative page components with PL/SQL code to execute the DELETE statement securely and efficiently.

To begin, identify the table and the primary key column that uniquely identifies each row. This primary key will be used to specify which record to delete. Typically, you will display the table data in a Classic Report or Interactive Grid, and for each row, provide a Delete button or link.

Next, create a button or a link in the report that passes the primary key value to the page or process. For example, you can add a column with a link labeled "Delete" that includes the primary key as a URL parameter. Alternatively, in Interactive Grids, you can enable row selection and add a button outside the grid for deletion.

After setting up the interface, create a PL/SQL process that runs when the delete action is invoked. This process will use the passed primary key value to execute a DELETE statement on the target table. Here is a basic example of such a process:

BEGIN
  DELETE FROM your_table
  WHERE primary_key_column = :P1_PRIMARY_KEY;
  COMMIT;
END;

Ensure that the process includes proper error handling and commit the transaction to make the deletion permanent. You may also want to add a confirmation dialog before deletion to prevent accidental data loss.

Finally, refresh the report or region displaying the data after the deletion, so the user sees the updated state of the table without the deleted record. This can be done using Dynamic Actions that refresh the report region upon completion of the delete process.

By following these steps, you can implement manual deletion functionality in Oracle APEX that is both user-friendly and secure, maintaining data integrity and providing a seamless user experience.

EXAMPLE:

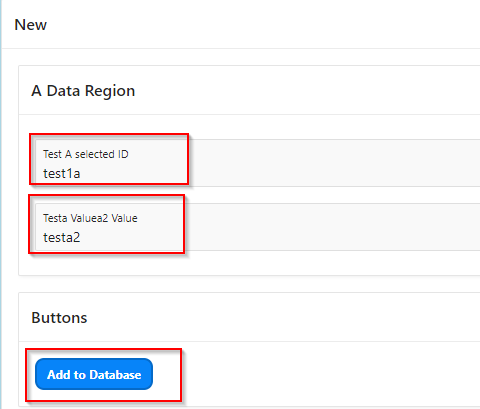
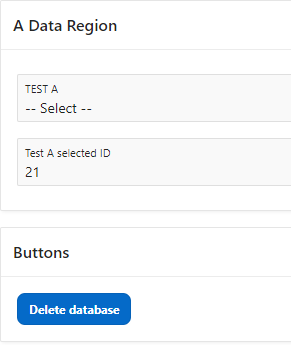
In this example we will select a value with the dropdown list, display the ID in a textbox, and delete it from the database via a manual button push, with a report display.


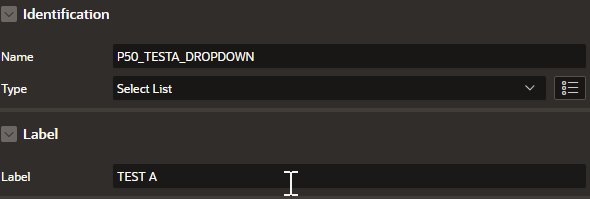
Step 1 Create a dropdown list with the following values

A screenshot of a computer

Description automatically generated

A screenshot of a computer

Description automatically generated

A screenshot of a computer

Description automatically generated

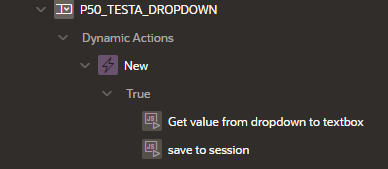
Step 2 – Add a dynamic Action and two True branches

A green and white rectangle with white text

Description automatically generated

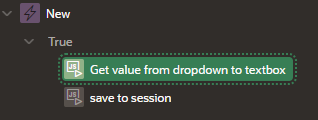
Step 3 -  In the first True branch

 A screenshot of a computer program

AI-generated content may be incorrect.

Here is the code used.

var DisplayValueVar =$("#P50_TESTA_DROPDOWN option:selected").val();

console.log(DisplayValueVar);

apex.item('P50_TESTA_ID_VALUE').setValue(DisplayValueVar);


var DisplayTextVar =$("#P50_TESTA_DROPDOWN option:selected").text();

console.log(DisplayTextVar);

apex.item('P50_NEW_TEXT').setValue(DisplayTextVar);

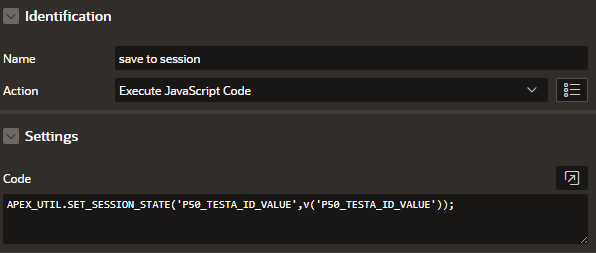
Step 4 – In the second true branch

A screenshot of a computer program

Description automatically generated

Step 5 – Add the button

A screenshot of a computer

Description automatically generated

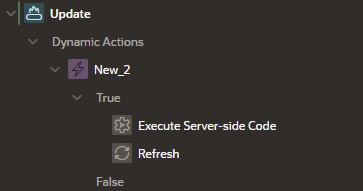
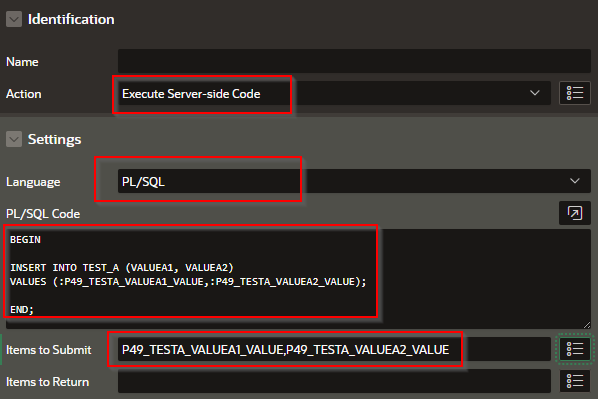
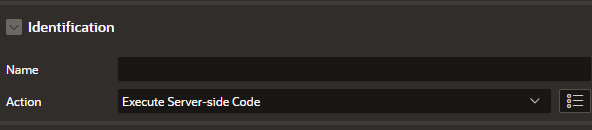
Step 6- Add the delete execute true branch with the following settings

A black rectangular object with white text

Description automatically generated


A screenshot of a computer program

Description automatically generated

Here is the code that we used

BEGIN


 DELETE FROM TEST_A

 WHERE ID = :P50_TESTA_ID_VALUE;


END;

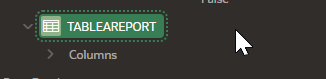
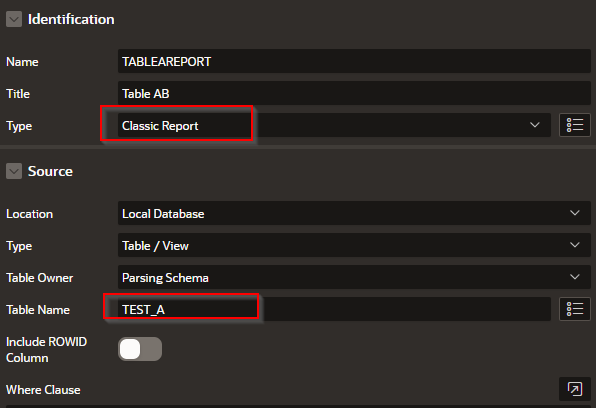
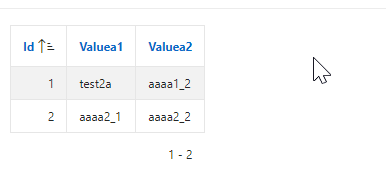
Step 7 – Add the report to the application

A green and white sign

Description automatically generated

A screenshot of a computer

Description automatically generated

 Step 8 – In the button’s second True branch set as follows.

A screenshot of a computer

Description automatically generated

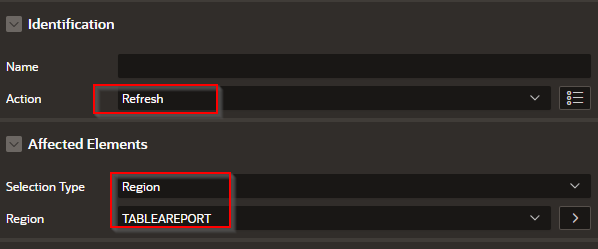
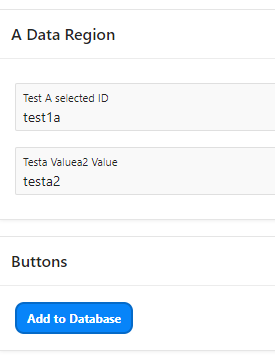
You should see something like this

A screenshot of a data region

AI-generated content may be incorrect.     A screenshot of a computer

AI-generated content may be incorrect.

Conclusion

Manually deleting rows from a table in Oracle APEX allows developers to create powerful, flexible interfaces tailored to user needs. By setting up the proper form controls and backend logic, you ensure that data removal is handled accurately and securely. Leveraging APEX’s declarative framework along with custom PL/SQL code makes it simple to implement deletion functionality that aligns with your application's workflow and data integrity requirements.

How do I ADD values from 2 controls into table

 Introduction

In Oracle APEX, adding values from multiple controls (form fields) into a table is a fundamental task in building data-entry forms. Whether you are creating a form for capturing customer information, entering orders, or submitting feedback, collecting values from two or more page items and inserting them into a table is done through built-in or custom processes. This approach ensures that user input is efficiently captured and stored in your application's database, using APEX's declarative tools or PL/SQL logic. This blog will walk you through how to take values from two form controls and add them into a database table.

In Oracle APEX, adding values from two form controls into a table involves capturing user input from page items and inserting those values using a Process. This can be done declaratively through the Application Builder or programmatically with PL/SQL. The most common use case is when you have a simple form with two fields—such as FIRST_NAME and LAST_NAME—and you want to save these values into a table like PEOPLE.

To begin, create the necessary table in your database. For example:

CREATE TABLE PEOPLE (
  ID NUMBER GENERATED ALWAYS AS IDENTITY PRIMARY KEY,
  FIRST_NAME VARCHAR2(100),
  LAST_NAME VARCHAR2(100)
);

Next, go into App Builder in Oracle APEX and follow these steps:

  1. Create a Form Page

    • From App Builder, click Create Page.

    • Choose Form > Form on a Table with Report or Form on a Table.

    • Select the PEOPLE table.

    • APEX automatically creates a report and a form that includes the table’s columns as form controls.

  2. Add Two Page Items (If Not Auto-Generated)

    • In the Page Designer, under the form region, ensure you have two page items: PXX_FIRST_NAME and PXX_LAST_NAME (where XX is your page number).

    • These items represent the two controls where users will enter data.

  3. Create an Insert Process (If Not Auto-Generated)

    • In the Processing section, create a new Process.

    • Set the Type to PL/SQL Code.

    • Use the following code:

INSERT INTO PEOPLE (FIRST_NAME, LAST_NAME)
VALUES (:PXX_FIRST_NAME, :PXX_LAST_NAME);
  • Replace PXX with your actual page number.

  1. Set the Process Point

    • The process should run On Submit: After Computations and Validations.

    • Make sure the form has a Submit button.

  2. (Optional) Add Validations

    • Add validations to ensure that neither FIRST_NAME nor LAST_NAME is left blank before submitting the form.

  3. Run the Application

    • Save and run the application.

    • Fill in the two fields and click Submit.

    • The values will be inserted into the PEOPLE table.

If you are working in a custom form and want to manually create the insert logic, follow the same steps but design the form from scratch, manually creating the page items and the PL/SQL insert process.

This method ensures you have full control over how data from multiple form controls is collected and saved into your database table.

Example

Adding Values from Two Textbox Items into a Database Table in Oracle APEX

Oracle APEX allows inserting values from multiple form fields into a database table using PL/SQL processes, dynamic actions, and form submissions. This tutorial covers different ways to insert values from two textbox items into a table.


Step 1: Create a Form with Two Textbox Items

  1. Open your Oracle APEX application.

  2. Click Create Page > Form > Form on a Table with Report.

  3. Choose the table where the values will be inserted (e.g., EMPLOYEE_DETAILS).

  4. In Page Designer, create two text fields: 

    • P1_EMP_NAME (for Employee Name)

    • P1_EMP_EMAIL (for Employee Email)

  5. Add a Submit or Save button (P1_SAVE_BUTTON).


Step 2: Create a PL/SQL Process to Insert Data

  1. In Page Designer, go to the Processing section.

  2. Click Create Process, select PL/SQL Code, and enter the following:

BEGIN

    INSERT INTO employee_details (emp_name, emp_email)

    VALUES (:P1_EMP_NAME, :P1_EMP_EMAIL);


    COMMIT;

END;

  1. Set Execution Point to After Submit and When Button Pressed to P1_SAVE_BUTTON.

  2. Click Save and Run the page.

When users enter values in the textboxes and click Save, the data will be inserted into EMPLOYEE_DETAILS.


Step 3: Confirm Success with a Message

To show a success message after inserting the record:

  1. Open Page Designer, go to Messages, and add the following code inside the PL/SQL process:

apex_util.set_session_state('P1_SUCCESS_MSG', 'Record successfully added!');

  1. Create a new static region and add a Display Item (P1_SUCCESS_MSG) to show the message.

  2. Set Source to PL/SQL Expression:

:P1_SUCCESS_MSG

Now, after submitting, users will see a confirmation message.


Alternative: Insert Data Using AJAX (Without Page Refresh)

If you want to insert data without refreshing the page, use AJAX and Dynamic Actions.

Step 1: Create an AJAX PL/SQL Process

  1. Go to Shared Components > Application Processes.

  2. Click Create Process, name it INSERT_EMPLOYEE_AJAX, and enter the following PL/SQL:

BEGIN

    INSERT INTO employee_details (emp_name, emp_email)

    VALUES (:P1_EMP_NAME, :P1_EMP_EMAIL);


    COMMIT;

END;

  1. Set Process Type to Ajax Callback.

Step 2: Create a Dynamic Action

  1. In Page Designer, select the Save Button (P1_SAVE_BUTTON).

  2. Click Create Dynamic Action and set:

    • Event: Click

    • Action: Execute JavaScript

  3. Add this JavaScript code:

apex.server.process("INSERT_EMPLOYEE_AJAX", {

    pageItems: "#P1_EMP_NAME, #P1_EMP_EMAIL"

}, {

    success: function(data) {

        alert("Record successfully added!");

        apex.item("P1_EMP_NAME").setValue("");

        apex.item("P1_EMP_EMAIL").setValue("");

    },

    error: function(request) {

        alert("Error inserting record.");

    }

});

This method inserts values without refreshing the page and clears the textboxes after insertion.


Best Practices

  • Validate Inputs: Ensure users enter valid data before inserting records.

  • Use Dynamic Actions for Better User Experience: Avoid full-page reloads by using AJAX.

  • Confirm Successful Insertions: Show success messages after inserting values.

  • Use Form Submissions for Simple Implementations: When AJAX is not required, a simple PL/SQL process on Submit works well.


Oracle APEX provides multiple ways to insert values from two textboxes into a table. You can use PL/SQL processes for form submissions or AJAX for real-time updates without refreshing the page. The best approach depends on your application's requirements.

EXAMPLE:

Assuming a page with 2 textboxes and a button. We want to take the two values from the controls and add them into the database as a new entry.

A screenshot of a computer

AI-generated content may be incorrect.

Step 1 – Add two textboxes to page 

A screenshot of a computer

Description automatically generated

Step 2 – Add a button with a Dynamic Action with two true branches

A screenshot of a computer

Description automatically generated

Step 3 – Set the following code in the first true branch

A screenshot of a computer program

AI-generated content may be incorrect.

The code is as follows:

BEGIN

INSERT INTO TEST_A (VALUEA1, VALUEA2)

VALUES (:P49_TESTA_VALUEA1_VALUE,:P49_TESTA_VALUEA2_VALUE);

 END;

Step 4 – add a report at the bottom of the page with the following settings.

A green and white sign

Description automatically generated

A screenshot of a computer

Description automatically generated

Step 5 – In the button’s second True branch set as follows.

A screenshot of a computer

Description automatically generated

You should now see something like this

A screenshot of a computer

Description automatically generated

Conclusion

Adding values from two controls into a table using Oracle APEX is both straightforward and powerful. By using APEX's native form-building features or by writing simple PL/SQL logic, you can ensure that user data is inserted correctly and efficiently. Whether you're capturing basic input like names and emails or more complex combinations, APEX offers the tools you need to quickly create secure and maintainable data-entry interfaces. This allows you to streamline application workflows and ensure accurate data handling within your Oracle database.

HOW DO I SET A HOME PAGE

 Setting a home page in Oracle APEX is an essential step in defining the default landing page for your application. The home page serves as ...