Introduction
In Oracle APEX, inserting values from page controls—such as text fields, select lists, and date pickers—into a database table is a common task in application development. This functionality allows users to input data through a form and store that data directly in a table with a single click. Whether you're building a form to capture customer information or logging employee records, APEX provides a straightforward and declarative way to handle inserts using built-in page processes. With minimal coding, developers can connect form controls to table columns and ensure data is inserted reliably and securely.
To insert values from controls (such as text fields, select lists, checkboxes) into a database table in Oracle APEX, you typically use a Form page or create a custom PL/SQL process tied to a button. Below is a detailed explanation of how to do this using both the automatic form creation method and a manual PL/SQL block for full control.
1. Using a Form Page (Automatic Binding)
Oracle APEX makes inserting data easy through built-in Form pages that are directly linked to your database table.
Step-by-step:
-
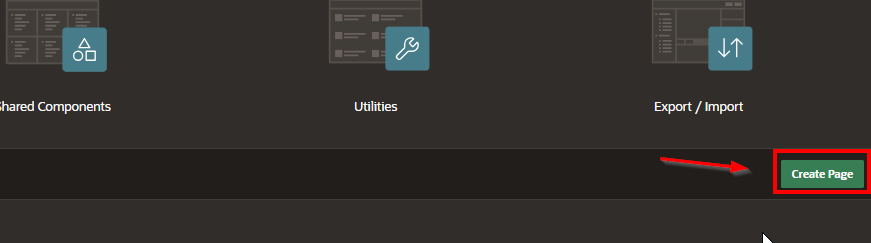
Open your Oracle APEX app and go to App Builder.
-
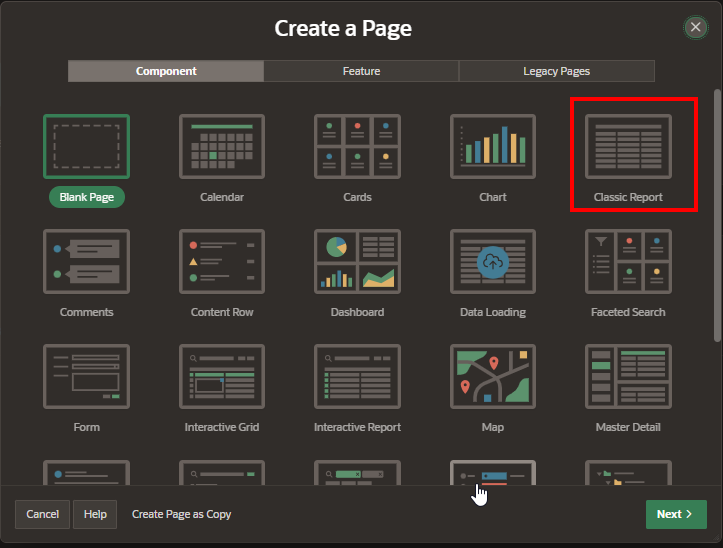
Click Create Page.
-
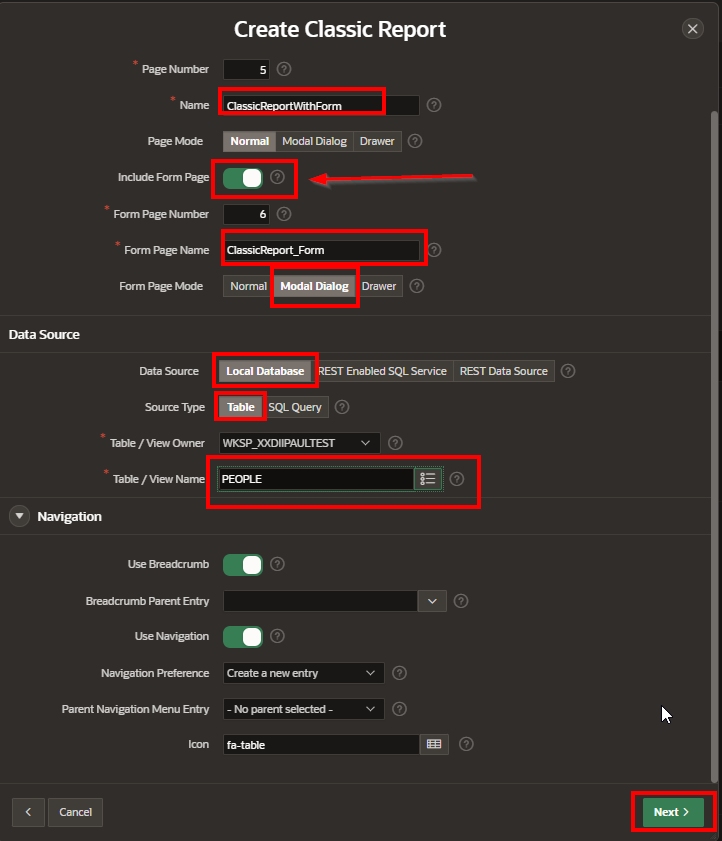
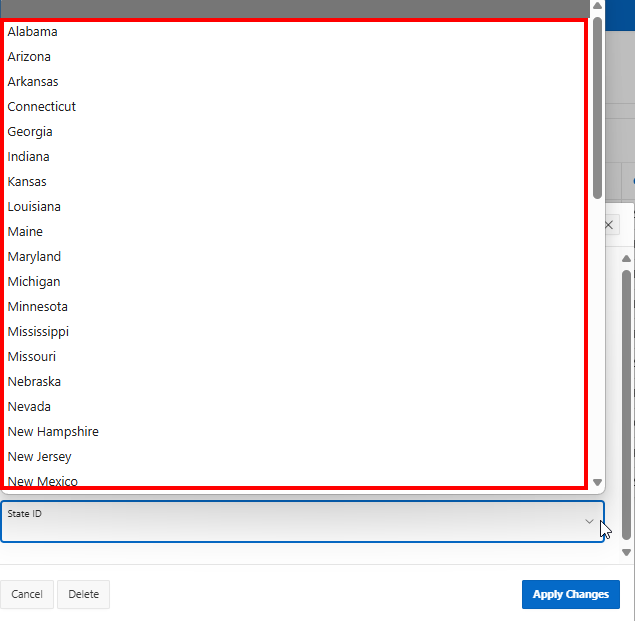
Choose Form > then select Form on a Table with Report or Form on a Table.
-
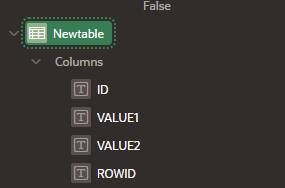
Choose your table (e.g.,
PEOPLE) where you want to insert the data. -
APEX will auto-generate form items (controls) that match your table columns.
-
A "Submit" button and process will be created automatically.
-
Run the application. When you fill out the form and click Submit, APEX inserts the values into the table.
This method uses Data Source Binding, where form items are automatically tied to column names.
2. Inserting with Custom PL/SQL Code
If you are not using an APEX-generated form and want to insert data manually, you can use a PL/SQL Process that runs on button click.
Steps:
-
Create a blank page or use an existing one.
-
Add page items like:
-
P1_FIRST_NAME(Text Field) -
P1_LAST_NAME(Text Field) -
P1_EMAIL(Text Field)
-
-
Add a Button (e.g.,
INSERT_BTN). -
Go to Processing > Create Process.
-
Type: PL/SQL Code
-
When Button Pressed:
INSERT_BTN -
In the PL/SQL Code section, write:
INSERT INTO PEOPLE (FIRST_NAME, LAST_NAME, EMAIL)
VALUES (:P1_FIRST_NAME, :P1_LAST_NAME, :P1_EMAIL);
-
Click Apply Changes.
Note: The : syntax is used to refer to APEX page items.
3. Optional Enhancements
-
Validation: Add page-level validations to ensure required fields are filled.
-
Success Message: Set a success message (e.g., “Record successfully added.”)
-
Navigation: Add a branch to return to a report page or confirmation screen after insertion.
4. Dynamic Actions (Optional Use Case)
If using JavaScript or AJAX for inserts, Dynamic Actions can trigger PL/SQL code via AJAX callback. This is more advanced and suitable for interactive UIs.
By using Forms or PL/SQL processes in Oracle APEX, developers can efficiently collect user input and insert it into database tables while keeping control over validations and data flow. Whether you use automated forms or write the insert manually, APEX provides all the tools needed to securely and efficiently manage data input.
Example
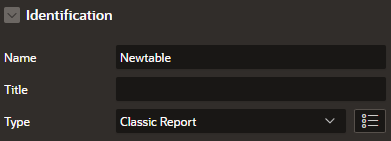
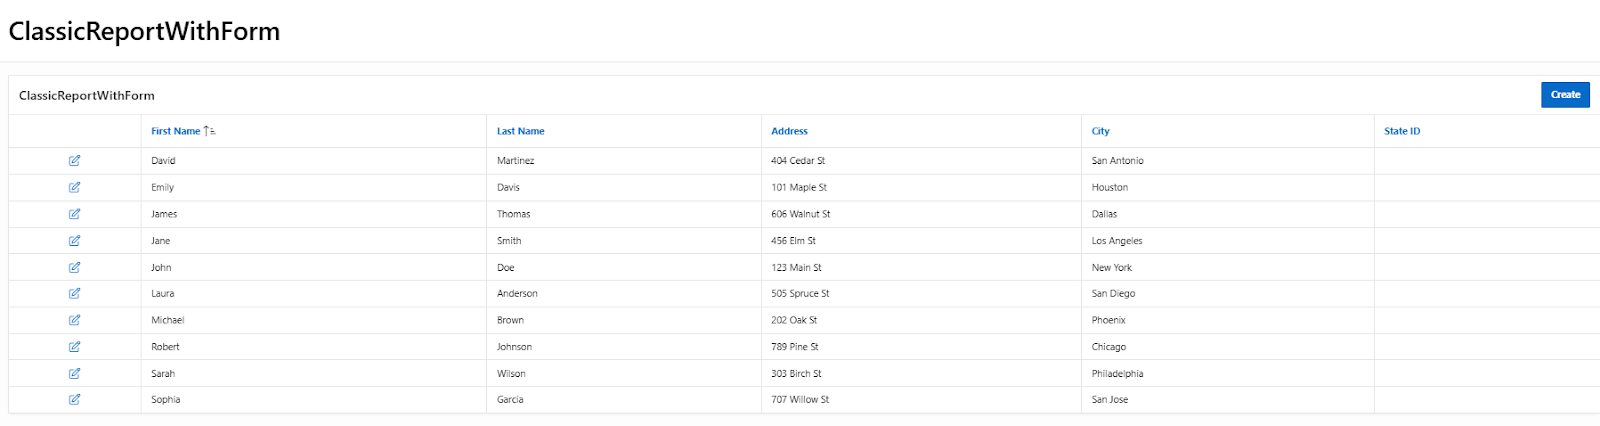
Inserting Values from Controls into a Table in Oracle APEX
Oracle APEX allows you to capture user input through form controls like text fields, dropdowns, and date pickers, and then insert these values into a database table. This tutorial explains different methods to insert values into a table using PL/SQL, Dynamic Actions, and Processes.
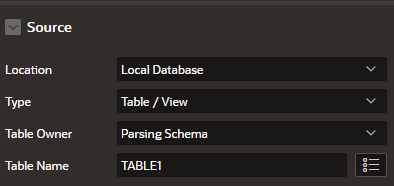
Step 1: Create a Table for Data Storage
Before inserting values, ensure there is a table where data will be stored.
CREATE TABLE employee_data (
emp_id NUMBER GENERATED ALWAYS AS IDENTITY PRIMARY KEY,
emp_name VARCHAR2(100),
emp_email VARCHAR2(100),
emp_salary NUMBER(10,2),
emp_hire_date DATE
);
This table will store employee details entered through APEX form controls.
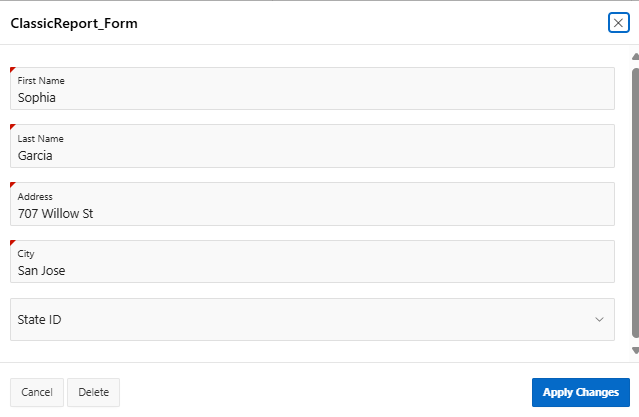
Step 2: Create an APEX Form with Controls
Open Oracle APEX and go to Page Designer.
Create a Blank Page or a Form Page.
Add the following items:
P1_EMP_NAME (Text Field)
P1_EMP_EMAIL (Text Field)
P1_EMP_SALARY (Number Field)
P1_EMP_HIRE_DATE (Date Picker)
P1_SUBMIT (Button)
These form fields will collect user input before inserting data into the employee_data table.
Step 3: Insert Data Using a PL/SQL Process (On Submit)
In Page Designer, select the P1_SUBMIT button.
Under Processing, click Create Process.
Set Type to PL/SQL Code.
Use the following PL/SQL code:
BEGIN
INSERT INTO employee_data (emp_name, emp_email, emp_salary, emp_hire_date)
VALUES (:P1_EMP_NAME, :P1_EMP_EMAIL, :P1_EMP_SALARY, TO_DATE(:P1_EMP_HIRE_DATE, 'YYYY-MM-DD'));
COMMIT;
END;
Under Execution Options, set When Button Pressed to P1_SUBMIT.
Click Save and run the page to test the form submission.
Step 4: Insert Data Using a Dynamic Action (Without Page Submit)
Instead of submitting the page, use AJAX and Dynamic Actions to insert data asynchronously.
Create an AJAX Process
Go to Shared Components > Application Processes.
Click Create Process, name it INSERT_EMPLOYEE_DATA, and set Type to PL/SQL AJAX Process.
Add the following PL/SQL code:
BEGIN
INSERT INTO employee_data (emp_name, emp_email, emp_salary, emp_hire_date)
VALUES (:P1_EMP_NAME, :P1_EMP_EMAIL, :P1_EMP_SALARY, TO_DATE(:P1_EMP_HIRE_DATE, 'YYYY-MM-DD'));
COMMIT;
END;
Create a Dynamic Action
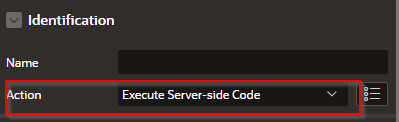
In Page Designer, select the P1_SUBMIT button.
Under Dynamic Actions, click Create Dynamic Action.
Set Event to Click and select P1_SUBMIT.
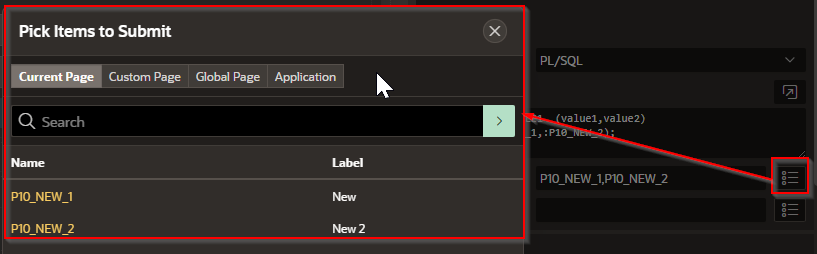
Under True Actions, select Execute Server-side Code and enter:
apex.server.process("INSERT_EMPLOYEE_DATA", {
pageItems: "#P1_EMP_NAME, #P1_EMP_EMAIL, #P1_EMP_SALARY, #P1_EMP_HIRE_DATE"
}, {
success: function(data) {
alert("Record inserted successfully!");
apex.item("P1_EMP_NAME").setValue('');
apex.item("P1_EMP_EMAIL").setValue('');
apex.item("P1_EMP_SALARY").setValue('');
apex.item("P1_EMP_HIRE_DATE").setValue('');
},
error: function(request) {
alert("Error inserting record.");
}
});
This method allows data to be inserted without a full-page reload, providing a better user experience.
Step 5: Display a Success Message
To notify users of successful insertion:
Go to Page Designer > Processing.
Select the PL/SQL Process.
Under Messages, set Success Message to "Record inserted successfully!".
Now, after submission, APEX will display this message automatically.
Step 6: Validating User Input Before Inserting
To ensure that required fields are not left empty:
In Page Designer, select each item (e.g., P1_EMP_NAME).
Under Validation, click Create Validation.
Set Type to Not Null.
Define a Validation Message like "Employee Name is required!".
This prevents blank submissions.
Best Practices for Inserting Values in APEX
Use PL/SQL Processes for direct database operations.
Use Dynamic Actions with AJAX for seamless form submission.
Validate inputs before inserting to prevent errors.
Display success and error messages for better user feedback.
Use COMMIT in PL/SQL to ensure the transaction is saved.
Inserting values from controls into a table in APEX can be done using PL/SQL processes, AJAX Dynamic Actions, or APEX Form Pages. The best approach depends on whether you want to submit the page or use AJAX for real-time updates.
EXAMPLE:
Given the following controls, we want to save the values from the textboxes into a table
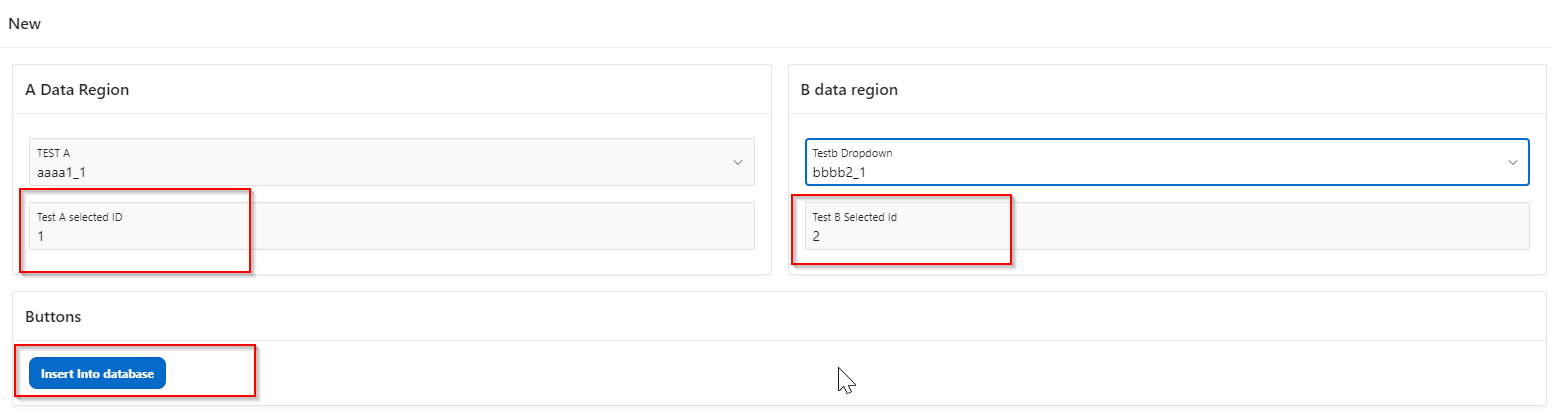
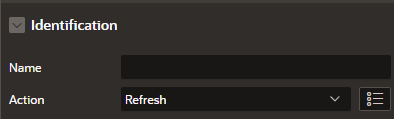
Step 1 – Give the button a Dynamic Action
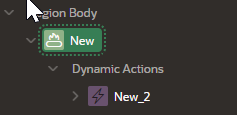
Step 2 – Give the Action a True branch
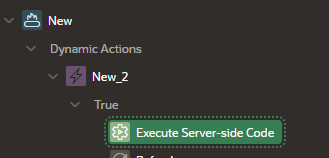
Step 3 – set the following

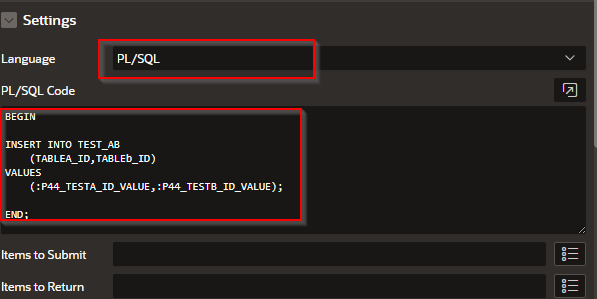
Where the code looks like the following:
BEGIN
INSERT INTO TEST_AB
(TABLEA_ID,TABLEb_ID)
VALUES
(:P44_TESTA_ID_VALUE,:P44_TESTB_ID_VALUE);
END;
***** Notice that the control’s values are passed with a “:” in front of the control’s name.
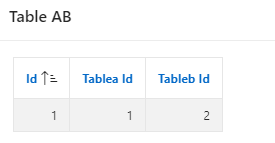
This will save into the TABLE_AB like the following:
Conclusion
Using Oracle APEX to insert values from page controls into a table streamlines data entry and supports rapid application development. By linking form items to database columns and using APEX’s declarative processing, developers can quickly build functional and responsive applications. This approach ensures consistent user input handling, integrates seamlessly with database logic, and maintains data integrity—making it an essential skill for any APEX developer.