Search This Blog

Monday, June 30, 2025

How do I Change a Report’s Column Display Name

Changing a report’s column display name in Oracle APEX is a straightforward yet essential step to improve the clarity and professionalism of your data presentations. By customizing the column headers, you ensure that users see meaningful and user-friendly labels instead of raw database column names. This enhances readability and helps tailor reports to meet specific business terminology or user expectations.

 Changing a report’s column display name in Oracle APEX is an important way to improve the readability and professionalism of your application’s data presentation. The column display name is what users see as the header in reports, so customizing it to match business terminology or user expectations helps make your reports clearer and easier to understand.

Here is a detailed step-by-step process for changing a column display name in different types of reports in Oracle APEX:

  1. Open Your Application in Oracle APEX Application Builder
    Log in to Oracle APEX and open the Application Builder. Select the application where your report resides.

  2. Navigate to the Page with the Report
    Find and open the page containing the Classic Report, Interactive Report, or Interactive Grid you want to edit.

  3. Edit the Report Region
    In the Page Designer, locate the report region in the layout tree on the left side. Click on the report region to display its properties.

  4. Locate the Columns Section
    Within the report region, find the "Columns" node or section. This lists all columns currently defined in the report.

  5. Select the Column to Rename
    Click on the specific column whose display name you want to change. The property editor on the right will show the column’s settings.

  6. Change the Column Heading
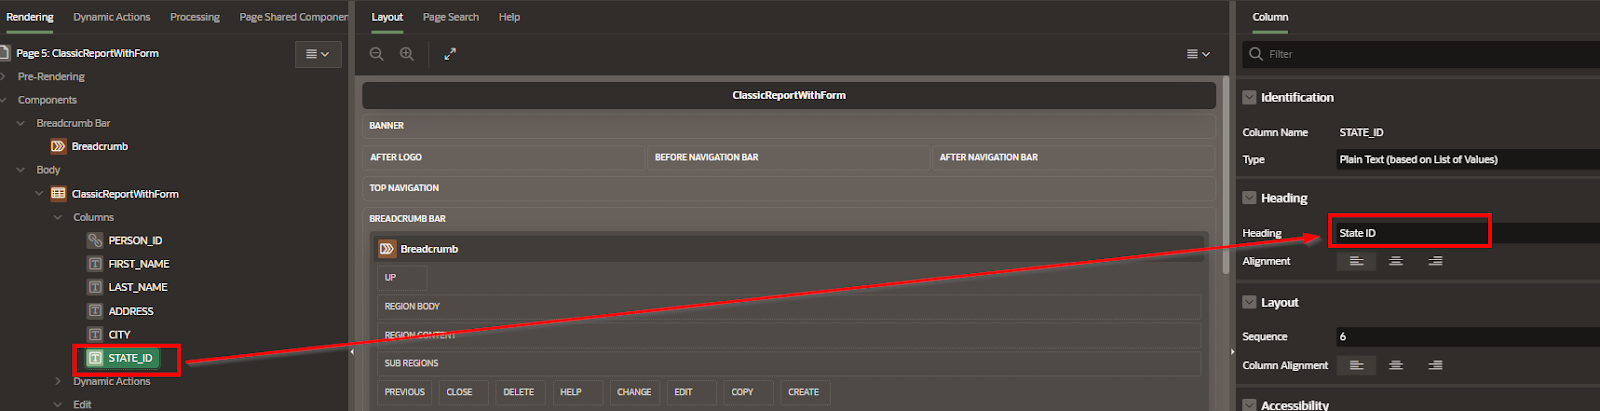
    In the property editor, look for the "Heading" attribute or "Column Heading" field. This is where you can enter a custom display name. Replace the existing heading with your desired name. For example, change "EMPLOYEE_ID" to "Employee Number" or "STATE_ID" to "State."

  7. Save and Run the Page
    After changing the column heading, save your changes. Run the page to see your updated report with the new column display names.

Additional Tips:

  • If your report is based on a SQL query, you can also change the column alias directly in the SQL query itself. For example:

    SELECT EMPLOYEE_ID AS "Employee Number", FIRST_NAME, LAST_NAME FROM EMPLOYEES;
    

    This SQL alias will be used as the column header unless overridden in the report attributes.

  • In Interactive Reports and Interactive Grids, users can also personalize column headers at runtime. However, setting the display name in the Page Designer ensures a consistent, default experience for all users.

  • Make sure the display names are concise but descriptive to avoid clutter and confusion in the report layout.

By following these steps, you can easily customize the display names of columns in your Oracle APEX reports, enhancing the user interface and making your data more accessible and understandable. This small but significant change contributes greatly to the overall usability and professionalism of your applications.

Example

To change the display name of a column in a Classic Report within Oracle Application Express (APEX), follow these steps:

Select the application containing the report you wish to modifyand open the specific page with the Classic Report.

Modify Column Attributes:

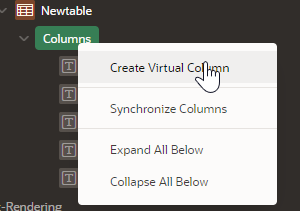
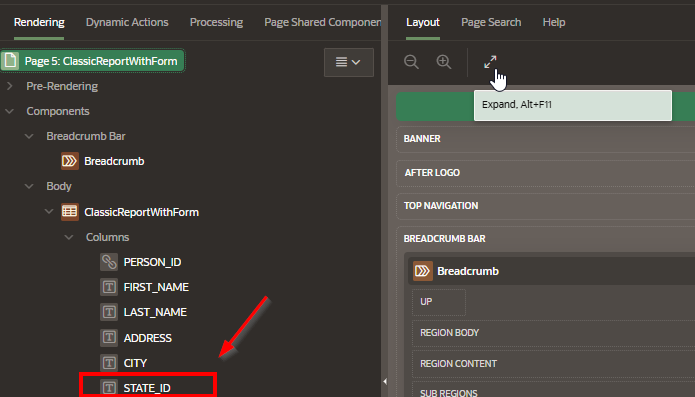
  • In the Rendering tab, locate the region associated with your Classic Report and expand the Columns node to view all report columns.

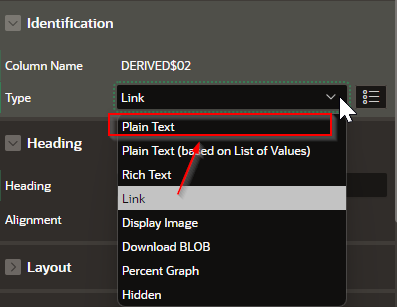
  • Select the column whose display name you want to change.

  • In the Property Editor, under the Heading section, edit the Heading attribute to your desired display name.

This change updates the column's header in the report.

Additional Tips:

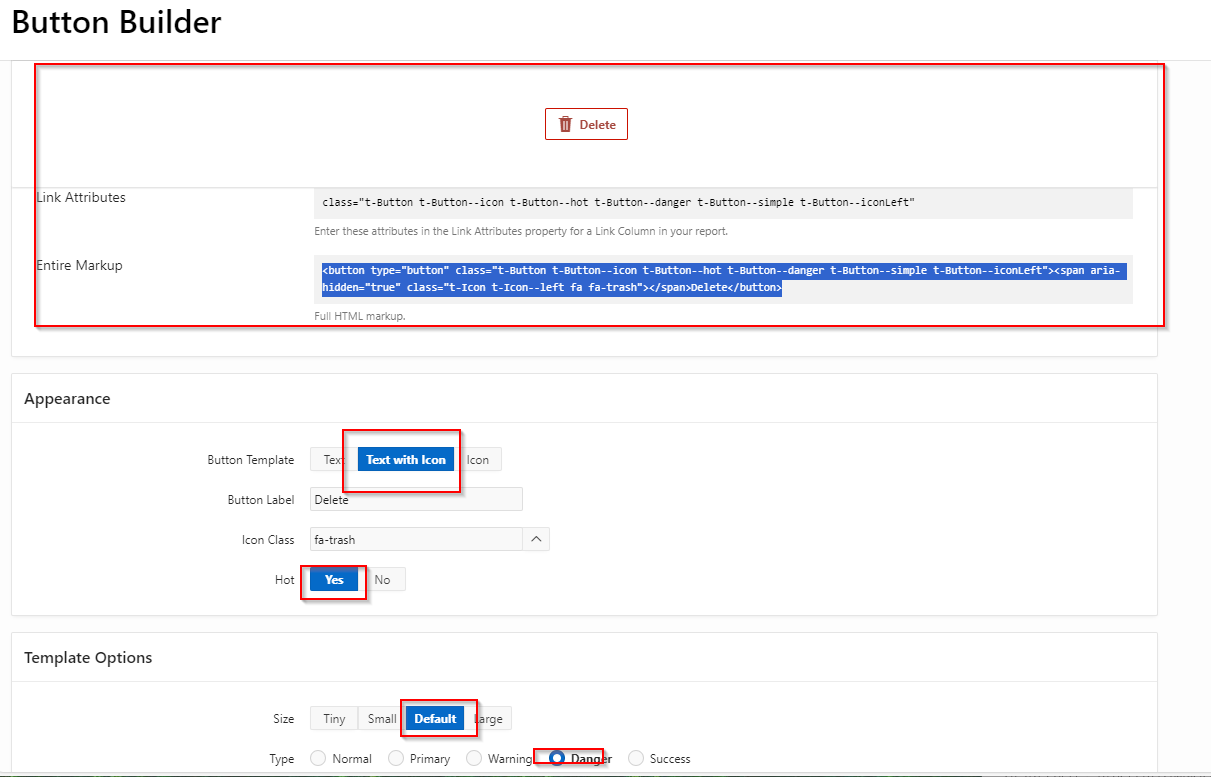
  • Custom Headings: If you want to define custom headings for your report columns, you can set the Heading attribute to your preferred text.
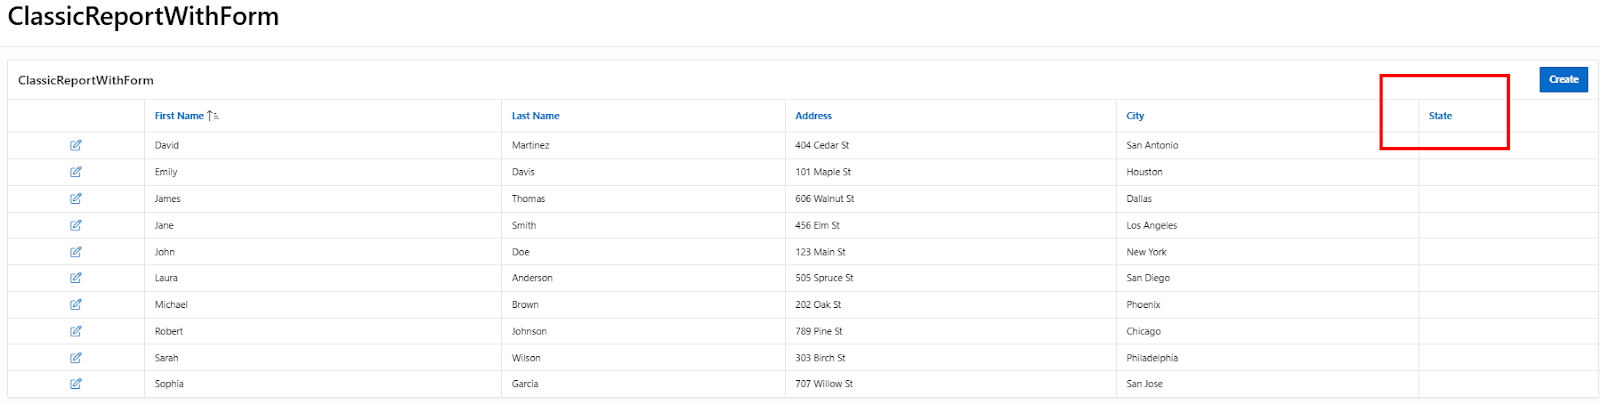
A screenshot of a computer

AI-generated content may be incorrect.


A screen shot of a computer

AI-generated content may be incorrect.

From:

A screen shot of a computer

AI-generated content may be incorrect.

To: 

A screenshot of a computer

AI-generated content may be incorrect.


A screenshot of a computer

AI-generated content may be incorrect.

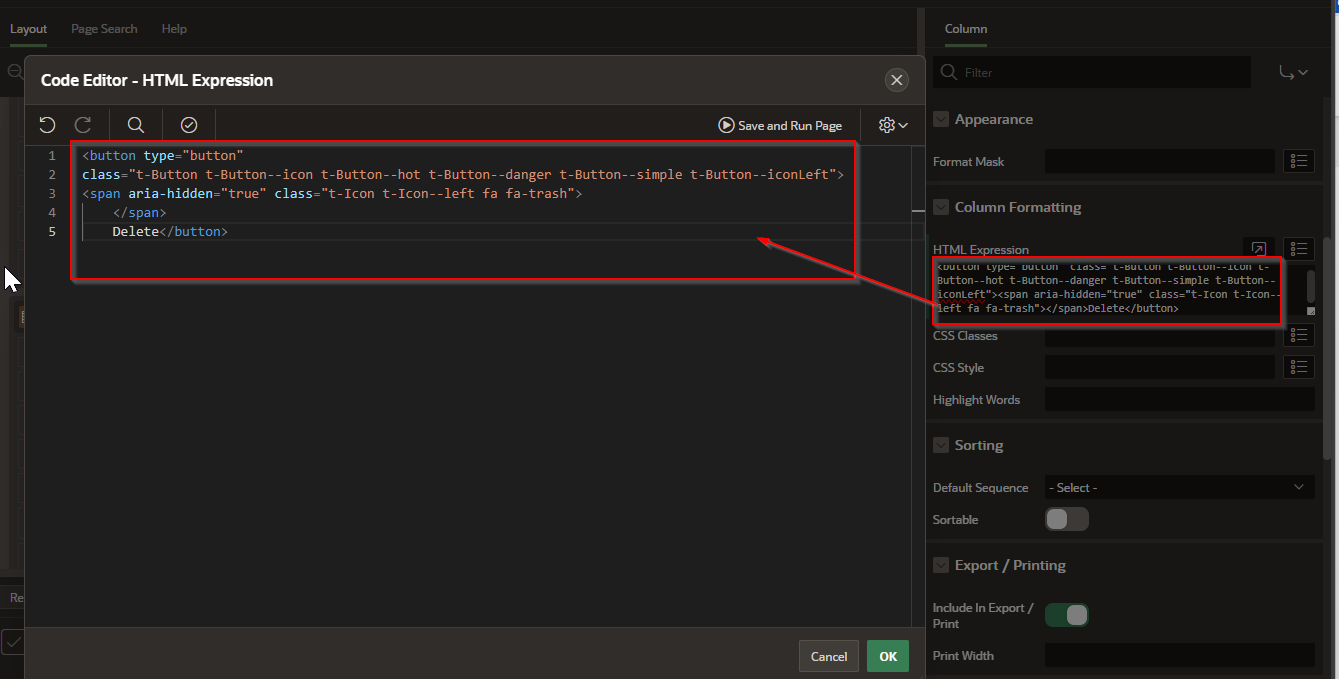
  • Dynamic Column Names: For dynamic assignment of column names based on certain conditions, consider using a PL/SQL function in the report's SQL query. This approach allows for flexible column naming based on session state or other variables.


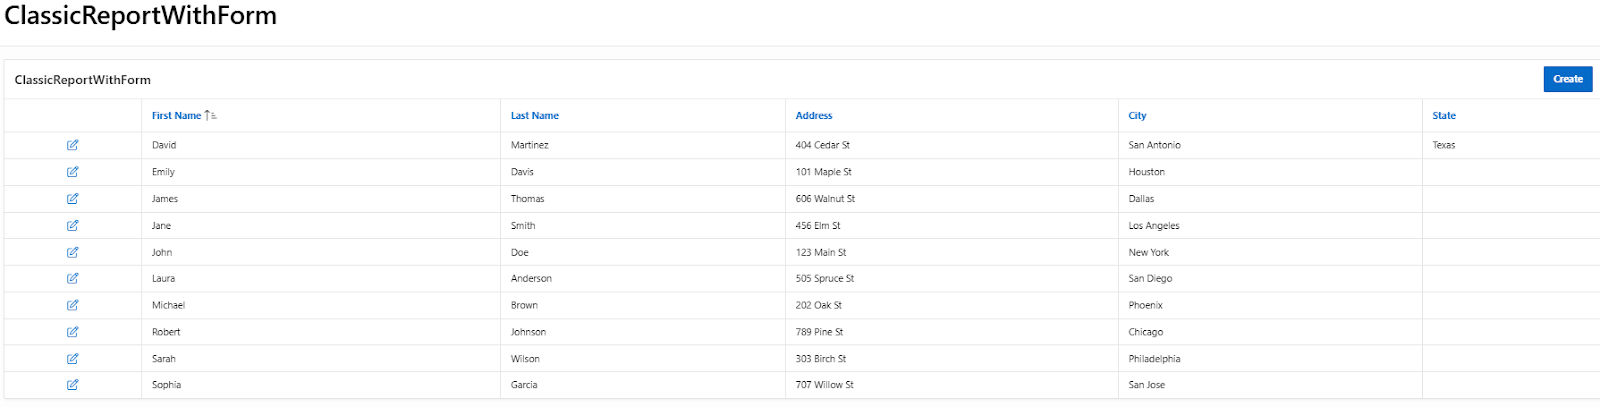
Lets make a change to David Martinez’s record and update the state.

A screenshot of a computer

AI-generated content may be incorrect.

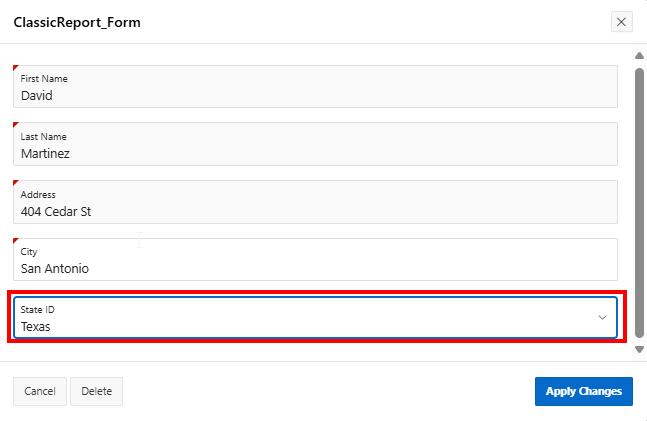
You can see here that the change has been applied

A screenshot of a phone

AI-generated content may be incorrect.


The form also allows us to “Create” a new  user

A screenshot of a computer

AI-generated content may be incorrect.

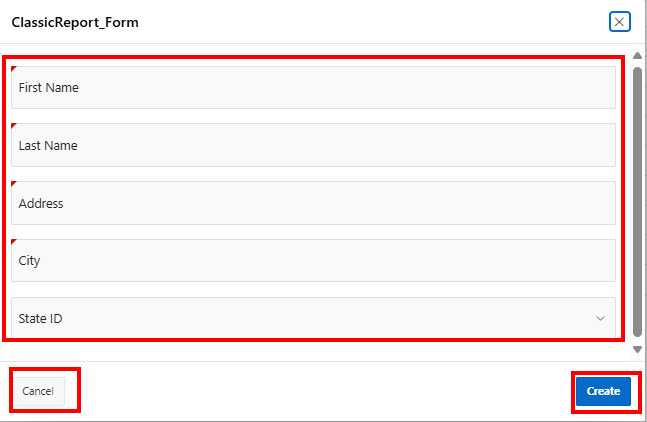
Notice that the fields are empty and that you have a “Create” button instead of an “Update” button.

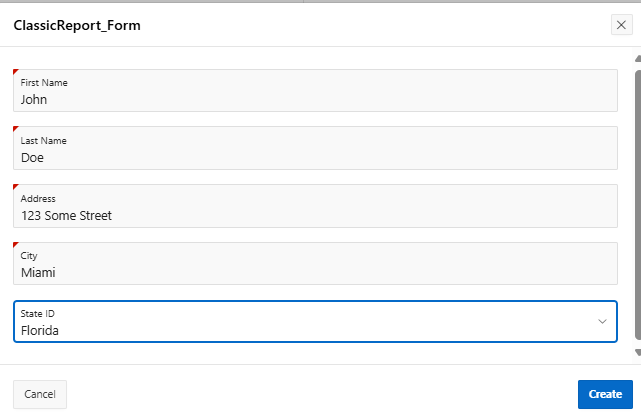
Lets add “John Doe” to the list:

A screenshot of a computer

AI-generated content may be incorrect.

John Doe is now in our list:

A screenshot of a computer

AI-generated content may be incorrect.


Lets Delete John Doe by Clicking on the “Pencil” Icon on the left.

A screenshot of a computer

AI-generated content may be incorrect.

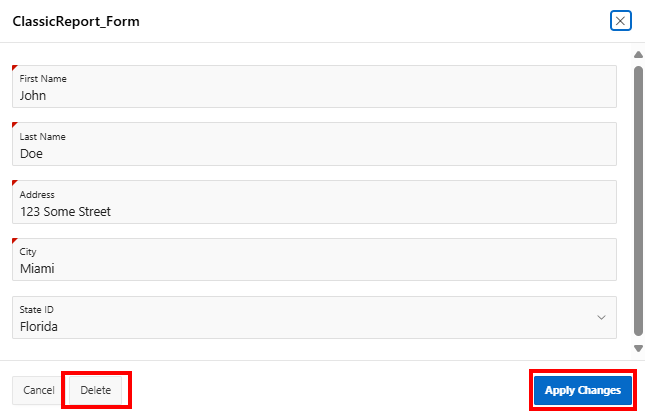
Notice that there is a “Delete” and a “Apply Changes” button.

Lets “Delete” John Doe. When we press the “Delete” button we get a confirmation message:

A screenshot of a computer

AI-generated content may be incorrect.

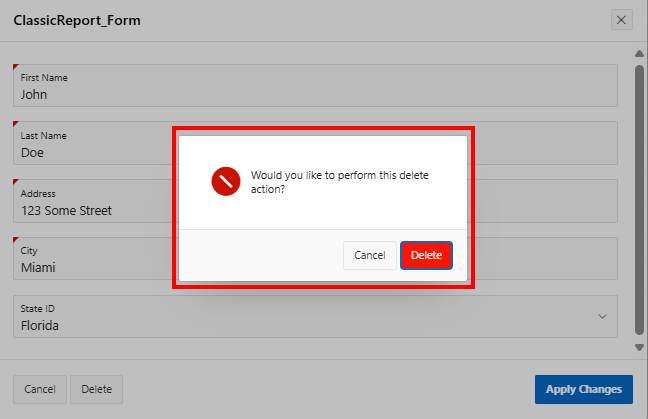
Press “ Delete” and “John Doe” disappears from the list.

A screenshot of a computer

AI-generated content may be incorrect.

In conclusion, adjusting the column display names in your Oracle APEX reports is a simple but powerful way to improve user experience. Whether you change the headings directly in the report attributes or use SQL aliases, this customization ensures that your reports communicate information clearly and effectively. Taking the time to set descriptive column names will make your application more intuitive and easier to use.

How do I add a delete button to a Classic Report

 Adding a delete button to a Classic Report in Oracle APEX is a practical way to allow users to remove records directly from the report interface. This feature enhances user interaction by providing a straightforward method to manage data without navigating away from the report page. Implementing a delete button involves combining SQL, page processes, and Dynamic Actions to ensure safe and efficient record deletion within your application.

Adding a delete button to a Classic Report in Oracle APEX allows users to delete specific records directly from the report, improving usability and efficiency. Here is a detailed step-by-step explanation of how to add this functionality:

  1. Create a Delete Button Column in the SQL Query
    Modify the SQL query used by your Classic Report to include a column that generates a delete link or button for each row. Use HTML anchor tags with URL syntax to call the current page or a processing page, passing the primary key of the row to be deleted as a parameter. For example:

    SELECT EMPLOYEE_ID,
           FIRST_NAME,
           LAST_NAME,
           '<a href="f?p=&APP_ID.:&APP_PAGE_ID.:&APP_SESSION.:DELETE_EMPLOYEE::P_EMPLOYEE_ID:' || EMPLOYEE_ID || '" 
            onclick="return confirm(''Are you sure you want to delete this record?'');">Delete</a>' AS DELETE_LINK
    FROM EMPLOYEES
    

    This creates a “Delete” link for each employee, passing the employee ID as a page item.

  2. Create a Page Item to Hold the ID to Delete
    In the page where the Classic Report exists, create a hidden page item (for example, PXX_EMPLOYEE_ID) to receive the primary key of the record to be deleted. This page item will be used in the delete process.

  3. Create a Branch or a Process to Handle Deletion
    Add a process on the page that runs before header or after submit that checks if the delete operation should be performed. Use a condition to run this process only when the request is DELETE_EMPLOYEE (matching the request value used in the link). In the PL/SQL code, delete the record based on the page item value:

    BEGIN
      DELETE FROM EMPLOYEES WHERE EMPLOYEE_ID = :PXX_EMPLOYEE_ID;
      COMMIT;
    END;
    
  4. Redirect Back to the Report Page
    After the deletion, add a branch to redirect the user back to the same page to refresh the Classic Report and reflect the changes.

  5. Add Confirmation Prompt
    The onclick JavaScript in the delete link confirms the user action before proceeding, preventing accidental deletions.

  6. Optional: Use Dynamic Actions for Enhanced UX
    Instead of a full page reload, you can use Dynamic Actions and AJAX callbacks to delete the record asynchronously, refreshing only the report region. This improves the user experience but requires additional configuration.

By following these steps, you create an effective delete button inside a Classic Report that is secure, intuitive, and integrates well with Oracle APEX’s architecture. It allows users to manage data efficiently without leaving the report page.

Example

Adding a delete button to a Classic Report in Oracle APEX allows users to remove records directly from the report without navigating to another page. This tutorial explains multiple approaches, including using JavaScript with AJAX, PL/SQL processes, and dynamic actions to achieve a seamless and interactive delete functionality.

Why Add a Delete Button in a Classic Report?

  • Allows users to remove records quickly without navigating away.

  • Enhances user experience by making the application more interactive.

  • Reduces the need for additional pages dedicated to delete actions.

  • Can be integrated with confirmation dialogs for safety.

Step 1: Modify the Classic Report SQL Query

To include a delete button, modify the SQL query to generate an HTML button inside the report.

SELECT 

    empno, 

    ename, 

    job,

    '<button class="delete-button" data-id="' || empno || '">Delete</button>' AS delete_action

FROM emp

Explanation:

  • The delete-button class is added for targeting via JavaScript.

  • The data-id attribute stores the empno value, which will be used in the delete action.

Step 2: Create a PL/SQL Process for Deleting the Record

Create an On-Demand AJAX Process that deletes the record from the database.

  1. Navigate to Shared Components > Application Processes.

  2. Click Create and set the process type to On-Demand: Process (Ajax Callback).

  3. Name the process DELETE_EMP_RECORD.

  4. Use the following PL/SQL code:

BEGIN

    DELETE FROM emp WHERE empno = :P0_EMPNO;

    COMMIT;

END;

This process deletes the employee record based on the employee number (empno).

Step 3: Add JavaScript to Handle the Delete Action

  1. Go to Page Designer and open the Classic Report's properties.

  2. In the Page Attributes, navigate to JavaScript > Function and Global Variable Declaration.

  3. Add the following JavaScript code:

$(document).ready(function() {

    $(".delete-button").click(function() {

        var empId = $(this).data("id");


        if (confirm("Are you sure you want to delete this record?")) {

            $.ajax({

                url: "wwv_flow.show",

                type: "POST",

                data: {

                    "p_request": "APPLICATION_PROCESS=DELETE_EMP_RECORD",

                    "p_flow_id": $v("pFlowId"), 

                    "p_flow_step_id": $v("pFlowStepId"),  

                    "p_instance": $v("pInstance"),  

                    "P0_EMPNO": empId

                },

                success: function(response) {

                    alert("Record deleted successfully!");

                    location.reload();  

                },

                error: function() {

                    alert("Error deleting record.");

                }

            });

        }

    });

});

Explanation:

  • When the delete button is clicked, it retrieves the empno from the data-id attribute.

  • A confirmation popup ensures users confirm before deleting.

  • The AJAX request calls the DELETE_EMP_RECORD process, passing the empno.

  • Upon success, the page refreshes to reflect the deleted record.

Step 4: Add a Confirmation Dialog for Better UX (Optional)

To use an APEX built-in confirmation dialog instead of confirm(), create a Dynamic Action:

  1. Select the Classic Report region.

  2. Click Create Dynamic Action.

  3. Set Event to Click.

  4. Set Selection Type to jQuery Selector and enter .delete-button.

  5. Add an Action: Execute JavaScript Code.

  6. Enter this JavaScript:

var empId = $(this.triggeringElement).data("id");


apex.confirm("Are you sure you want to delete this record?", {

    request: "DELETE_" + empId

});

  1. Create a PL/SQL Process (Before Header) with:

DECLARE

    v_empno NUMBER;

BEGIN

    v_empno := TO_NUMBER(SUBSTR(:REQUEST, 8)); 

    DELETE FROM emp WHERE empno = v_empno;

    COMMIT;

END;

  1. Set the Condition to REQUEST LIKE 'DELETE_%'.

This method enhances user experience by utilizing APEX’s built-in confirmation modal.


Step 5: Using a Trash Icon Instead of a Button (Alternative)

For a more modern UI, replace the button with an icon using Font Awesome.

Modify the SQL query to:

SELECT 

    empno, 

    ename, 

    job,

    '<i class="fa fa-trash delete-icon" data-id="' || empno || '"></i>' AS delete_action

FROM emp

Update the CSS:

.delete-icon {

    color: red;

    cursor: pointer;

    font-size: 18px;

}


.delete-icon:hover {

    color: darkred;

}

This provides a cleaner interface with a trash icon instead of a button.

Best Practices for Adding a Delete Button

  • Always use a confirmation dialog to prevent accidental deletions.

  • Ensure that the PL/SQL process uses a COMMIT; statement to save changes.

  • Use APEX built-in modal dialogs instead of confirm() for better UI consistency.

  • Apply CSS styles to improve button visibility and usability.

  • Implement role-based authorization to restrict who can delete records.

Adding a delete button in a Classic Report allows users to remove records directly from the report while maintaining a smooth user experience. By using PL/SQL processes, JavaScript, AJAX, and dynamic actions, you can implement a secure and interactive delete feature. Customizing the button with CSS or replacing it with an icon can further improve usability.

EXAMPLE: 

Step 1 - Create your button here and copy the generated html.

A screenshot of a computer

Description automatically generated

Button Builder - Universal Theme (oracle.com)

In this case, the HTML code is as follows:

<button type="button" 

class="t-Button t-Button--icon t-Button--hot t-Button--danger t-Button--simple t-Button--iconLeft">

<span aria-hidden="true" class="t-Icon t-Icon--left fa fa-trash">

</span>Delete

</button>

Step 2- In your report, add a virtual column

A screenshot of a computer

Description automatically generated

Step 3- In the column’s type change from “Link” to “Plain Text”

A screenshot of a computer

Description automatically generated

Step 4-  in the column’s  HTML Expression enter the button ‘s mark up code from Step 1

A screenshot of a computer

Description automatically generated

In conclusion, adding a delete button to a Classic Report empowers users with convenient data management capabilities while maintaining control and security through APEX’s built-in features. With careful configuration, developers can provide a seamless and intuitive experience that integrates record deletion directly into the reporting workflow.

HOW DO I SET A HOME PAGE

 Setting a home page in Oracle APEX is an essential step in defining the default landing page for your application. The home page serves as ...