Search This Blog

Tuesday, June 24, 2025

How Do I Change a dropdown LOV into a radio group

 Changing a Dropdown List of Values (LOV) into a Radio Group in Oracle APEX

In Oracle APEX, a Select List (Dropdown LOV) allows users to choose from a predefined set of options. However, in some cases, a Radio Group is a better option when you want to display all choices upfront, making selection quicker without the need to open a dropdown.

This tutorial explains how to change an existing dropdown list into a Radio Group and the different customization options available.


Steps to Convert a Dropdown LOV into a Radio Group

1. Identify the Existing Dropdown List

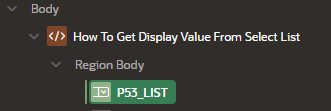
If you already have a Select List item, locate it in your page's Rendering tree. If not, create a new Select List item:

  • Open the APEX Page Designer.

  • Click CreateItemSelect List.

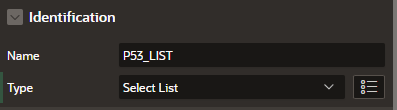
  • Assign a meaningful name like P1_CATEGORY.

  • Set the List of Values (LOV) to either Static Values or a SQL Query.

Example of a Static LOV:

Electronics | 1

Furniture | 2

Clothing | 3

Example of a SQL Query LOV:

SELECT category_name, category_id FROM product_categories ORDER BY category_name;

This query retrieves category names and their corresponding IDs from the database.

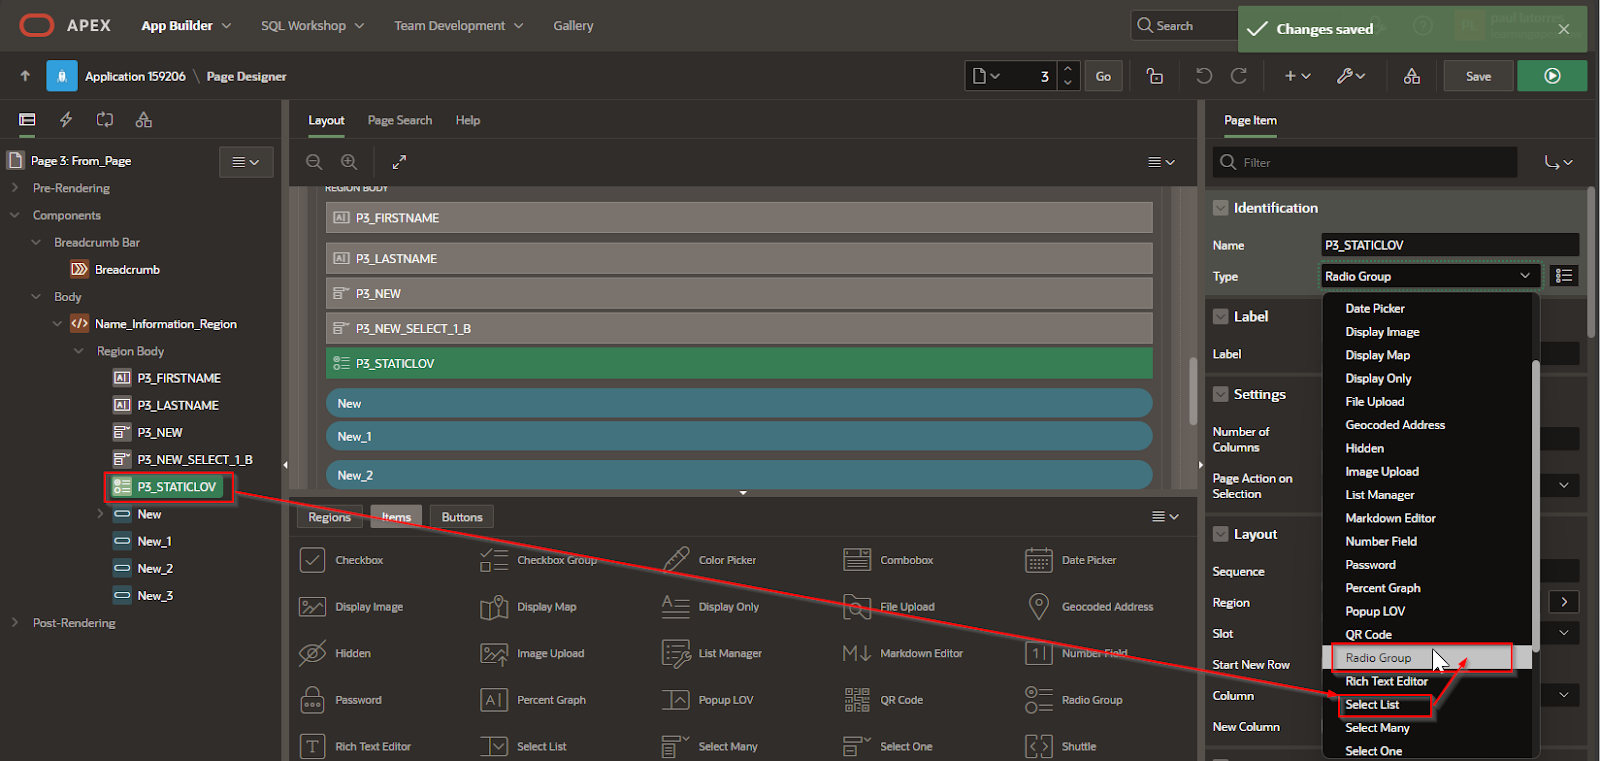
2. Change the Item Type to a Radio Group

Once the Select List is created:

  • Click on P1_CATEGORY in the Rendering panel.

  • Under Settings, locate the Type property.

  • Change the type from Select List to Radio Group.

  • Ensure the List of Values remains the same (static or SQL-based).

3. Customize the Layout of the Radio Group

Oracle APEX allows you to configure the Radio Group display. Some useful properties include:

  • Number of Columns: Defines how many radio options appear per row.

  • Display Null Value: Enables an extra option like "None" or "Select One".

  • Null Display Value: Specifies what text appears for the null option.

For example, setting Number of Columns = 3 will display the options in a single row instead of a vertical list.

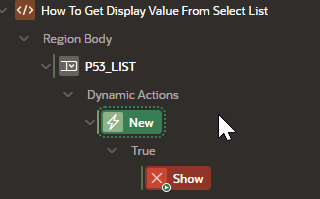
4. Apply Conditional Formatting with Dynamic Actions (Optional)

If you need additional behavior when selecting a radio option:

  • Create a Dynamic Action on P1_CATEGORY.

  • Set the Event to Change.

  • Add an Action such as Show / Hide or Set Value.

  • Define the target elements that should respond to the selection.

Example: If selecting Electronics, a hidden field P1_BRAND appears, while other options hide it.


Using JavaScript to Enhance Radio Groups

In some cases, you may want to dynamically modify radio buttons using JavaScript.

Dynamically Change the Selection with JavaScript

$s("P1_CATEGORY", "2"); // Automatically selects the second option

This script pre-selects Furniture if it's the second option in the LOV.

Change Styles Based on Selection

$("#P1_CATEGORY input").change(function() {

    if ($(this).val() == "1") {

        $("#P1_MESSAGE").text("You selected Electronics").css("color", "blue");

    } else {

        $("#P1_MESSAGE").text("");

    }

});

This script updates a message based on the selected option.


Best Use Cases for Radio Groups Instead of Dropdown Lists

  • Small Lists (3–5 Items): A dropdown is better for long lists, but a radio group is more efficient for fewer choices.

  • User Experience Improvement: If users frequently switch between options, a radio group reduces clicks.

  • Clearer Selection Visibility: Unlike a dropdown, all choices are visible without clicking.

  • Conditional Form Behavior: Useful when selecting an option triggers another field to appear.


Changing a Dropdown LOV into a Radio Group in Oracle APEX improves usability for short lists of options. This is easily done by changing the Item Type and adjusting its layout. Additional enhancements using Dynamic Actions and JavaScript allow for even more interactive behavior.


EXAMPLE:

You can take a short list (like our Yes/No list) and change it from a dropdown List to a radio group as follows

Change  the Type from Select List to Radio Group

A screenshot of a computer

Description automatically generated


How Do I Use a dropdown list to populate a text box

 Using a Dropdown List to Populate a Text Box in Oracle APEX

In Oracle APEX, dropdown lists (select lists) are often used to control other form elements dynamically. A common requirement is to populate a text box with a value based on the selection made in a dropdown. This can be achieved using dynamic actions or JavaScript.


Basic Steps to Populate a Text Box from a Dropdown List

  1. Create a Select List (Dropdown)

    • Open APEX and navigate to the desired page.

    • Click Create > Item > Select List.

    • Name it something meaningful, such as P1_CATEGORY.

    • Define its List of Values (LOV), using either Static Values or a SQL Query.

  2. Create a Text Box

    • Add a new Text Field item.

    • Name it P1_DESCRIPTION.

    • This field will be populated automatically based on the dropdown selection.

  3. Use Dynamic Actions to Populate the Text Box

    • Create a Dynamic Action on P1_CATEGORY.

    • Set Event to Change (so it triggers when the dropdown value changes).

    • Choose Action as Set Value.

    • In Set Type, select SQL Statement and enter a query like:

SELECT description FROM product_categories WHERE category_id = :P1_CATEGORY;

  • Set Affected Elements to P1_DESCRIPTION (this is the text field being updated).

  • Enable Fire on Page Load if you want the value to be set when the page loads.


Using JavaScript to Populate the Text Box Dynamically

Instead of a dynamic action, JavaScript can also be used to achieve this.

  1. Open the Attributes section of the dropdown (P1_CATEGORY).

  2. In the Advanced section, set a Static ID like category_list.

  3. Go to the Page JavaScript section and add the following script:

$("#category_list").change(function() {

    let selectedValue = $(this).val();

    apex.server.process(

        "GET_CATEGORY_DESCRIPTION",  

        { x01: selectedValue },  

        {

            success: function(data) {

                $s("P1_DESCRIPTION", data);

            }

        }

    );

});

  1. Create an On-Demand AJAX Process in APEX named GET_CATEGORY_DESCRIPTION with this PL/SQL code:

DECLARE

    v_description VARCHAR2(4000);

BEGIN

    SELECT description INTO v_description 

    FROM product_categories 

    WHERE category_id = apex_application.g_x01;


    sys.htp.p(v_description);

END;

This method uses AJAX to fetch the corresponding text value from the database when the dropdown selection changes.


Using a Static List for Simple Dropdowns

For small dropdowns with static values, an alternative method is using JavaScript directly without an AJAX call.

  1. In the List of Values, use static values like:

  2. Electronics | 1

  3. Furniture | 2

  4. Clothing | 3

  5. Add the following JavaScript code to manually set the text box value:

$("#category_list").change(function() {

    let descriptions = {

        "1": "Devices like phones and laptops",

        "2": "Tables, chairs, and cabinets",

        "3": "Shirts, pants, and shoes"

    };

    let selectedValue = $(this).val();

    $s("P1_DESCRIPTION", descriptions[selectedValue] || "");

});

This approach is useful when the text box values do not need to be retrieved from the database.


Best Use Cases for This Approach

  • Product Selection Forms: Users select a product category, and a description field is auto-filled.

  • User Registration: Selecting a country populates a text box with a country code.

  • Order Management: Choosing a customer from a dropdown fills in their address automatically.


 Using a dropdown list to populate a text box in APEX can be done using Dynamic Actions, JavaScript, or AJAX Calls. Each method has its benefits depending on the use case. Dynamic Actions are simple and work well for direct SQL queries. JavaScript provides more flexibility for client-side interactions. AJAX is useful for retrieving data dynamically without page refreshes.


EXAMPLE:

The following example allows a display list of Countries to display a selected value inside a text box.

The first part of the code handles the displaying of the data in the textbox and the second part shows how

To insert the values into the session.

  • In a page, create a region.

  • Add a “Select One” Item, from “Items”, to the Region.

A screenshot of a computer screen

AI-generated content may be incorrect.

  • In the Page Item section, in the Identification Area, change type to “Select List”

A screenshot of a computer

Description automatically generated

  • In the Page Item section , List of Values section, select a method to populate the list

    • Shared  component

    • SQL Query

    • Static Value

    • Function Body returning SQL Query


  • In this case, a Shared Component LOV of Countries

A screenshot of a computer

Description automatically generated

  • Turn “OFF” Display NULL Values if needed.

  • Create a “Dynamic Action” for the list control

A screenshot of a computer

Description automatically generated

  • Set “True” part of the DA, in the Action section, changes the name of the action and set it to “Execute JavaScript Code”

A screenshot of a computer program

AI-generated content may be incorrect.

A screenshot of a computer program

AI-generated content may be incorrect.

Use the following Code:


var DisplayValueVar =$("#P53_LIST option:selected").text();

console.log(DisplayValueVar);

apex.item('P53_TEXT').setValue(DisplayValueVar);


Create an Additional “True” DA for saving the data into the Session

A screenshot of a computer program

Description automatically generated

Set “Action” to “Execute JavaScript Code”

In the settings add the following code

 A screenshot of a computer program

Description automatically generated

APEX_UTIL.SET_SESSION_STATE('P53_TEXT',v('P53_TEXT));


A screenshot of a computer

Description automatically generated


UI Defaults

 In Oracle APEX, User Interface (UI) Defaults are a set of metadata-driven, table- and column-scoped attributes that APEX consults when it g...